How to host Esri basemaps
Introduction
Flowfinity Actions allows users to visualize geographic location data in maps hosted within dashboard widgets. Administrators may customize their basemap designs by registering map source styles designed in ArcGIS Vector Tile Style Editor.
Custom Vector Tile Packages where all data is sourced to feature layers (including base map data) which can be done with ArcMap tool and/or ArcTutor, then packaged in a Vector Tile package using ArcGIS Pro Desktop tool, can also be used in Flowfinity.
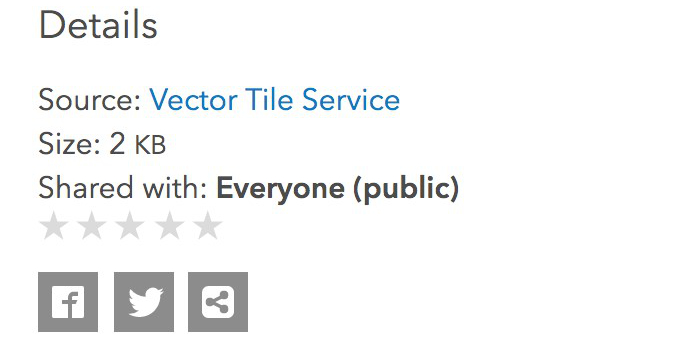
Once the Vector Tile Layer has been created and saved in the Esri Portal mapping tool, it needs to be publicly shared to make the style visible to external systems.
Now you can use the Esri Portal to download the JSON file style sheet for the public Vector Tile Layer and register it in the list of available map configurations in Flowfinity. The style will then be available in map dashboard widgets, allowing you to customize Flowfinity data visualizations.
Instructions for preparing Vector Style Layer using Esri Vector Style Editor (Esri Basemaps)
- To start designing a new vector tile layer, open the ArcGIS Vector Tile Style Editor.
Note: If you already have a style JSON file for an Esri Vector Tile Layer that you would like to use in Flowfinity, skip to the 'Register a map style in Flowfinity Actions' section below.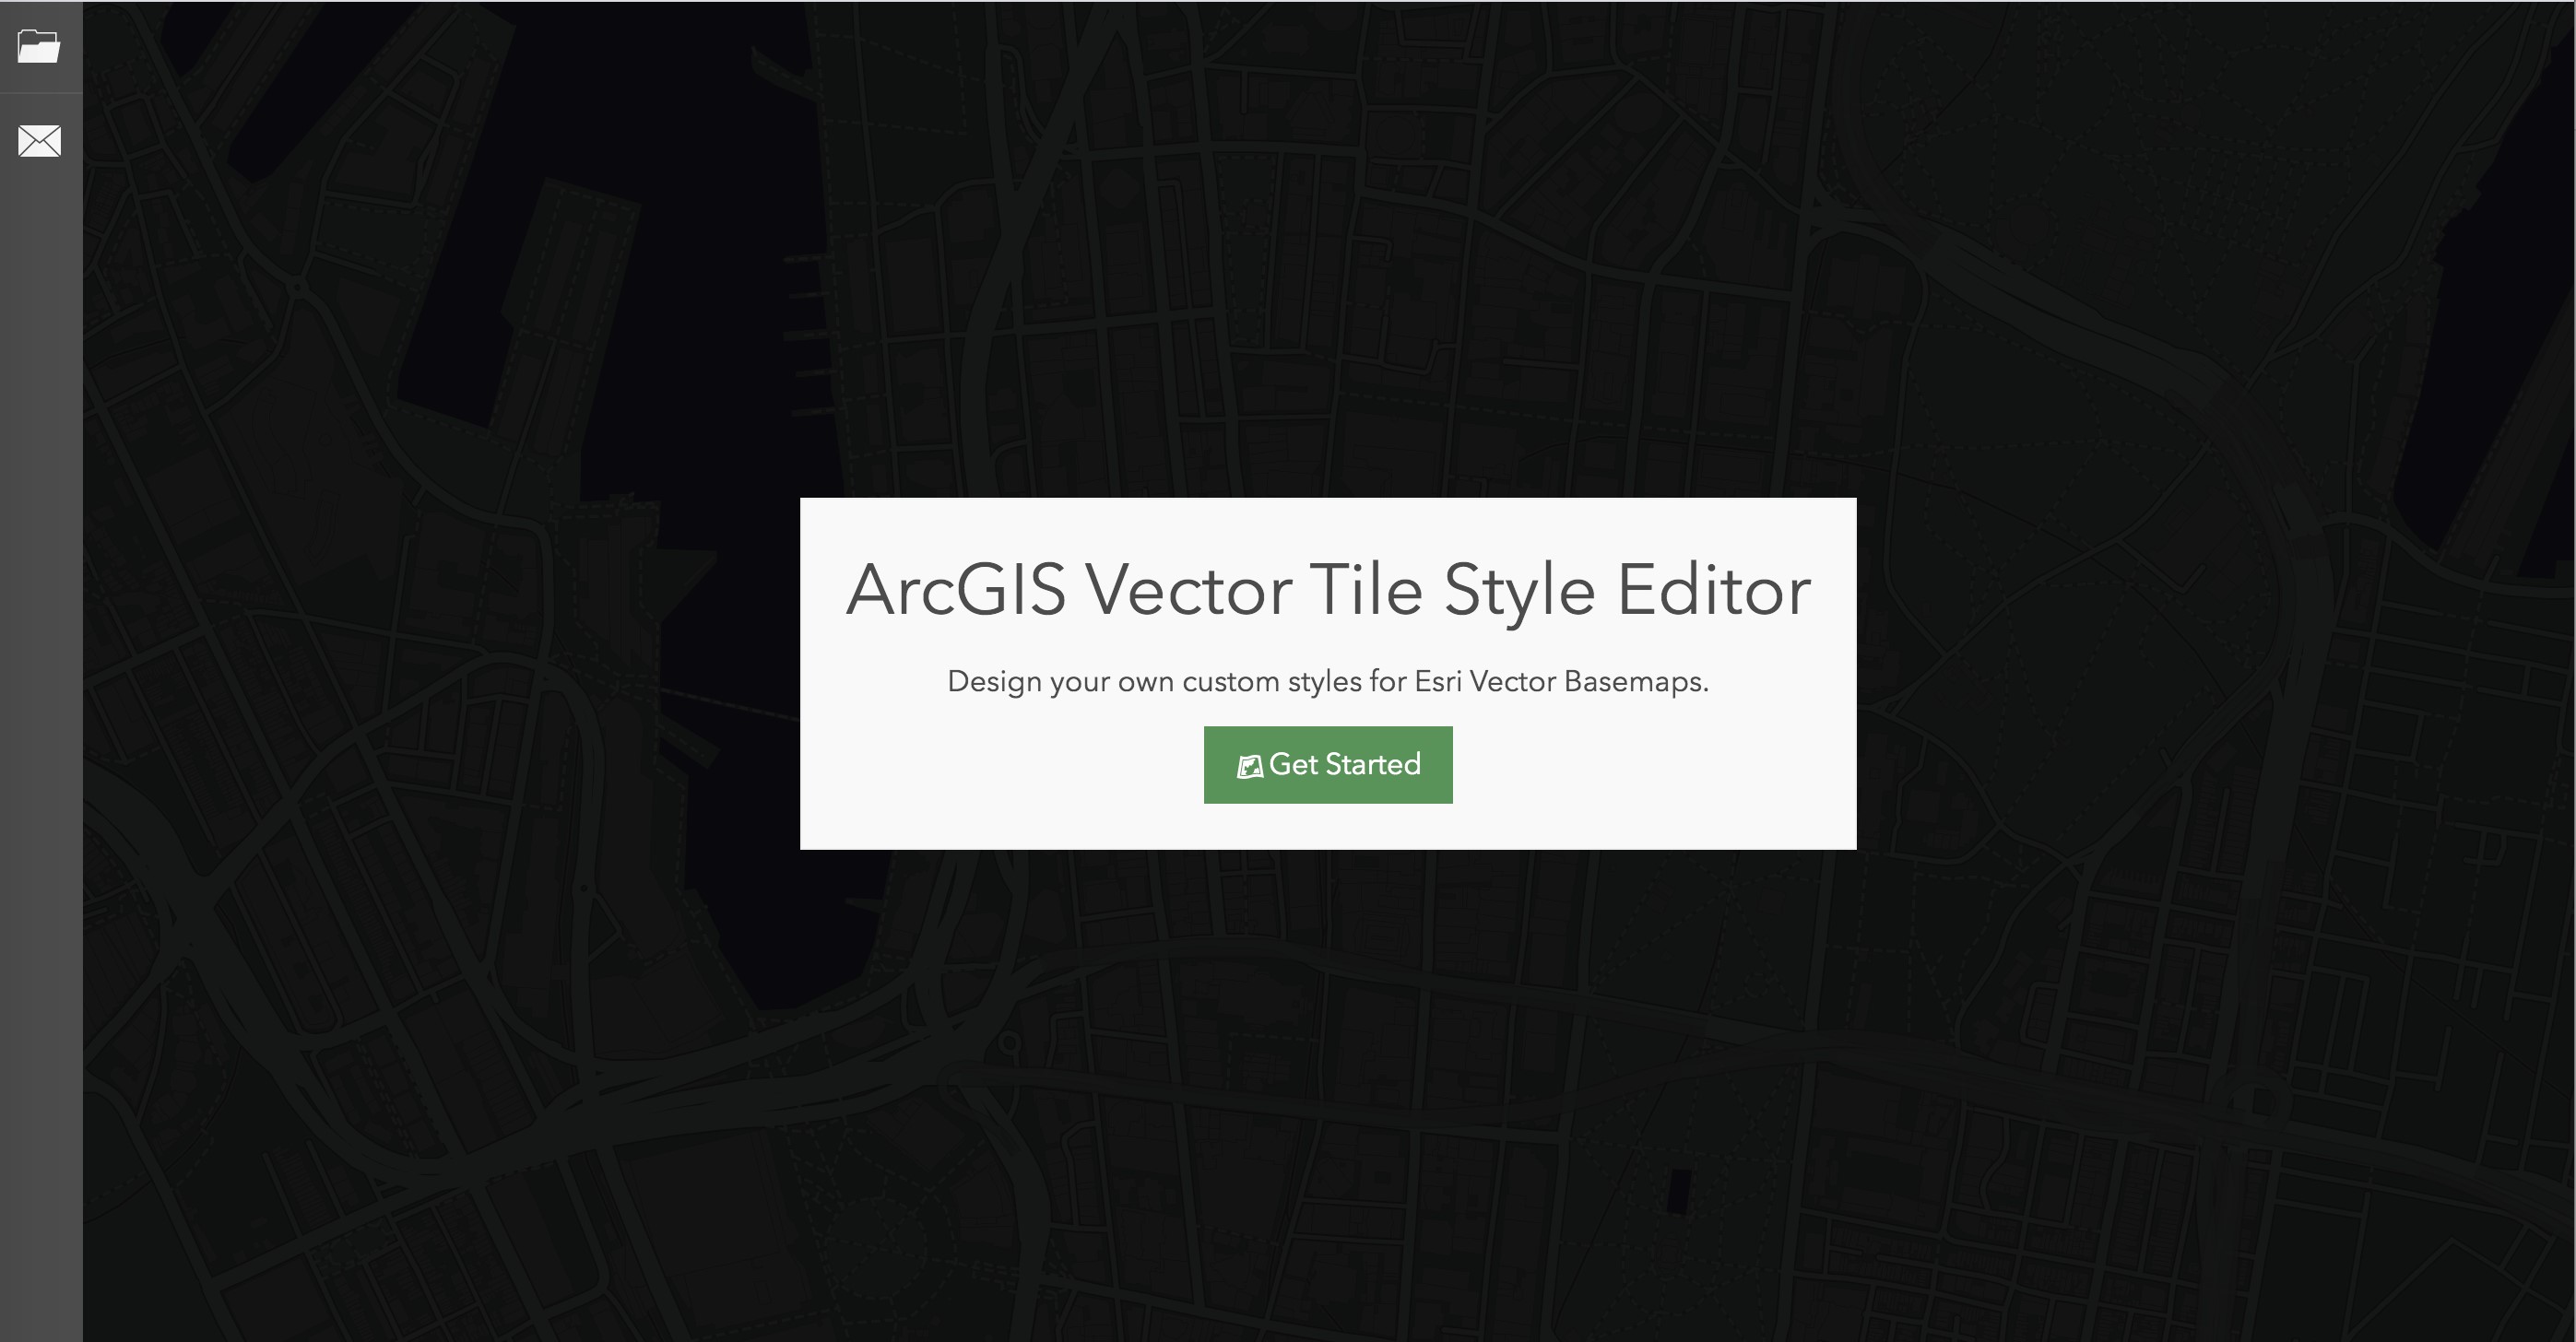
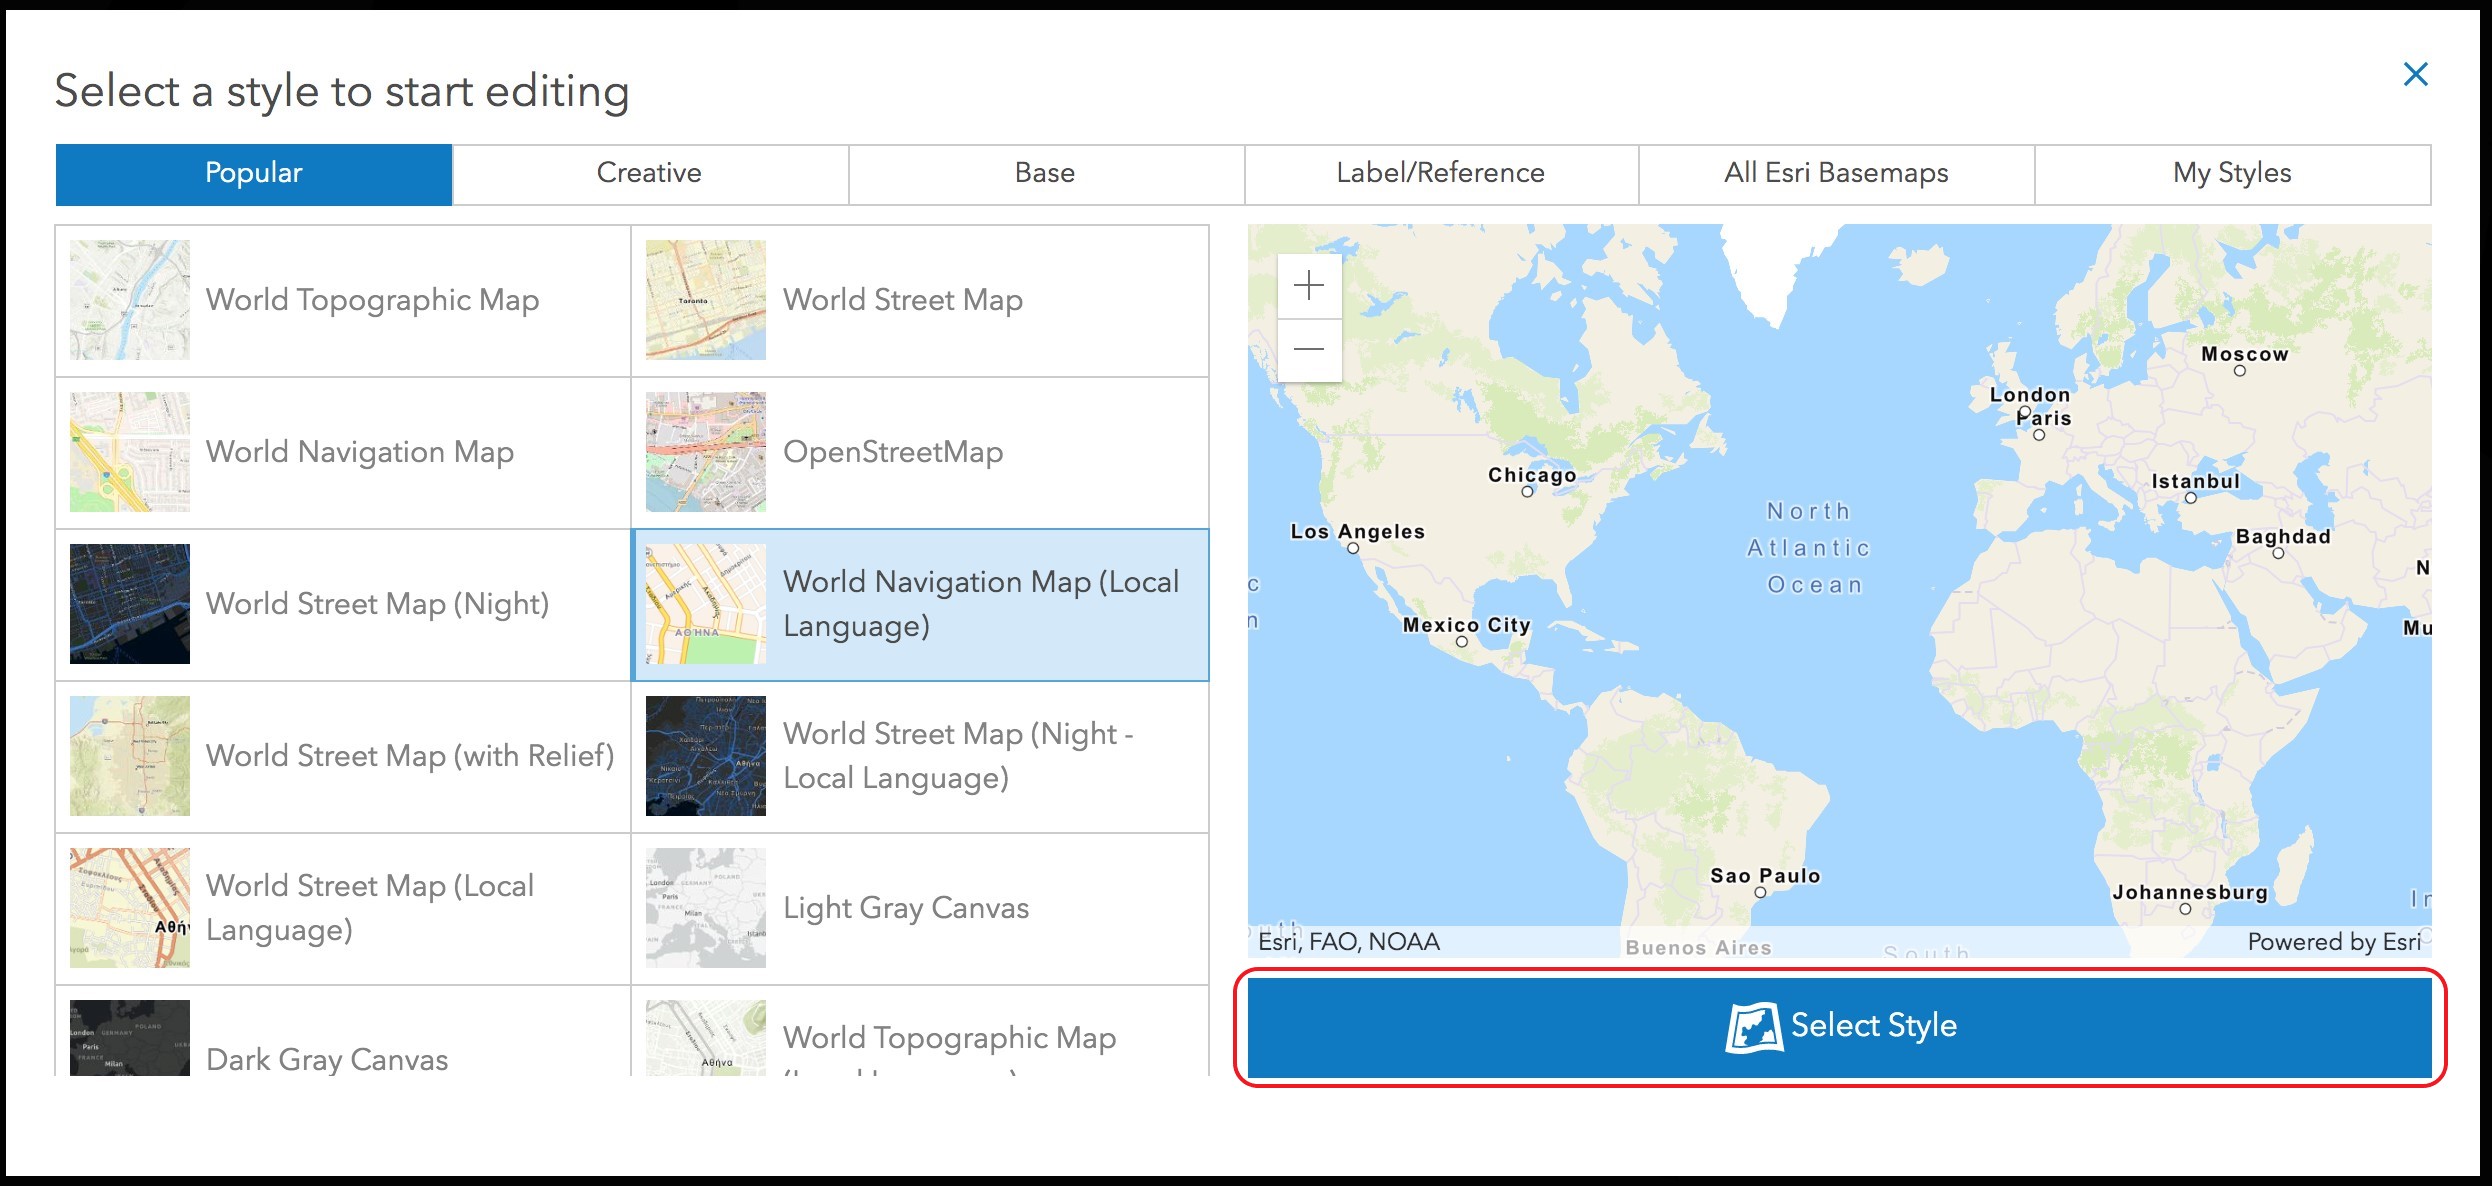
- Select the basemap template that you would like to customize and click 'Select Style.
- In the Quick Edit screen, you can perform basemap customizations such as custom color themes and custom markers.
Note: You cannot add your custom new data features using this tool, even if you are logged into the Esri Portal. To create a map with custom features, you need to use the ArcMap tool to create a completely new map, sourcing all data including land and water areas into feature layers and then publish it as a custom vector tile package.
- Once you are finished customizing, you can either select 'Save' (saving the style to your Esri Portal) or 'Download' to immediately download the JSON style file.
Note: If you choose to save the style to the Esri Portal, it will be listed there as a 'Vector Tile Layer' item. You can then download the JSON style file by clicking the 'Download Style' button.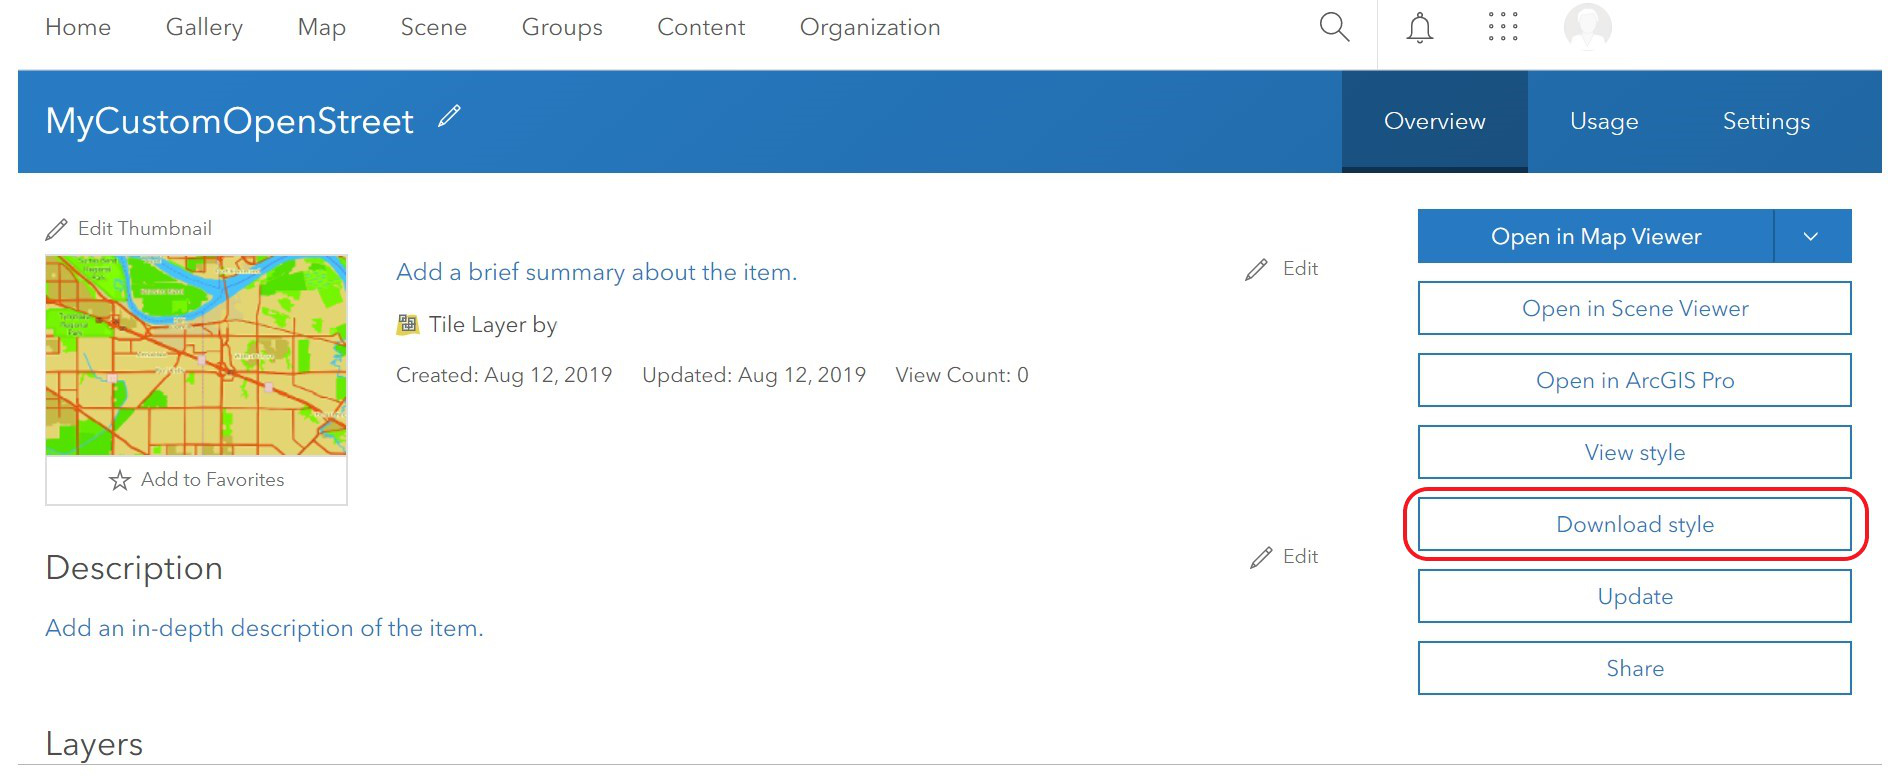
- You are now ready to register the map style with Flowfinity Actions, proceed to the 'Register map style in Flowfinity Actions' section of this knowledge base article below.


Instructions for preparing a custom Vector Tile Package hosted Vector Tile Layer from the Esri Customer Portal
- Log into the Esri Portal and navigate to the Content tab.
- In the Content tab, any maps or layers that you have created or published will be displayed. If you already have a custom Vector Tile Package prepared and published, you will see both Vector Tile Package and Tile Layer items in the list.

- If you do not have the Vector Tile Package created yet, you can find out how to create one via ArcGIS Pro using the links provided. Make sure that you have all the data for the map, including land, water, roads, etc, available in feature layers. Although you can use a standard Esri basemap for displaying your data in ArcGIS Pro, you will not be able to include the basemap features in a customer Vector Tile Package, resulting in data and other features being displayed without a basemap underneath.
Author a map for vector tile creation: https://pro.arcgis.com/en/pro-app/help/mapping/map-authoring/author-a-map-for-vector-tile-creation.htm
Create Vector Tile Index: https://pro.arcgis.com/en/pro-app/tool-reference/data-management/create-vector-tile-index.htm
Create Vector Tile Package: https://pro.arcgis.com/en/pro-app/tool-reference/data-management/create-vector-tile-package.htm
Share Package: https://pro.arcgis.com/en/pro-app/tool-reference/data-management/share-package.htm
Tip: to publish use the ArcGIS Pro 'share' command. Under the 'share as' section, pick WebLayer and select the layer type as 'Vector Tile.' Under configuration, select the Tiling format as 'Index,' then Publish. - Make sure that both Vector Tile Package and Tile Layer are shared publicly.
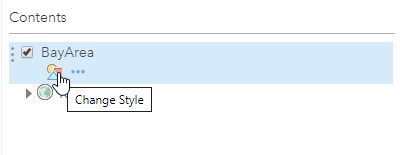
- Finally, re-save the style layer to adjust the URLs within the style.JSON file by navigating to the Contents tab within Esri Portal, open the Tile Layer in Map Viewer, and then use the Change Style option. In the sample below, the 'MyTrees Layer (hosted)' is resaved as 'MyTrees_Copy' to adjust URLs in Esri before downloading the style JSON file.
Note: for further information visit: https://doc.arcgis.com/en/arcgis-online/create-maps/update-vector-tile-style.htm

- Ensure that public sharing (globe icon) has been enabled for both the Tile Layers and Vector Style Package.
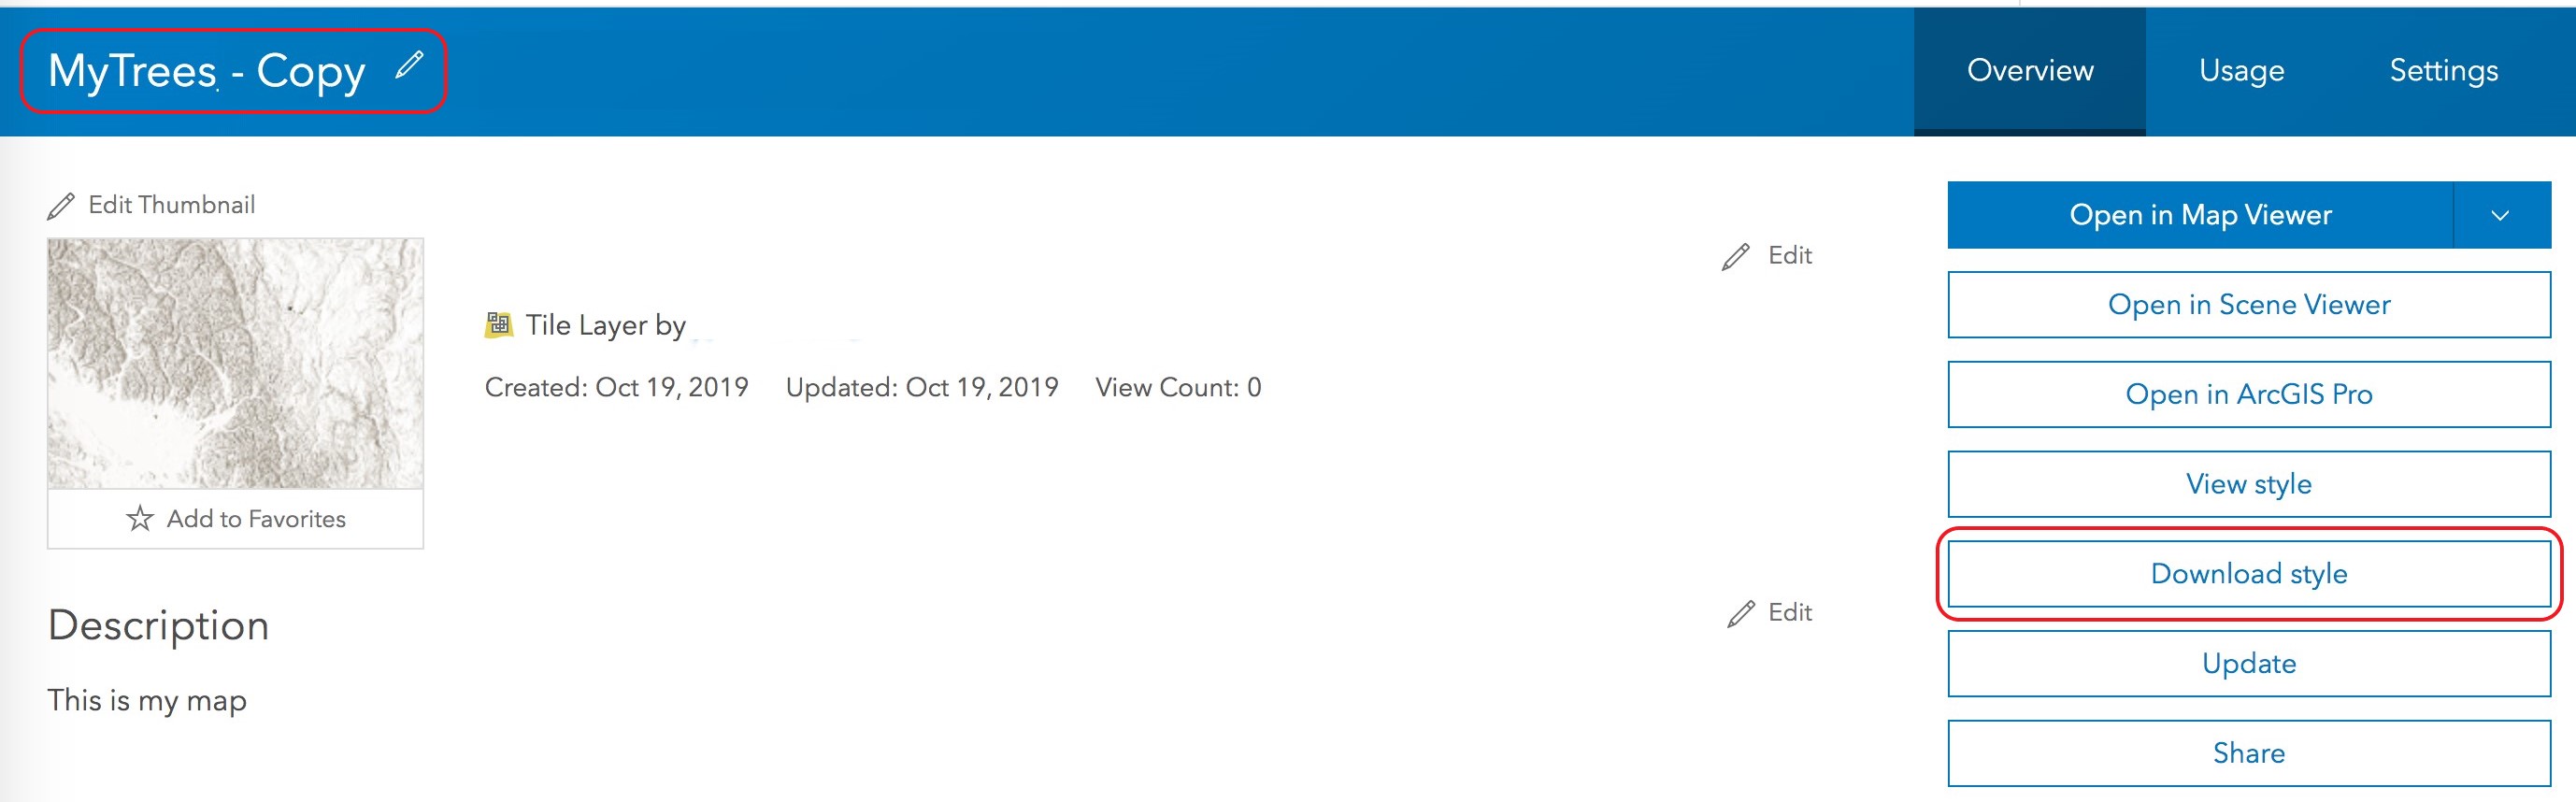
- Select the newly created Style Layer (e.g. MyTrees – Copy) and select 'Download style' to download the JSON style file.


Register a map style in Flowfinity Actions
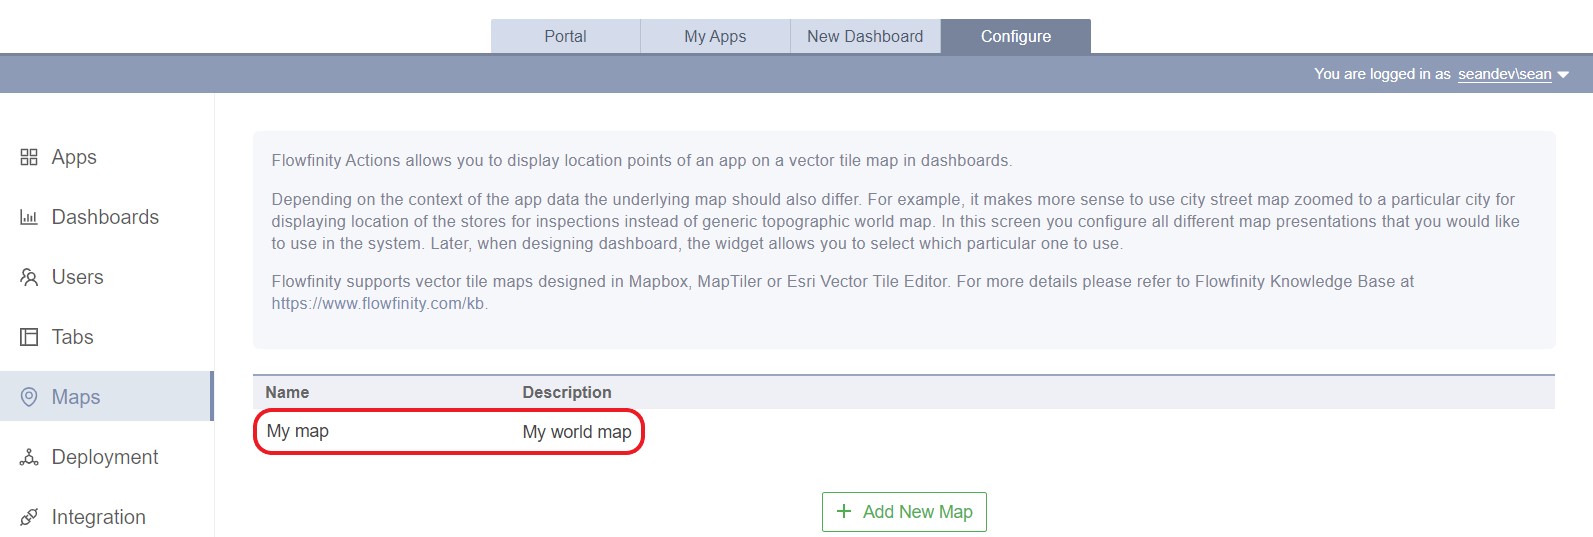
- Open Flowfinity Actions and navigate to the Configure tab, then select the Maps section. Click 'Add New Map.'
Note: If you are using Enterprise Edition. you need to switch to the Public Site to access these settings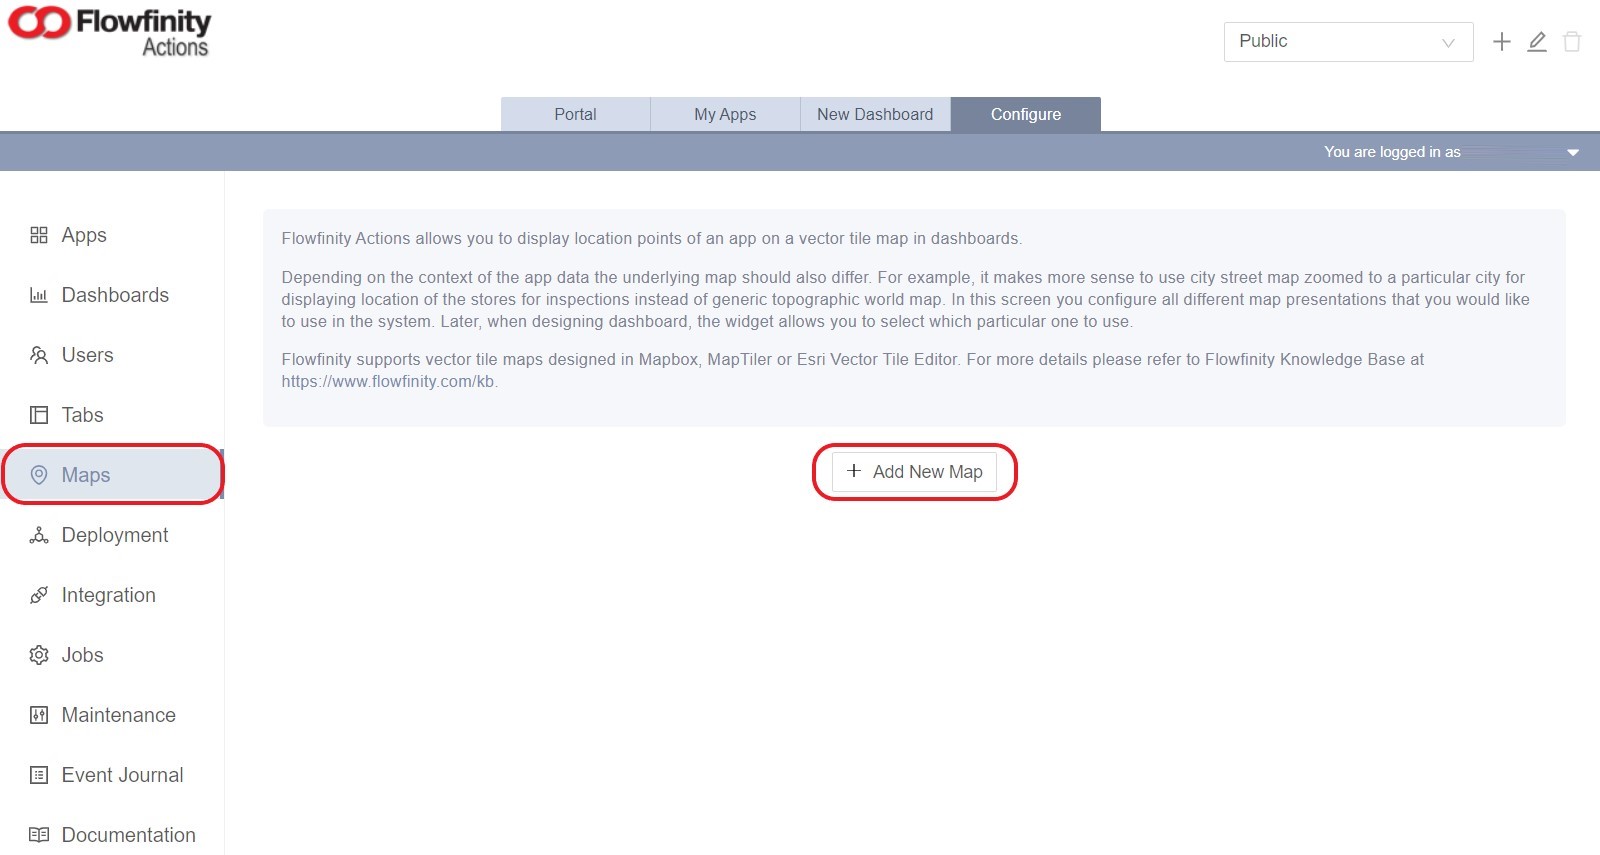
- In the Map Configuration window, specify a title, name, and description.
Note: The title is a user-friendly name that will be shown in the dashboard whereas the name is the unique system identifier for the map and is not visible to end-users.
In the Source section of the Map Configuration window, select Esri as the source, and use the upload link to import the style JSON file (e.g. MyTrees – Copy) from Esri.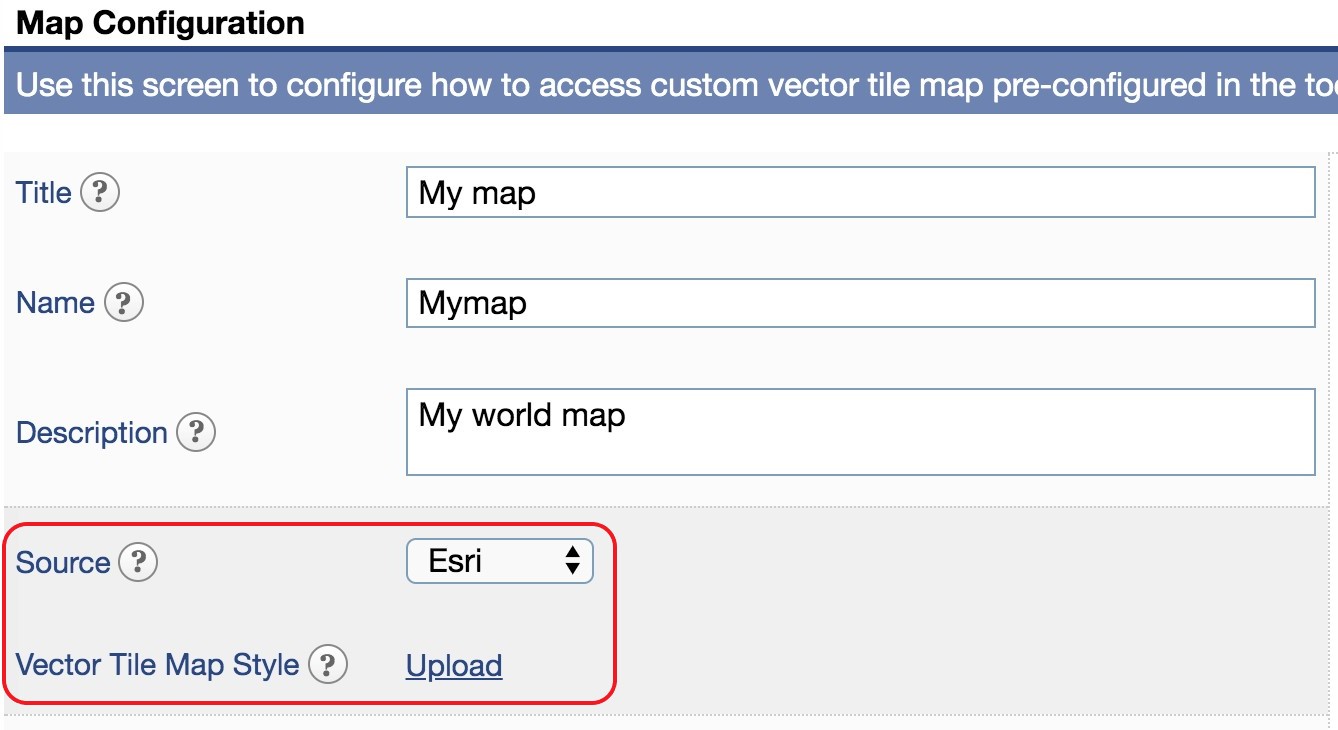
- Once uploaded, Flowfinity should refresh and display the style file name and a map preview. The configuration should look like this:
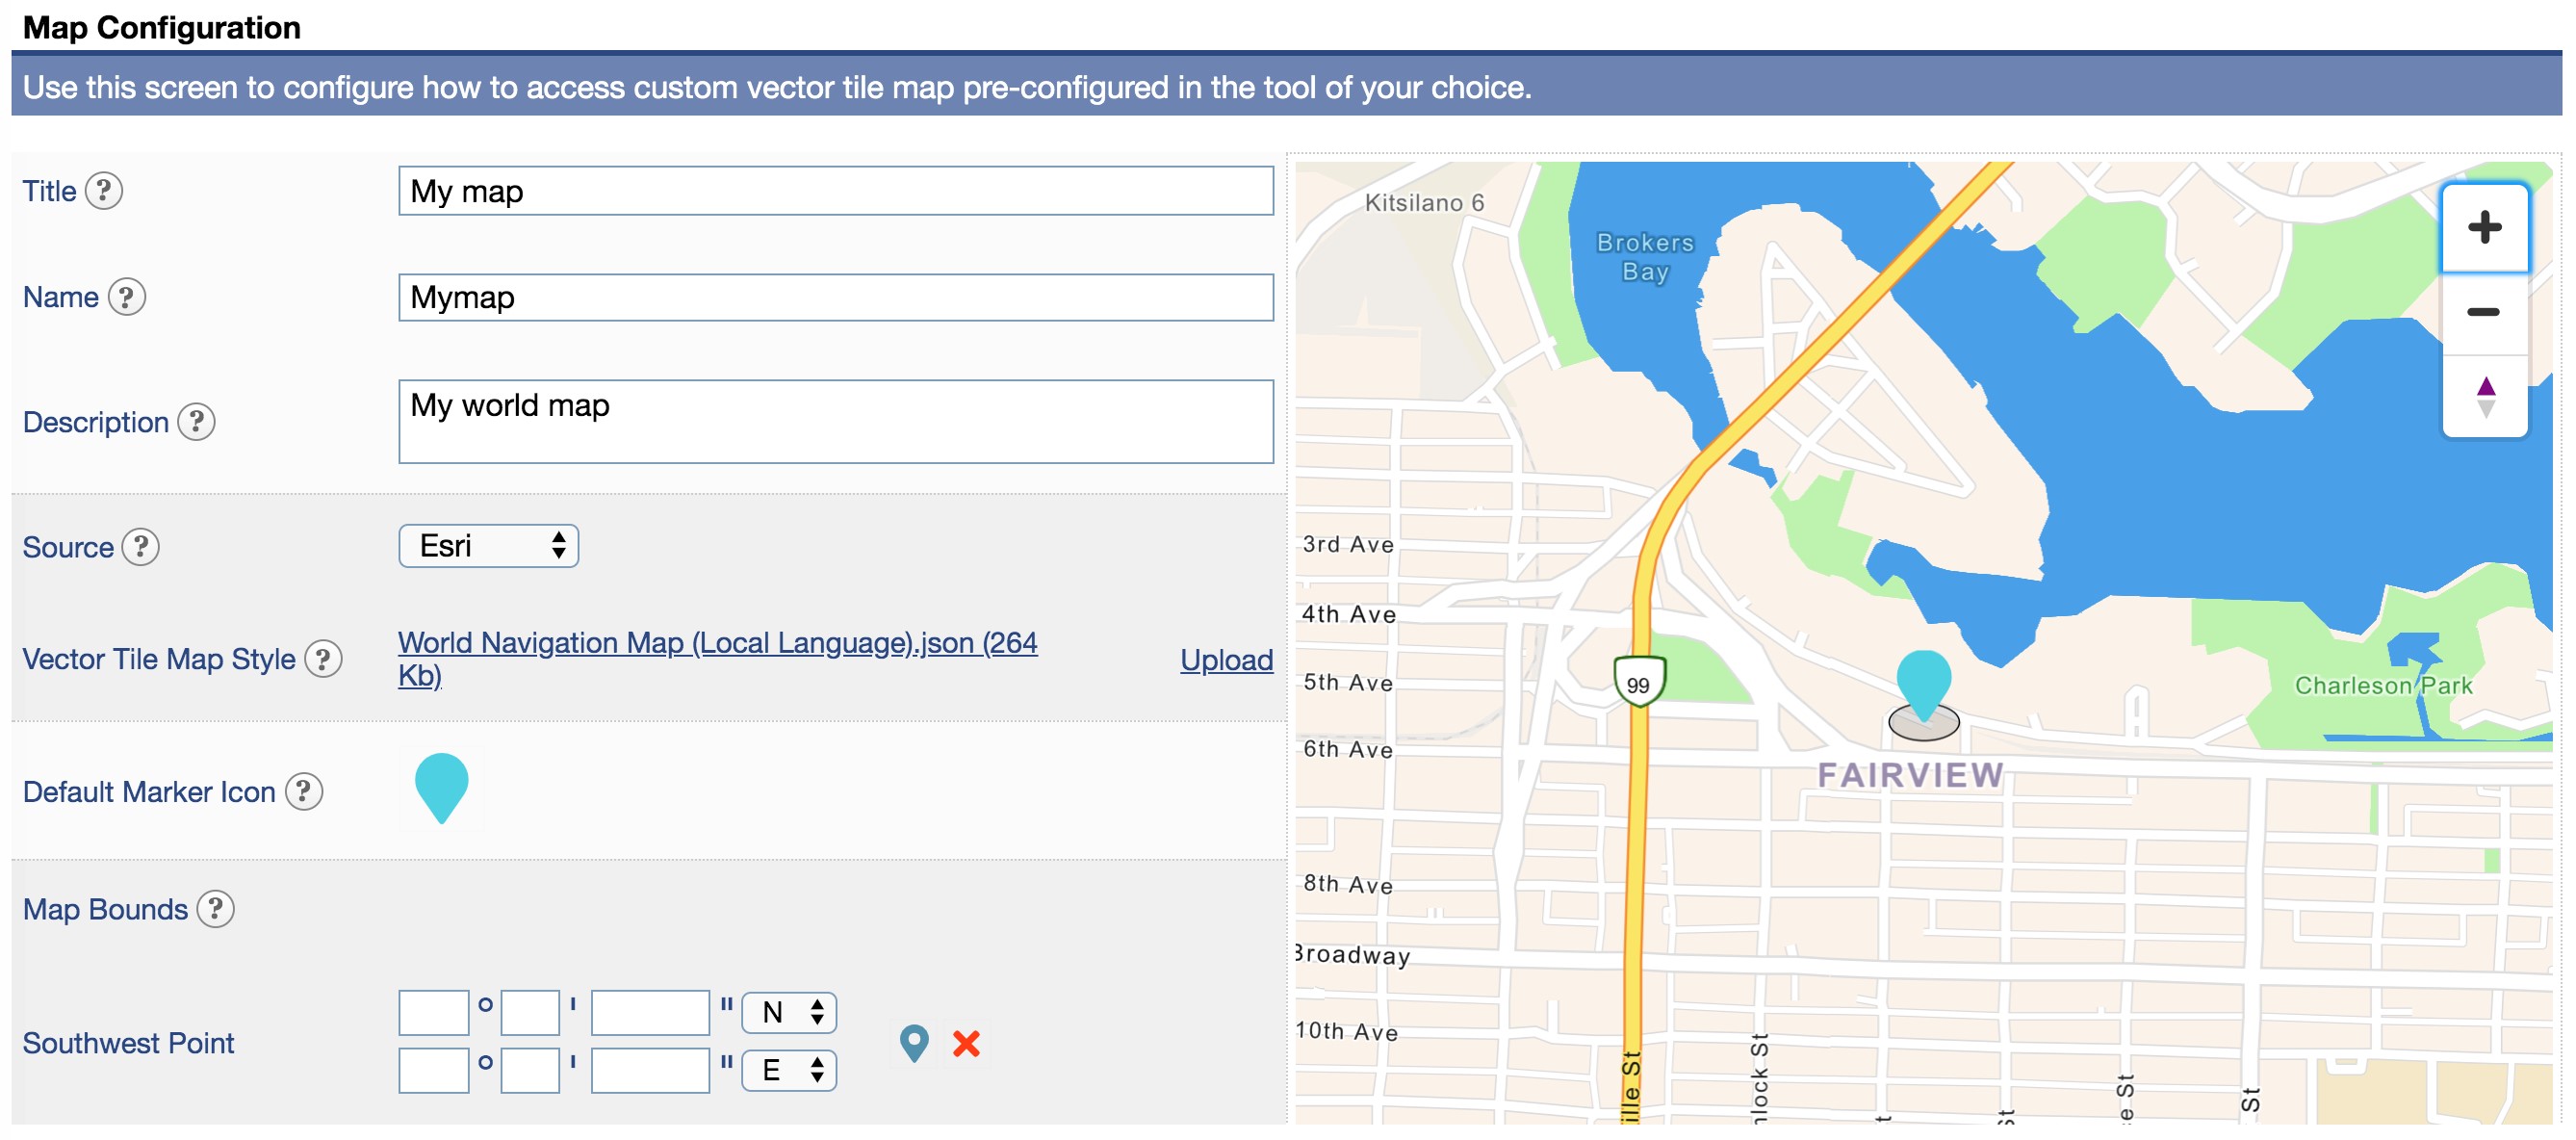
- The basic Map Configuration is now complete. You can save the configuration and proceed. However, two additional optional settings can be configured that adjust the end-user experience – Default Marker and Map Bounds.
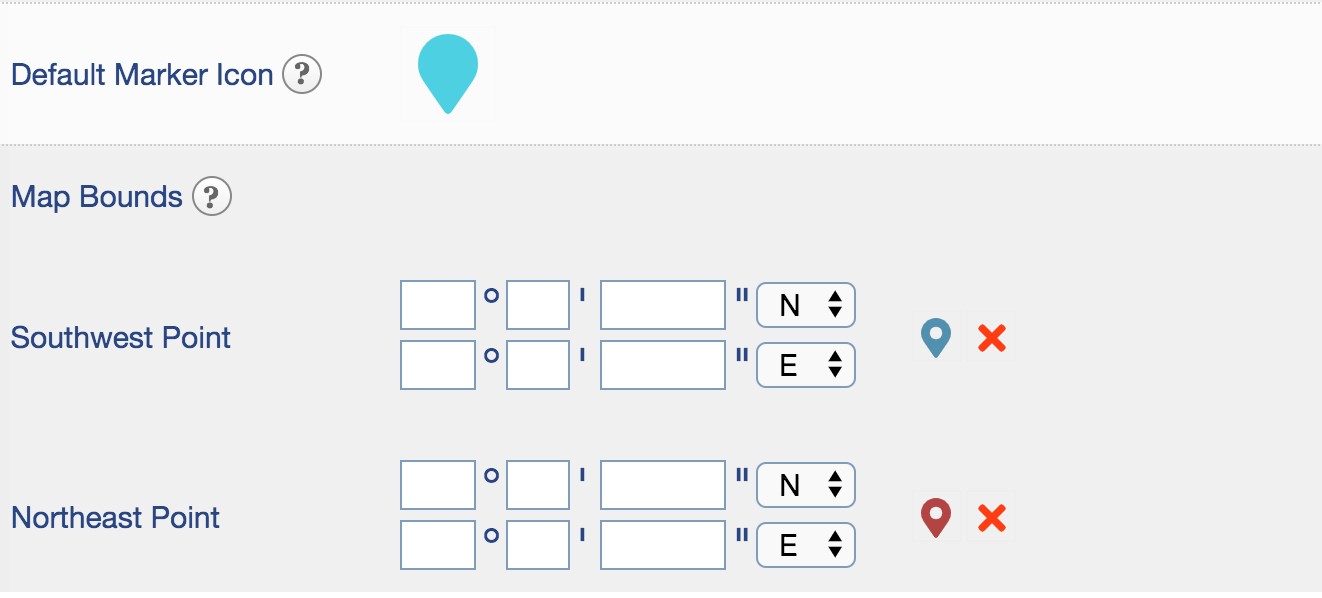
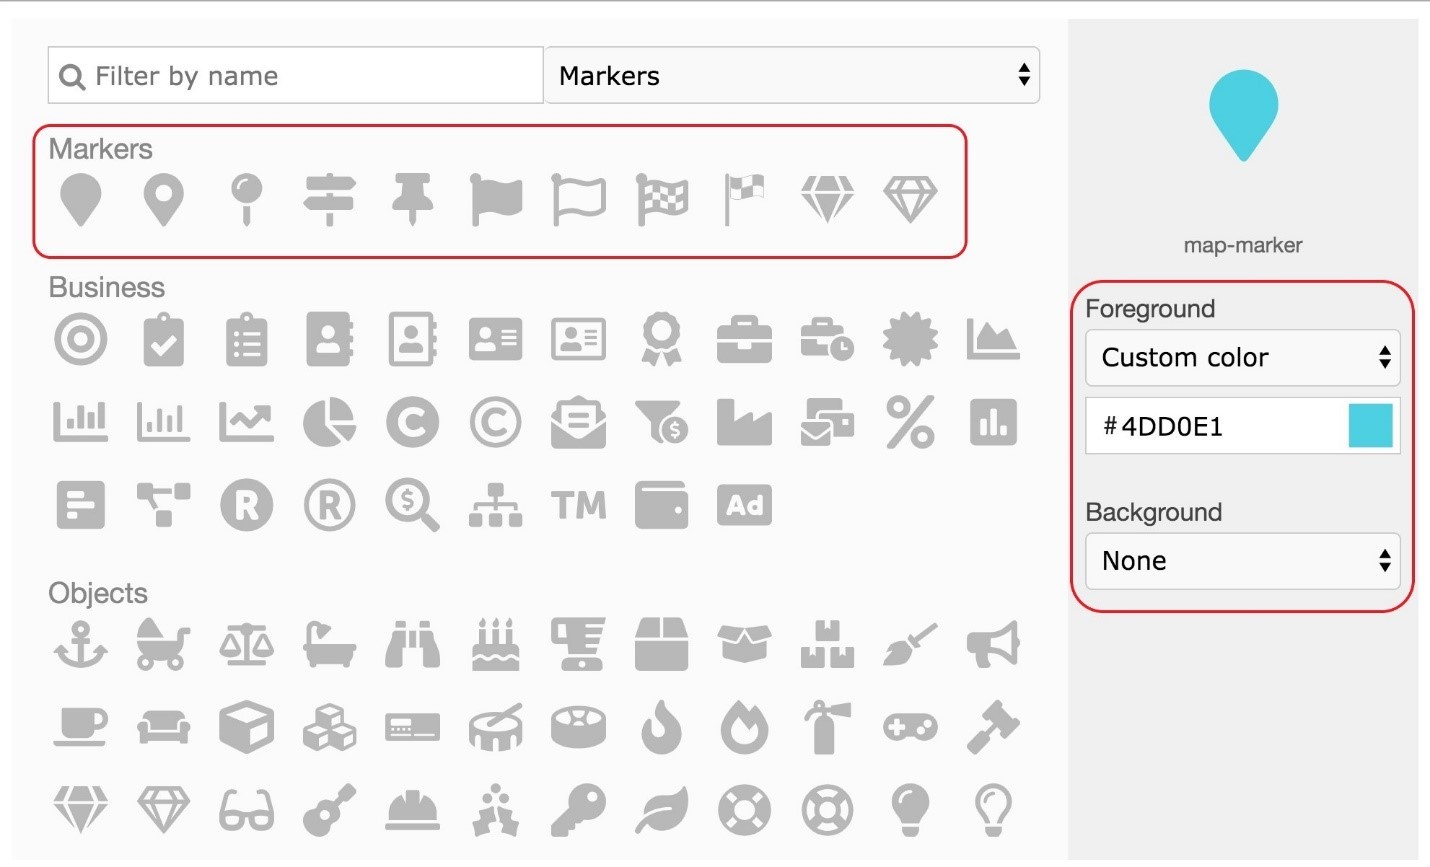
- The Default Market Icon will be used to display data points on the dashboard map. To change the default, click on the Icon and select the desired marker shape and color.
- Configuring Map Bounds allows administrators to restrict the map widget to display only a specific area to users. This is done by defining the Southwest (bottom left) and the Northeast (top right) coordinates, restricting the ability of users to zoom out beyond this area.
Note: This feature is useful when the GPS coordinates are expected to be within a specific geographic region. Configuring Map Bounds will ensure a better end-user experience by pre-defining the scope of the map widget, removing the need for a user to navigate to the relevant area every time from a wider global view. - You can specify coordinates manually, or you can specify coordinates by using the map.
When using the map to select coordinates, click the marker icon next to the Southwest Point to launch a popup map.
Zoom and pan the map to the desired Southwestern point coordinate. Click to place the market and then click 'use selected location' to save.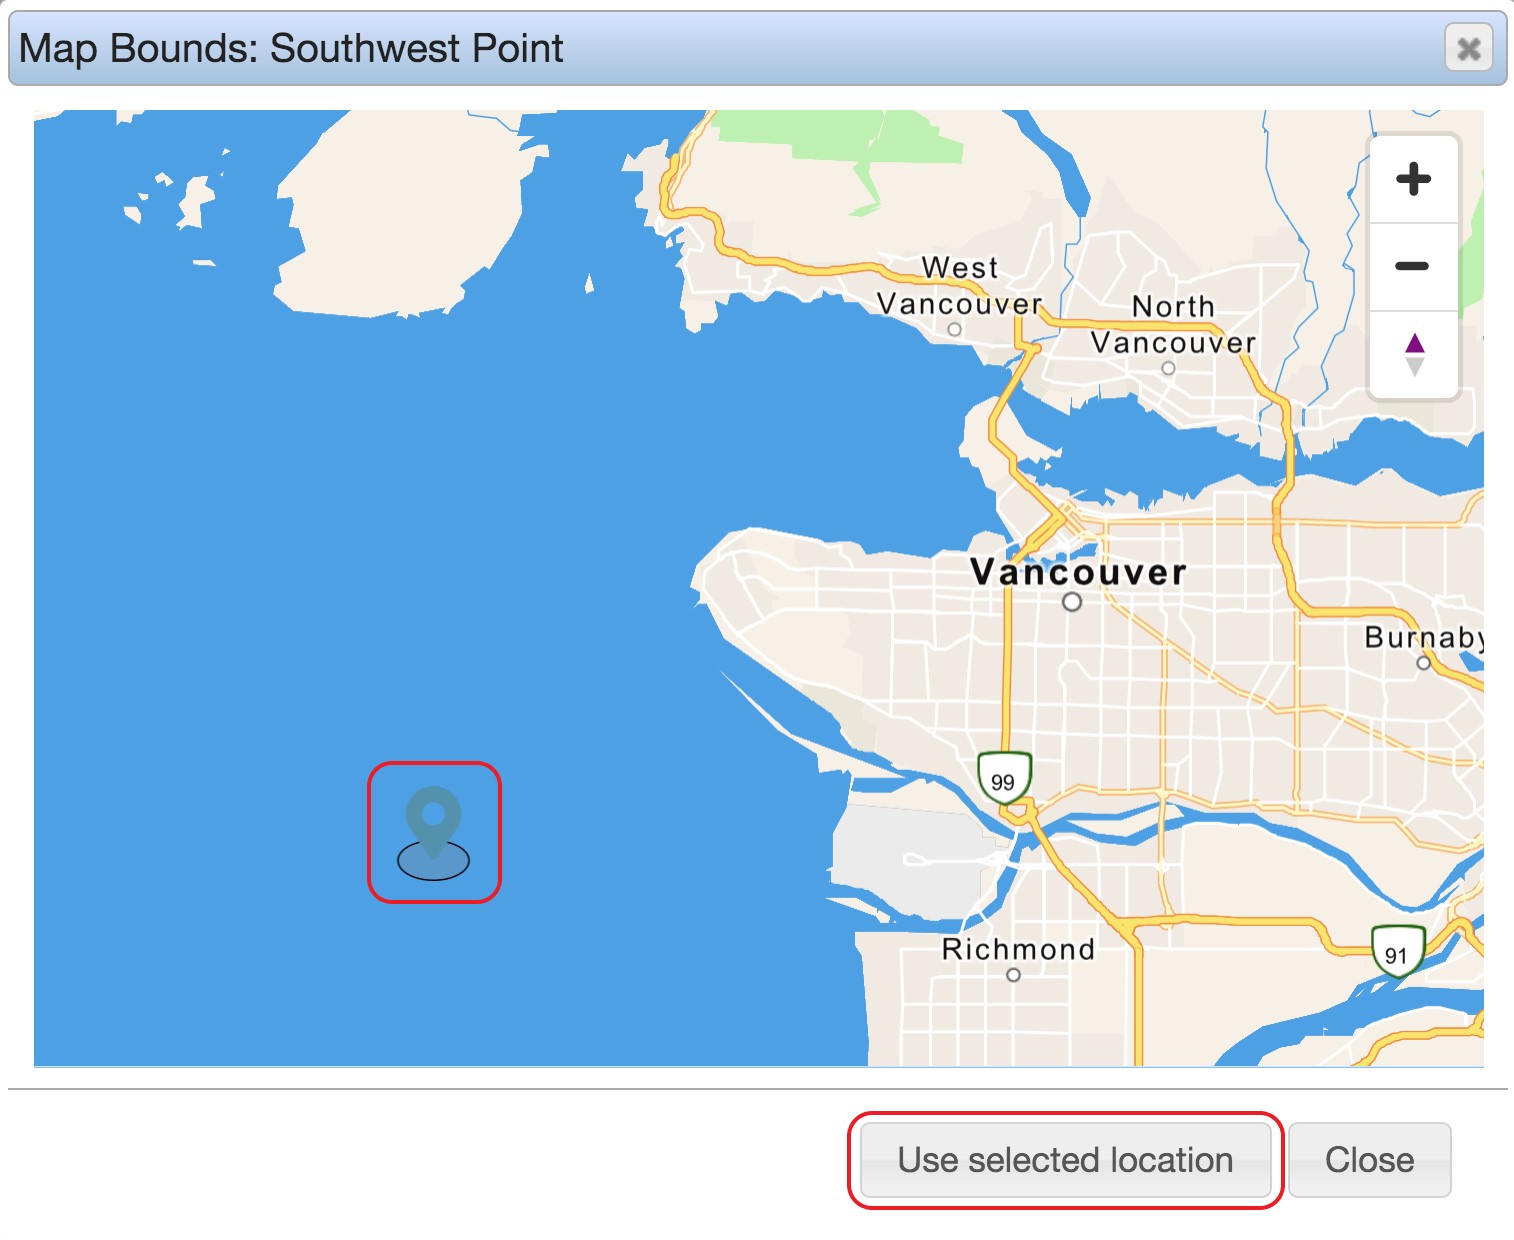
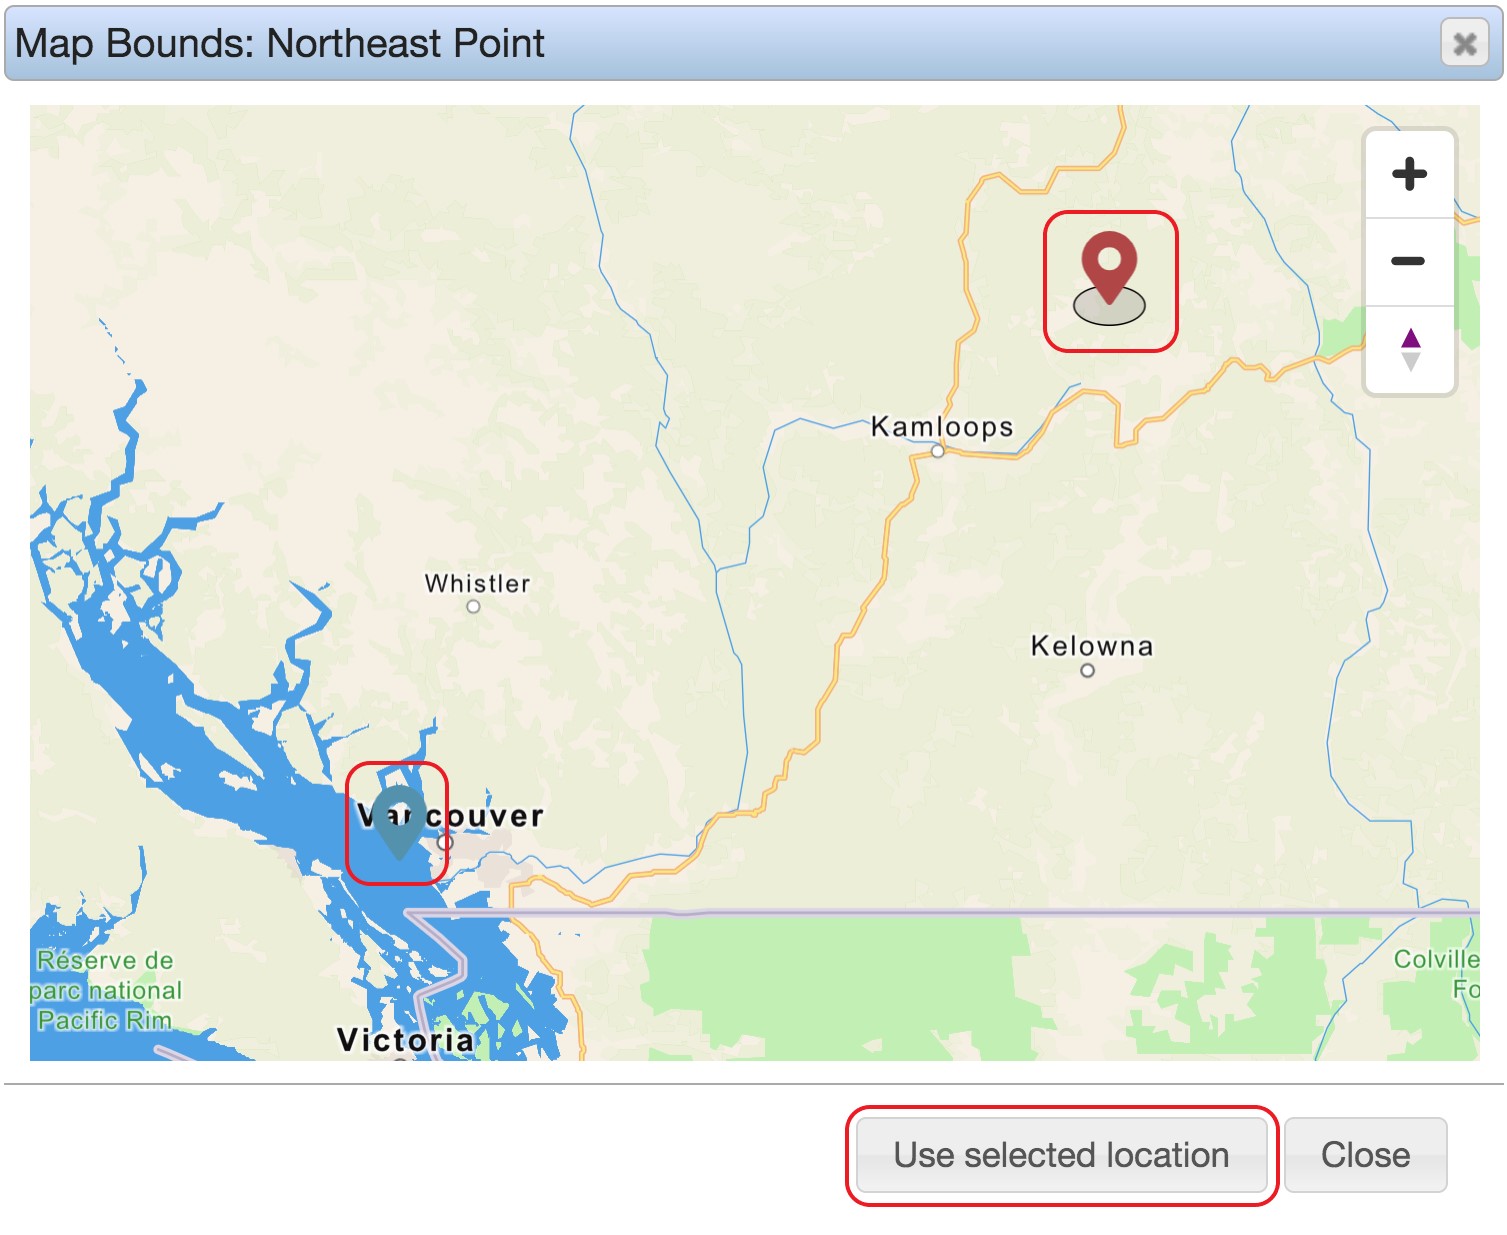
- When selecting the Northeastern coordinate, the map is already pre-zoomed to the estimated area and displays a suggested marker position. You can keep this pre-configured coordinate or change the location as desired by navigating to a new coordinate, placing the marker, and clicking 'use selected location' to save.
- The Map Bounds should now be configured, and the map should be available for selection in the Maps section of the Configure tab.
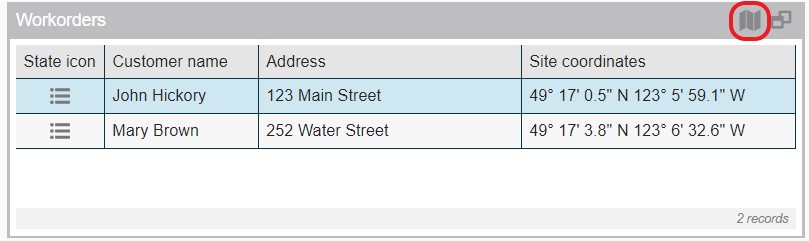
- To use a map configuration in a dashboard widget, you will need to have an application that contains location field data. For this article, we have selected a Work Orders application that contains two records with location coordinates taken from GPS.
- Add a widget to a new dashboard, selecting the desired application (e.g. Work Orders) and select a view. Make sure the 'Data source' is set to 'non-aggregated.'
- The configuration should resemble the following screenshot:
- If you do not see the map button at the top right of the widget, right-click on the widget and open the 'Widget Properties' window. Check that the 'widget display modes' are configured to allow the Map view.

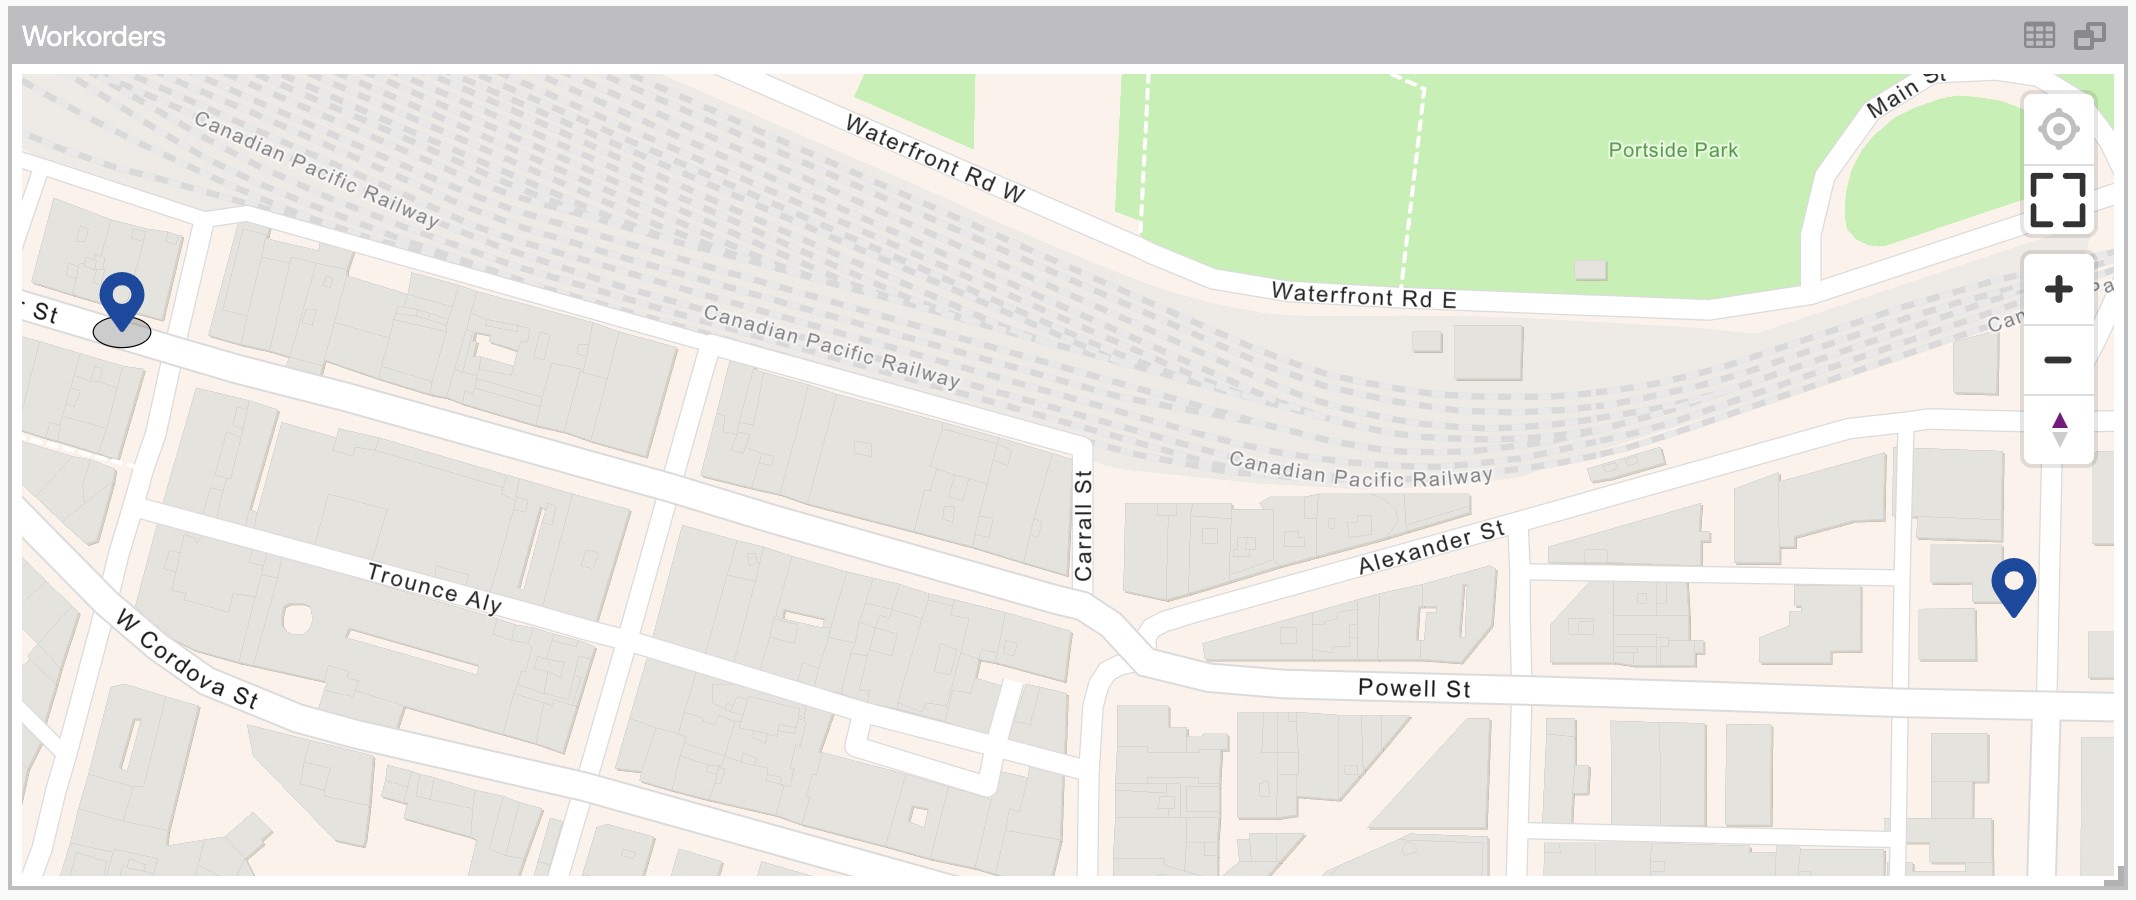
- Click on the Map icon to change the widget to map mode. The GPS coordinates for the records in the Work Orders should now be plotted onto the dashboard map.
Note: If you have more than one map configuration in the system, the widget will select the first entry in the list. To change this, right-click on the map and select 'Map properties.'
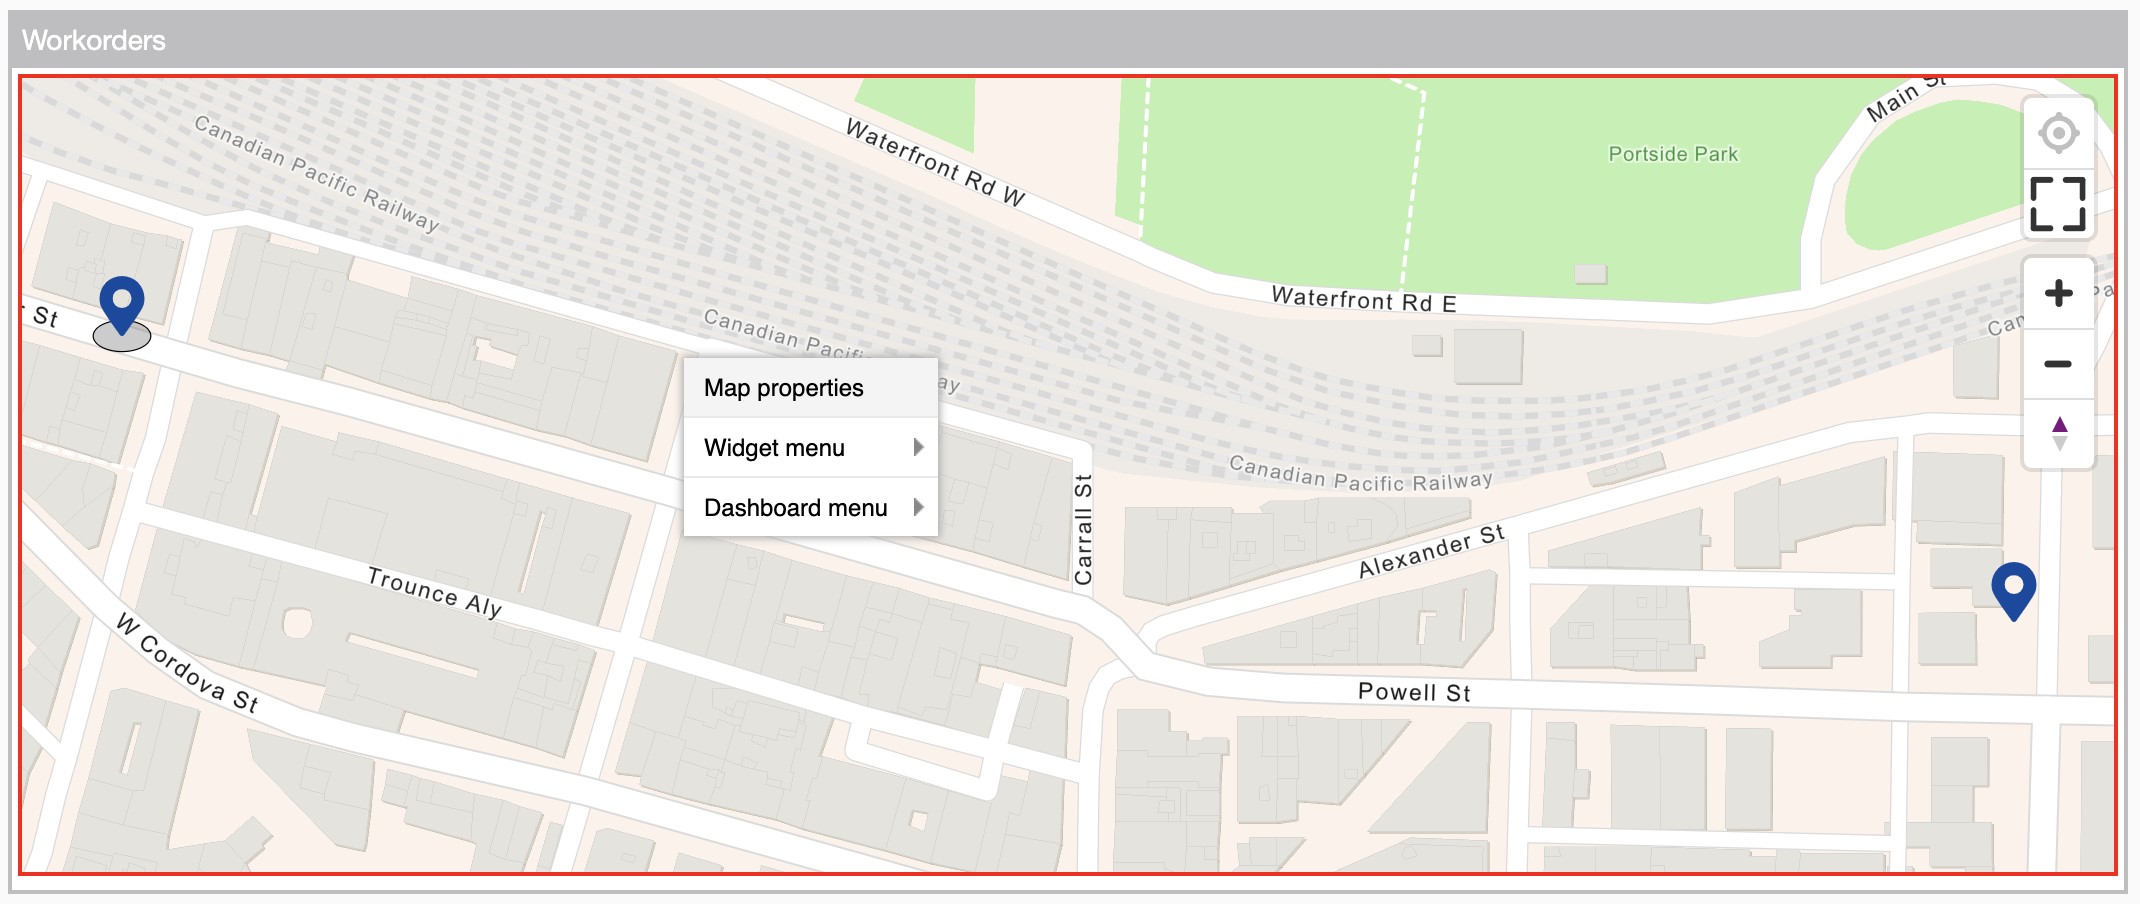
- In the Map Properties window, use the dropdown on the top to select the appropriate map.
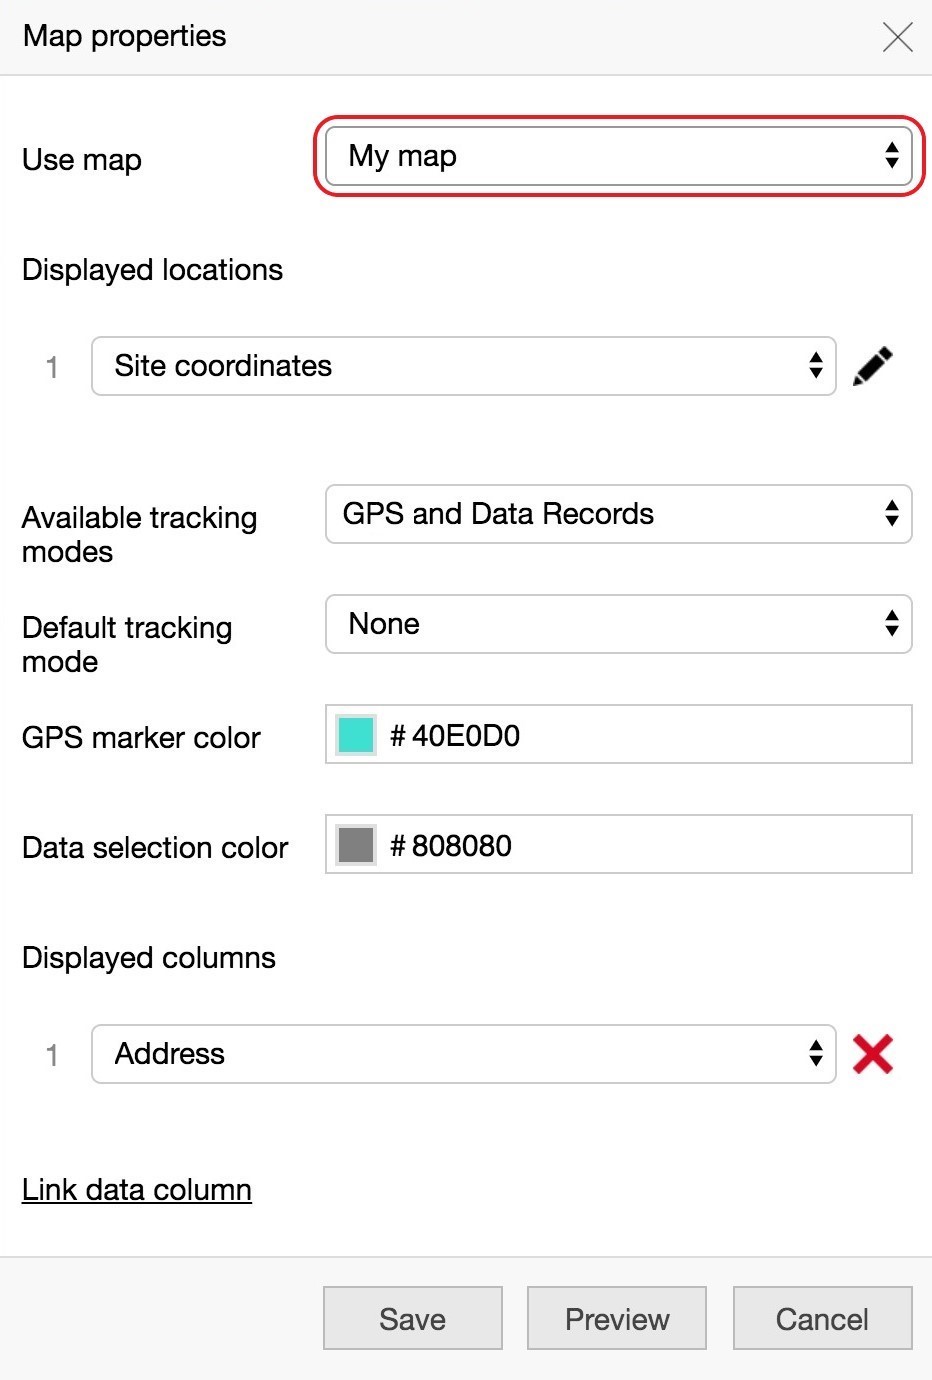
- In the Map Properties window, you also have options to configure which marker to use, which columns to display (if the record has multiple GPS location columns), as well as the modes for data display and navigation.
Note: The 'Displayed columns' list at the bottom specifies which record values will be displayed to the end-user when they select the market on their dashboard map. For example, the end-user will require the 'Address' field from the record to navigate to the work order location
It is possible to add further columns to the marker icon, for example, a contact phone number or other fields from the source app.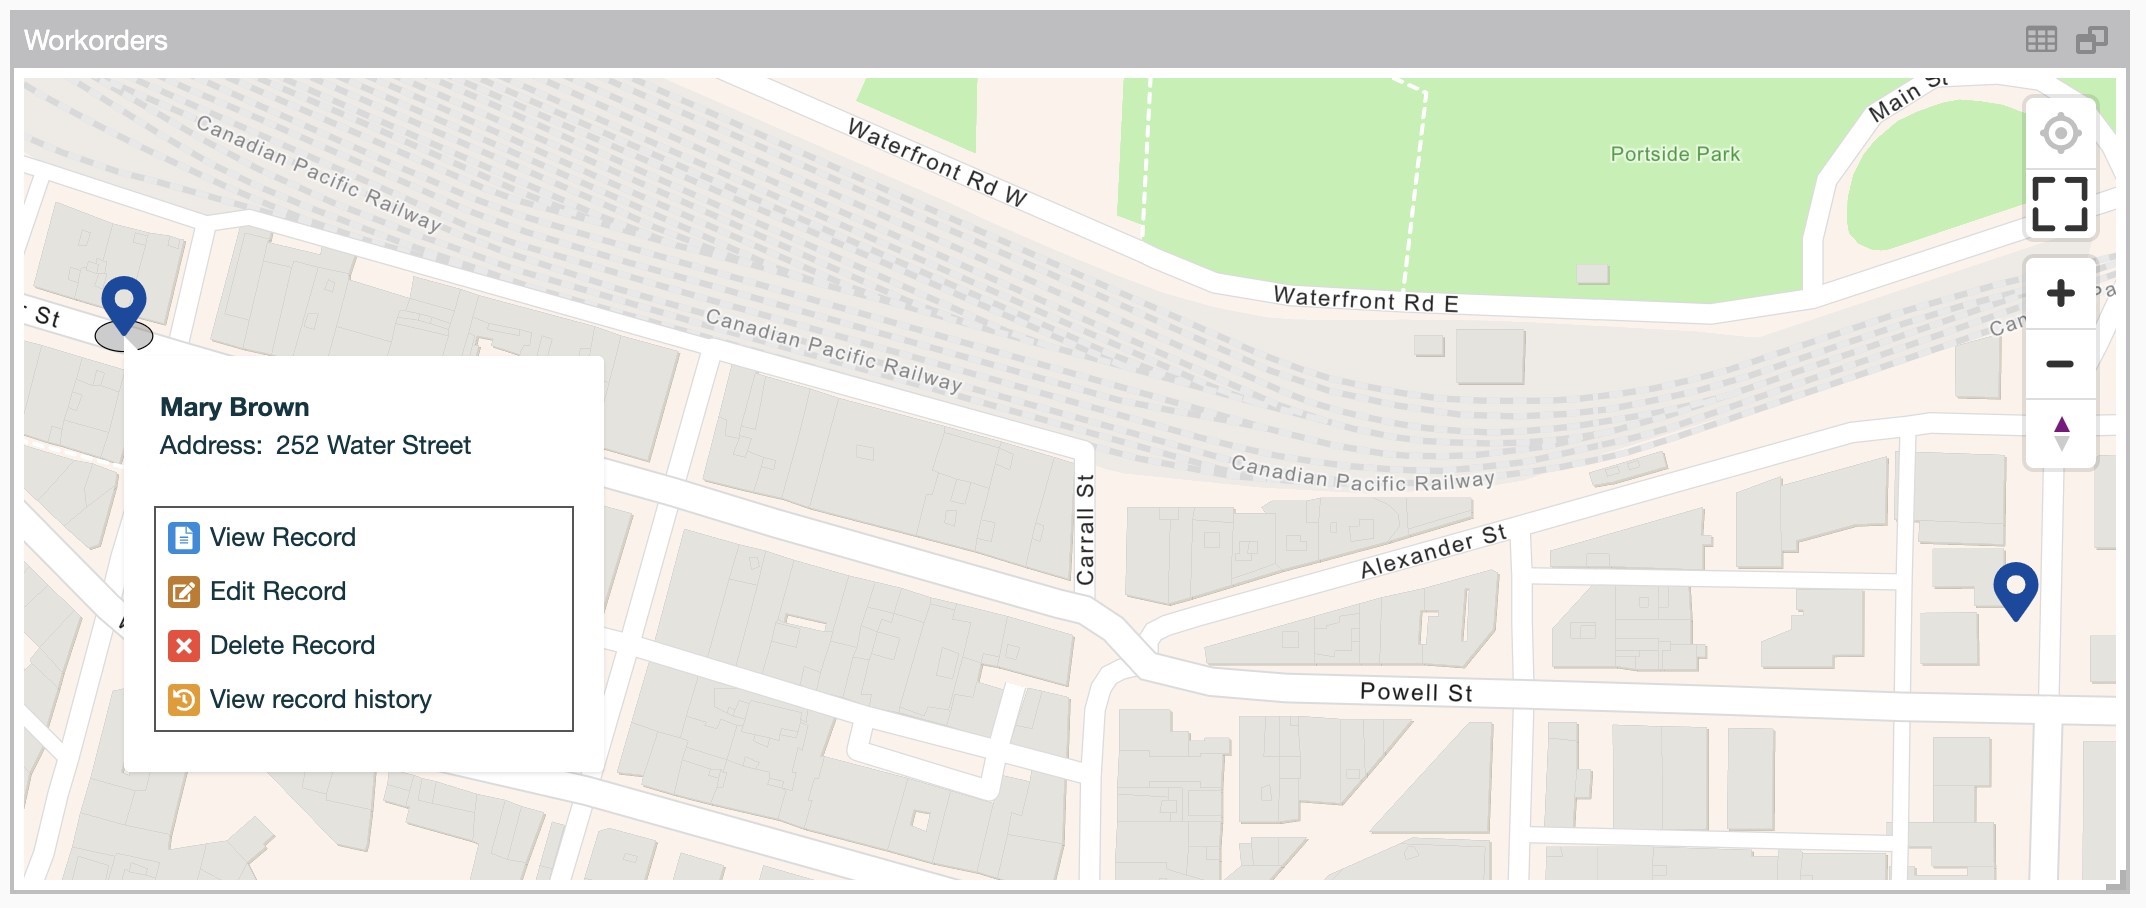
- Publish your dashboard.


You have now successfully hosted an Esri basemap in Flowfinity.