Integration Concepts 1 – How to configure REST in Flowfinity
These articles describe how to create an integration user and connect Flowfinity to external systems using a sample "Lead Registration" app. The sample app is designed to capture and manage sales leads and includes some common data capture fields. Please download an FTF of the app to import into your Flowfinity site.
Flowfinity includes Representational State Transfer (REST) integration features. These features are disabled by default as a security measure, so to use this method REST must be enabled by following 4 steps:
- Create a new user account and assign the type as 'Integration'
- Enable surface configuration Execute and/or Query functions
- Configure an integration Operation
- Configure an integration View or View level.
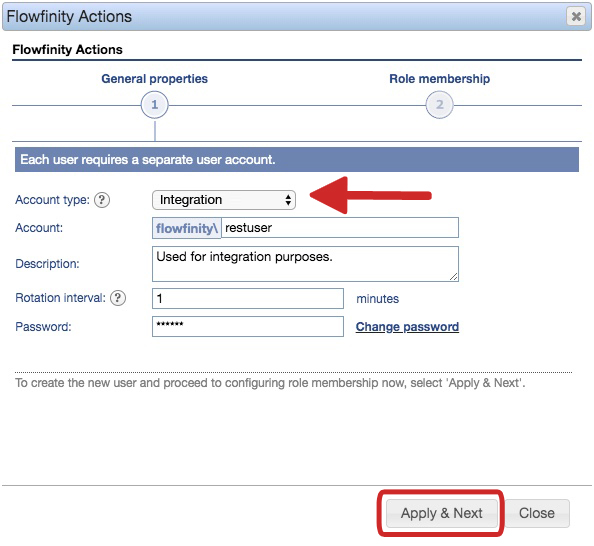
1. Create a dedicated Integration type user account
To integrate with external applications using REST you must first create a dedicated user account and assign the 'Account type' as 'Integration.' This user account will require a license like any regular or robot user. To create the dedicated integration user follow these steps:
- In Flowfinity, navigate to the 'Configure' tab.
- Select the 'Users' tab, then 'Add User.'
- Set the 'Account type' to 'Integration.'
- Assign an account username (restuser) and password.
- Click 'Apply & Next.'
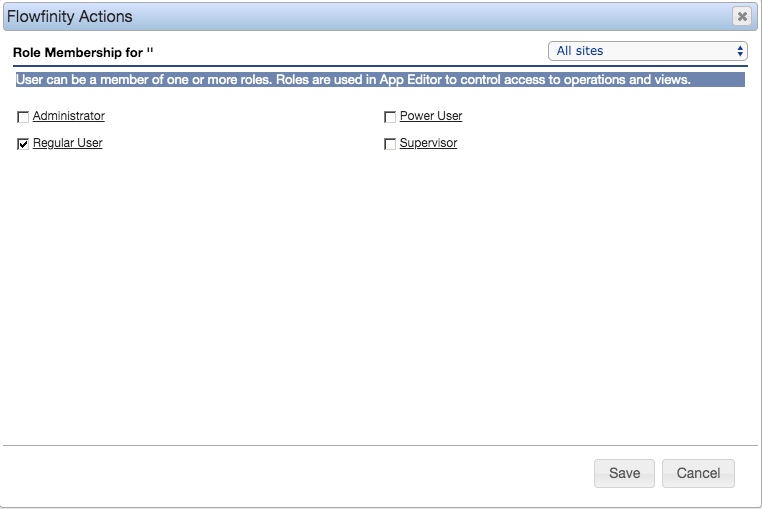
- Select a Role Membership of 'Regular User' for the Integration user.
- Click 'Save' to create the Integration User Account.


2. Enable surface configuration
The following steps outline how to enable Surface Configuration:
- In Flowfinity, navigate to the 'Configure' tab.
- Select the 'Integration' tab, then 'REST Integration.'
- Under 'Surface configuration' there are two checkbox options:
Check 'Execute()' to allow external applications to invoke operations in your Flowfinity apps.
Check 'Query() to allow external apps to retrieve data from your Flowfinity apps.
Specify the dedicated Integration User Account that will be used.
If you receive the error message: 'There are no available account of "Integration Account" type found'. This means you need to configure a dedicated Integration User Account.
If your receive the error message: 'Warning: There are no Integration Accounts that have required permissions to call configured operations or views'. This means you need to configure a valid integration operation in your app and set the correct role permissions - please see section 3 of this document below.
- All the Operations (Execute) and Views (Query) that have been enabled for REST integration are displayed as shown. Each 'details' link under the URL column contains a URL endpoint and example JSON payload.
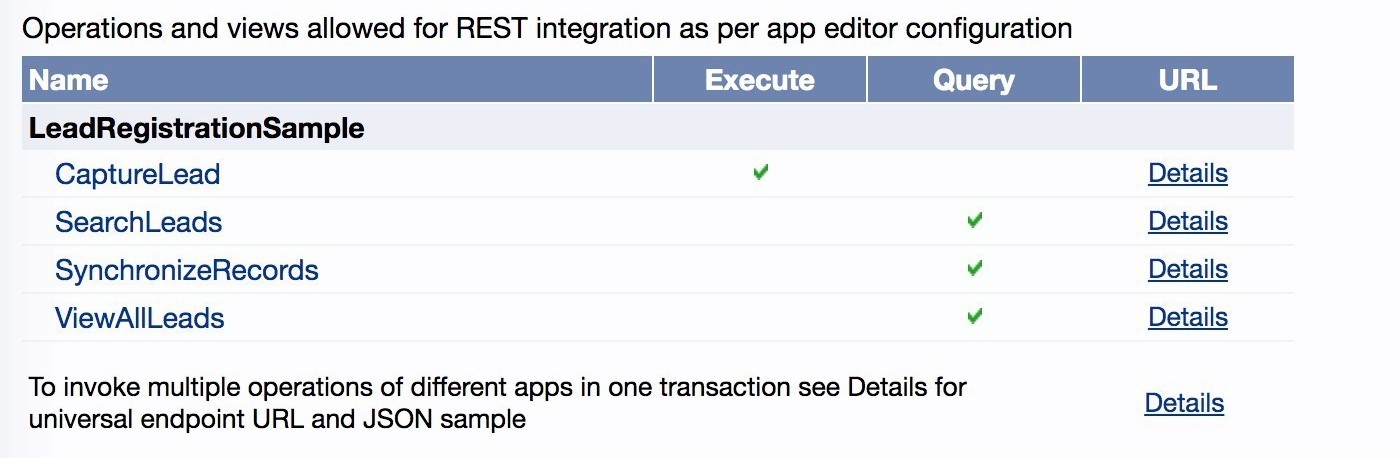
For example: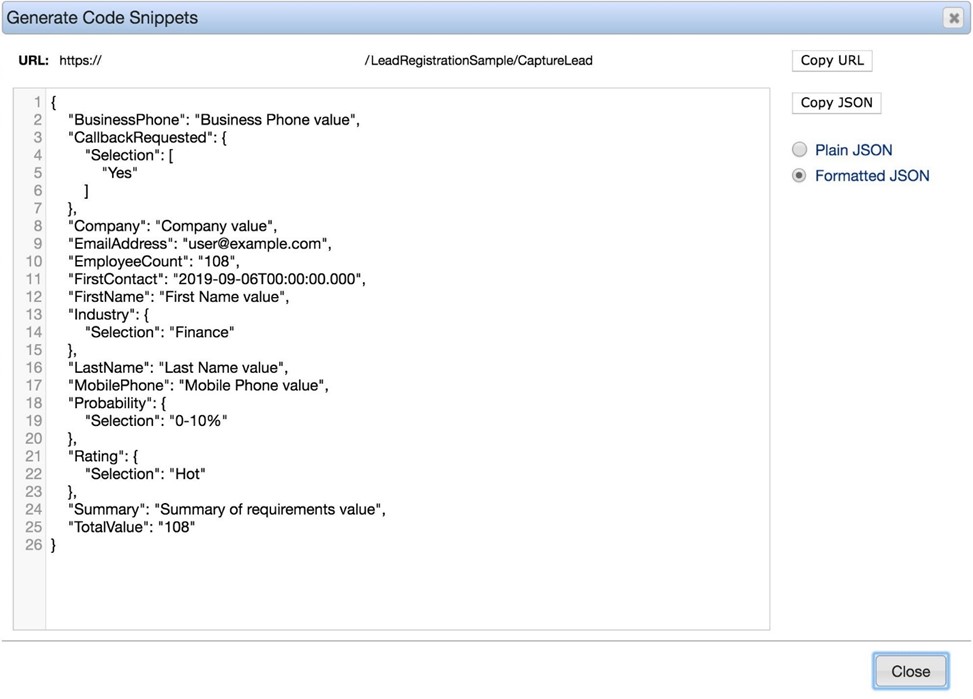


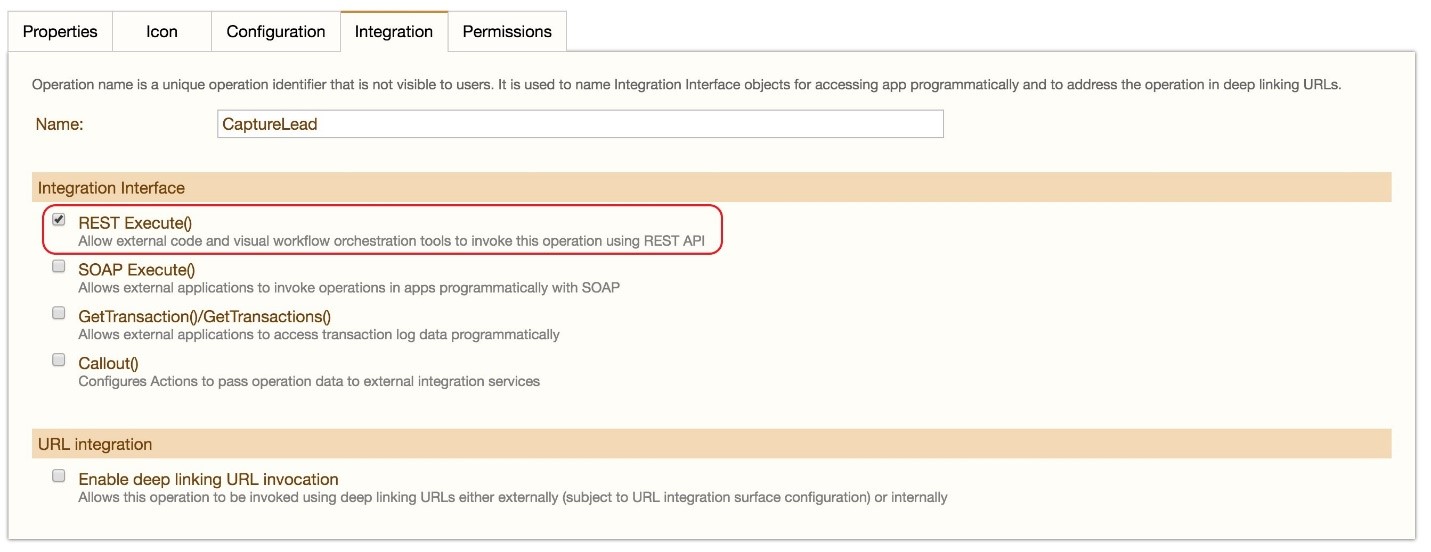
3. Configure an Operation
In order to enable an Operation for REST API integration follow these steps:
- Go to the 'Configure' tab and customize the desired application.
- Create a new operation or click an existing operation and select 'edit operation.'
- Select the Integration tab.
- Click the REST Execute() option, this will allow external code and visual workflow orchestration tools to invoke this operation using REST API.

4. Configure a View
In order to enable a View for REST API integration follow these steps:
- Go to the 'Configure' tab and customize the desired application.
- Select the Views tab in the App Editor.
- Select an existing view or create a new one.
-
Navigate to the Integration tab and select the REST API checkbox. This will allow external code and visual workflow orchestration tools to retrieve this view using REST API.
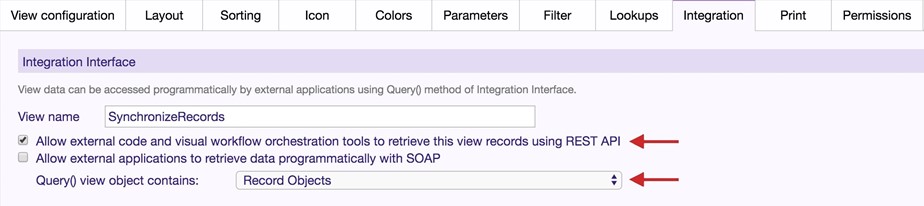
- For Query() view objects contains, select Record Objects. This is necessary for synchronization, as it overrides any Layout settings and returns all fields during synchronization.
- In some instances, it may be necessary to add parameters and filters to avoid duplicating data. For further information visit this video.
