Synchronize records between Flowfinity and external systems using Power Automate (Microsoft Flow) – Read
Flowfinity provides the ability to integrate with external systems by enabling access to views in apps via Representational State Transfer (REST) Application Programming Interface (API) services. When access is enabled, programmers can use an HTTPS request/response-based REST API model to query view data in Flowfinity.
This article outlines how to configure Power Automate (formerly Microsoft Flow) with Flowfinity app views to enable one-way synchronization of new and updated records from a Flowfinity app to your external system of choice. In this example, the synchronized records will be sent to a user's email address instead of saving the data in an external system.
This tutorial uses a demo Lead Registration app as an example. To follow along you may download and import an FTF file of the Lead Registration app to your Flowfinity site.
Introduction
Synchronizing batch records is a common requirement when integrating systems. For the process to work smoothly, the synchronization must be timely, reliable, and transactional. This means being able to recover from network and system errors without creating duplicates or losing records in the process.
REST HTTPS based architecture is non-transactional by design and can potentially be prone to losing data due to the nature of Hypertext Transfer Protocol Secure (HTTPS).
The steps described below outline how to implement synchronization from a Flowfinity app to Power Automate while ensuring data integrity for reliable production use.
This synchronization method follows these steps:
- Flowfinity exposes a view in the application to be synchronized. Records in the app are filtered and sorted by the last modification date to ensure that all new and updated records are returned to the caller in the order they were received by Flowfinity.
- Each record received is stamped with a unique persistent ID 'lastSubmissionID' which can be used by external logic to filter duplicates.
- The date of last submission value 'lastSubmissionID' is only saved in persistent storage (Azure File) by Power Automate after the received batch of records is successfully processed without errors.
This value is passed as a parameter to the view in Flowfinity to return only new records since the last run. The value is read from the file on subsequent Flow runs to ensure its values are not lost during unexpected system restarts or disconnects.
Step 1: Enabling REST API surface configuration
Enable REST integration by assigning a dedicated integration user, providing access to app operations and creating a view in the App Editor by following these steps.
Once external integration is enabled the REST URL endpoint address for submitting operations to Flowfinity will be displayed in the Configure > Integration > REST Integration section. Click the Details link to see the JSON payload request and response which you will need to set up Power Automate.

Step 2: Configure a dedicated View that will be used for synchronization
A View containing the system value 'lastSubmissionID' must be created to enable synchronization. This view will require a parameter to only return records created since the last run and sort these in ascending order. This ensures the records received by Power Automate are in the same order as they were saved in Flowfinity.
- In Flowfinity select the 'Configure' tab and customize your app. Click the Views tab in the App Editor.
- Create or copy an existing view and call it 'Synchronize records by lastSubmissionId.' Leave all other settings as default.
Note: If you are using a production server, you may want to uncheck 'Make this view accessible in the Activities menu' to hide this view from end-users.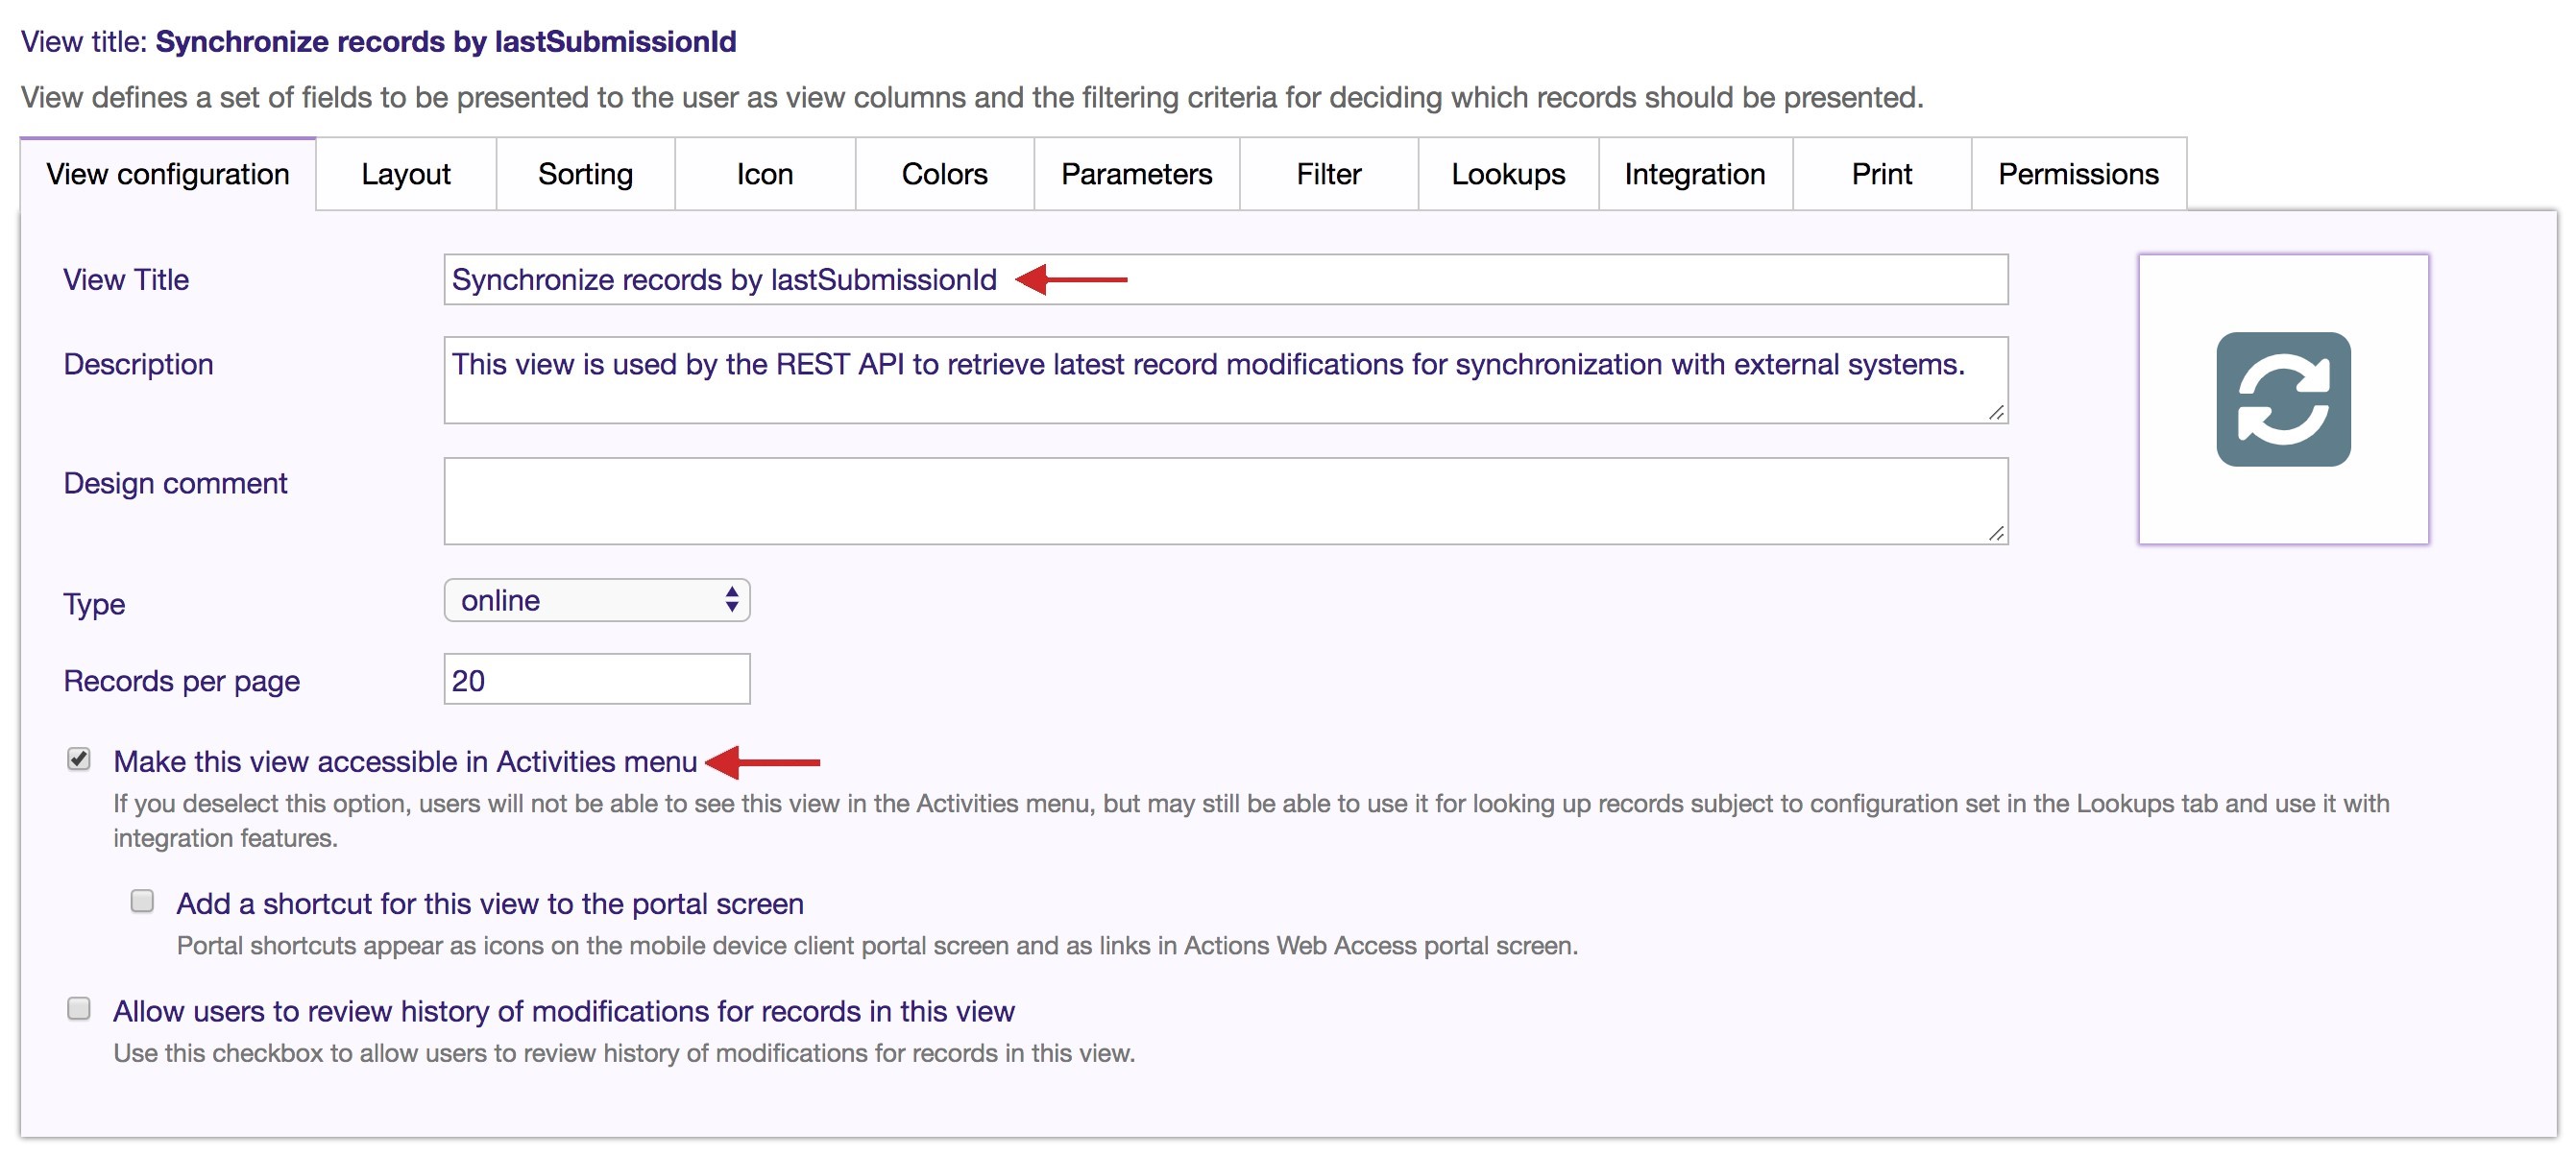
- Open the 'Integration' tab within the view. Name the View 'SynchronizeRecords' and select the REST API access checkbox. Select 'Record Objects' for the Query() view object setting.
Note: selecting 'Record Objects' overrides any settings set in the Layout view columns and returns all available fields to the caller. This is necessary for synchronization.
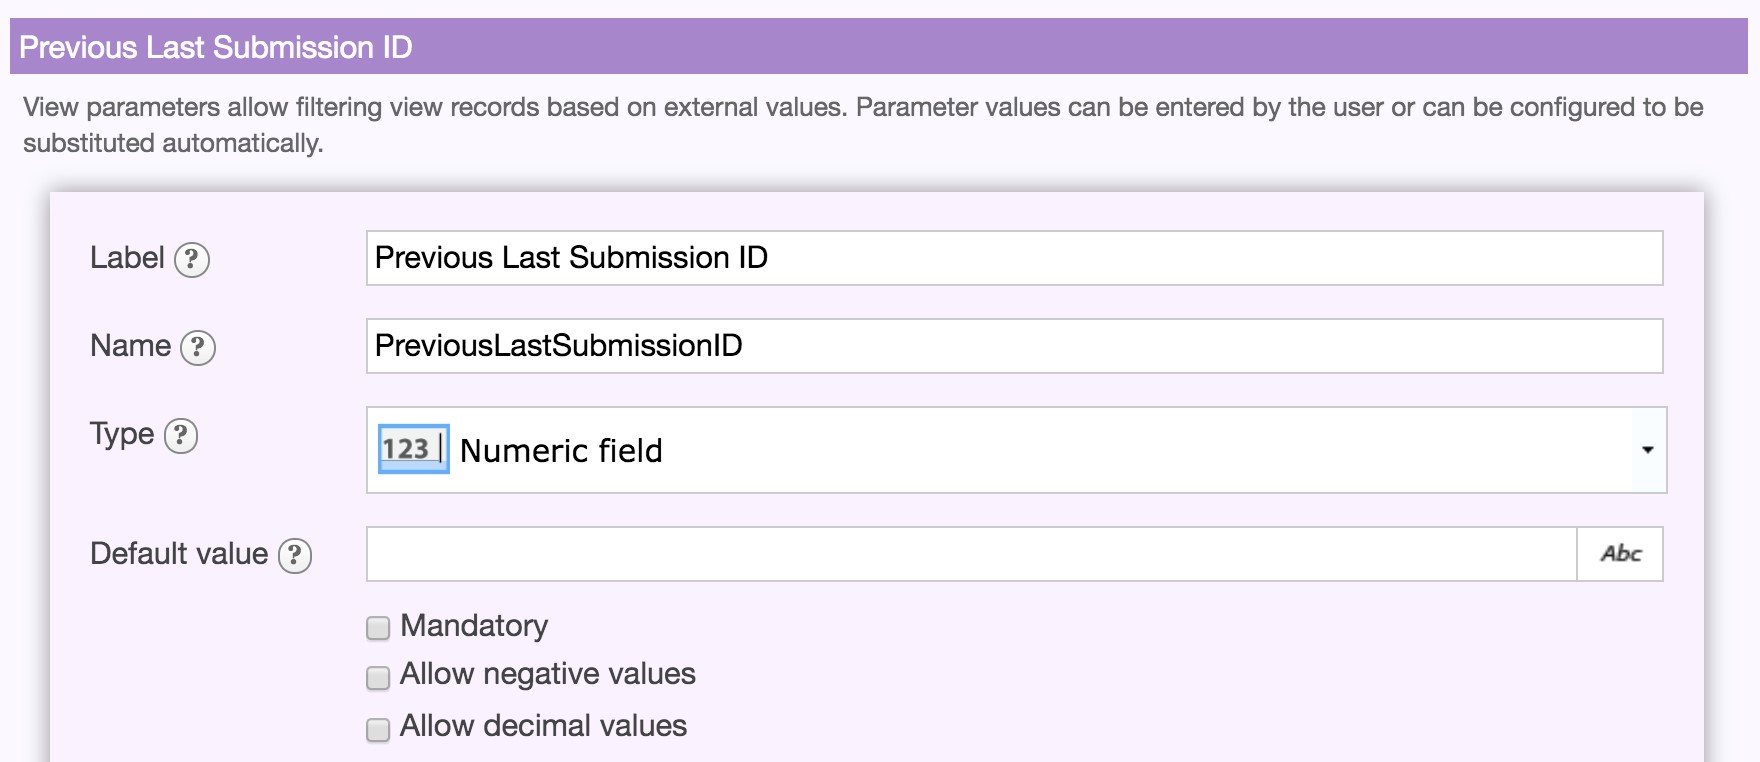
- Navigate to the 'Parameters' tab and click 'Add parameter.' Label it 'Previous Last Submission ID' which will generate the name 'PreviousLastSubmissionID.' Select the 'Numeric' field type. Click 'OK.'
-
Now access the 'Filter' tab to configure a filter that will only return records that are newer than the last processed last submission ID, as shown below.
a) Click 'Add condition.' Select: 'Last submission ID', 'Is Greater Than', 'Previous Last Submission ID .'
b) Click 'Add condition.' Select: 'Previous Last Submission ID', 'Does Not Contain Data.'
c) Select both of the conditions and click 'Combine with OR.'
Note: Steps 'b and c' account for the possibility of receiving an empty value for the parameter, and will then return all related records.
- Save the view.
- Publish the app to implement the changes.


Step 3: Configure Power Automate (MS Flow) workflow
For demonstration purposes this Power Automate tutorial saves variables that need to be retained between subsequent calls and system restarts in a persistent file stored within the Azure File System. You can use alternate storage if desired such as a database table, a SharePoint file, or similar as long as the storage is persistent and retains the data between flow starts or any online system restarts or interruptions.
Log in to Power Automate using your valid username and password.
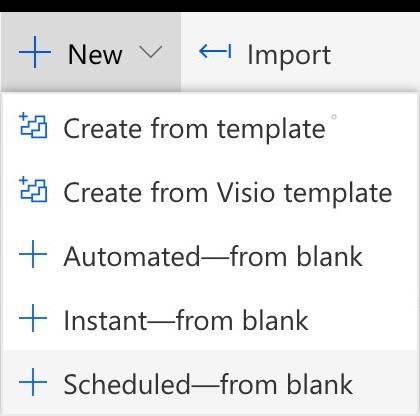
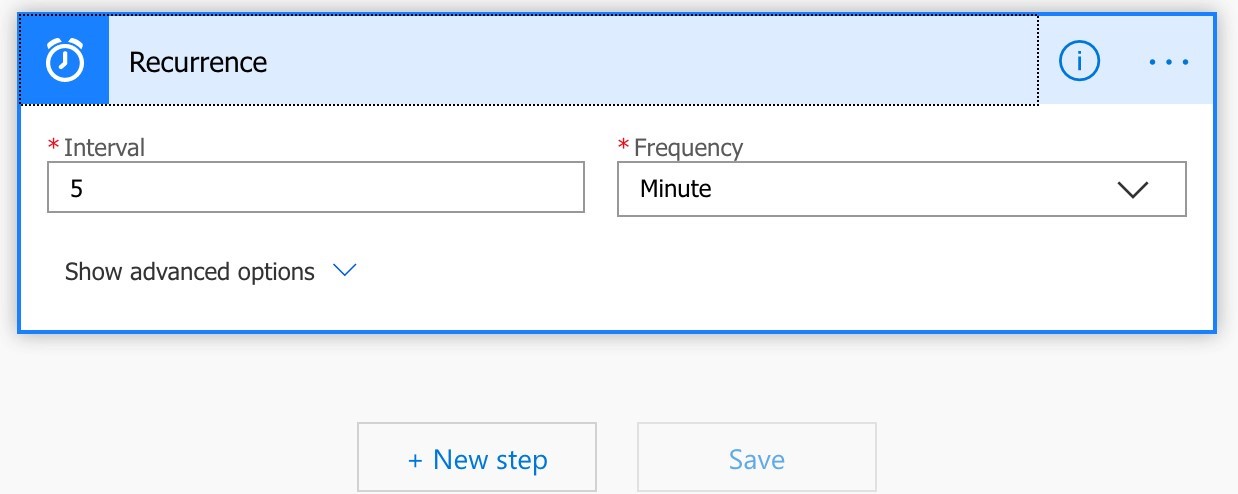
- Click 'New' to create a new flow and set the type to 'Scheduled – from blank.'
- Name the flow and select the desired run frequency, we'll set ours to 5 minutes. Click 'Create.'
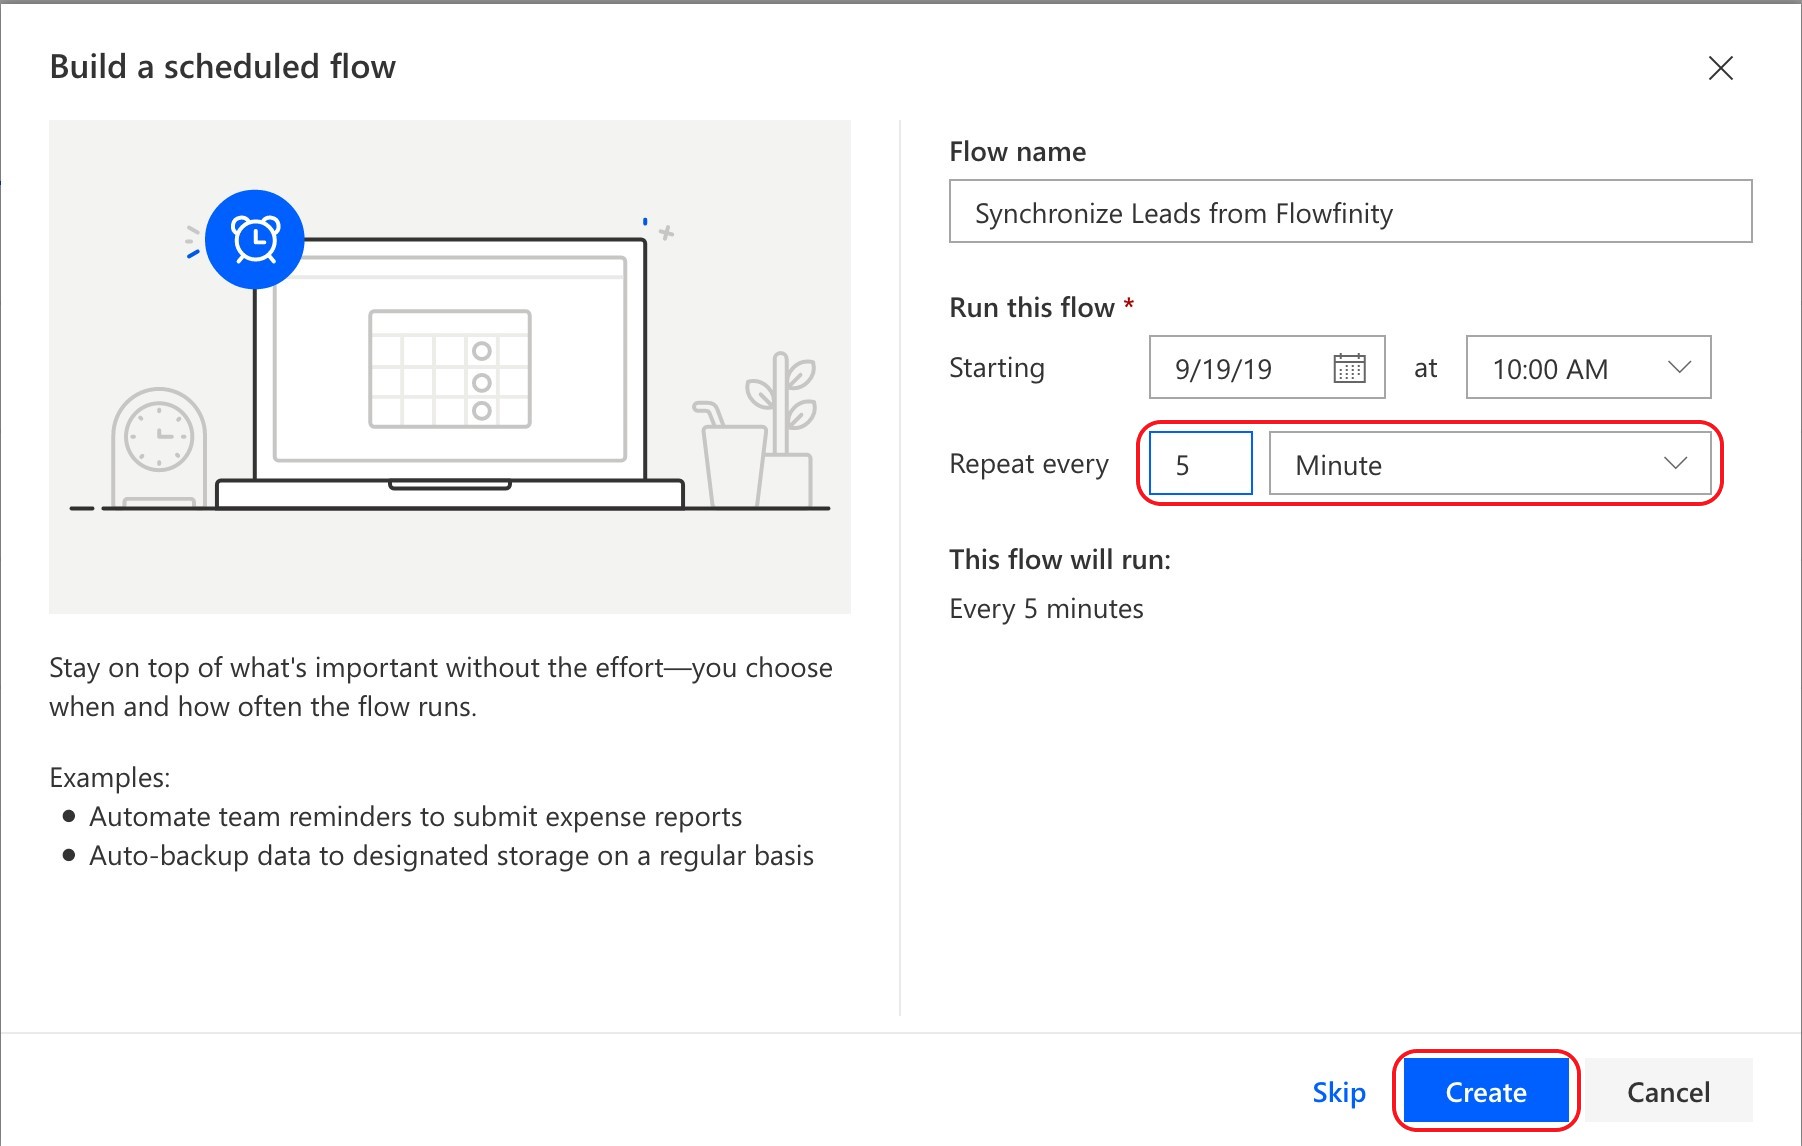
- A new 'Recurrence' type flow has been created, with a 5 minute interval frequency.
- Next, we need to configure the flow to connect with Flowfinity. This is accomplished by querying the 'SynchronizeRecords' View we created while setting the value for the parameter to the last saved value from the previous run.
As discussed the value for the parameter must be stored and read from a file in Azure (or another external persistent storage) instead of as a local variable stored within the flow.
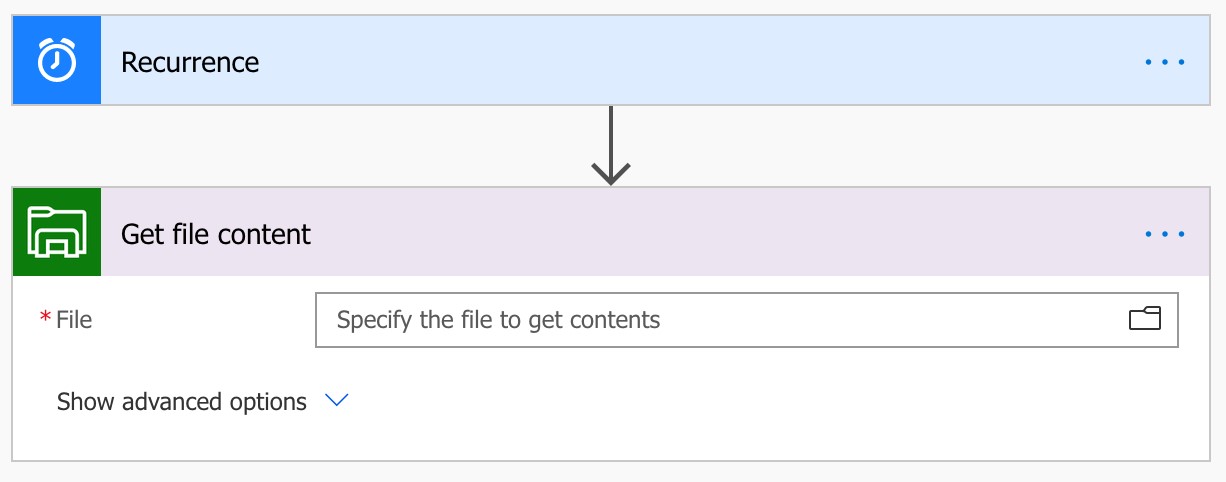
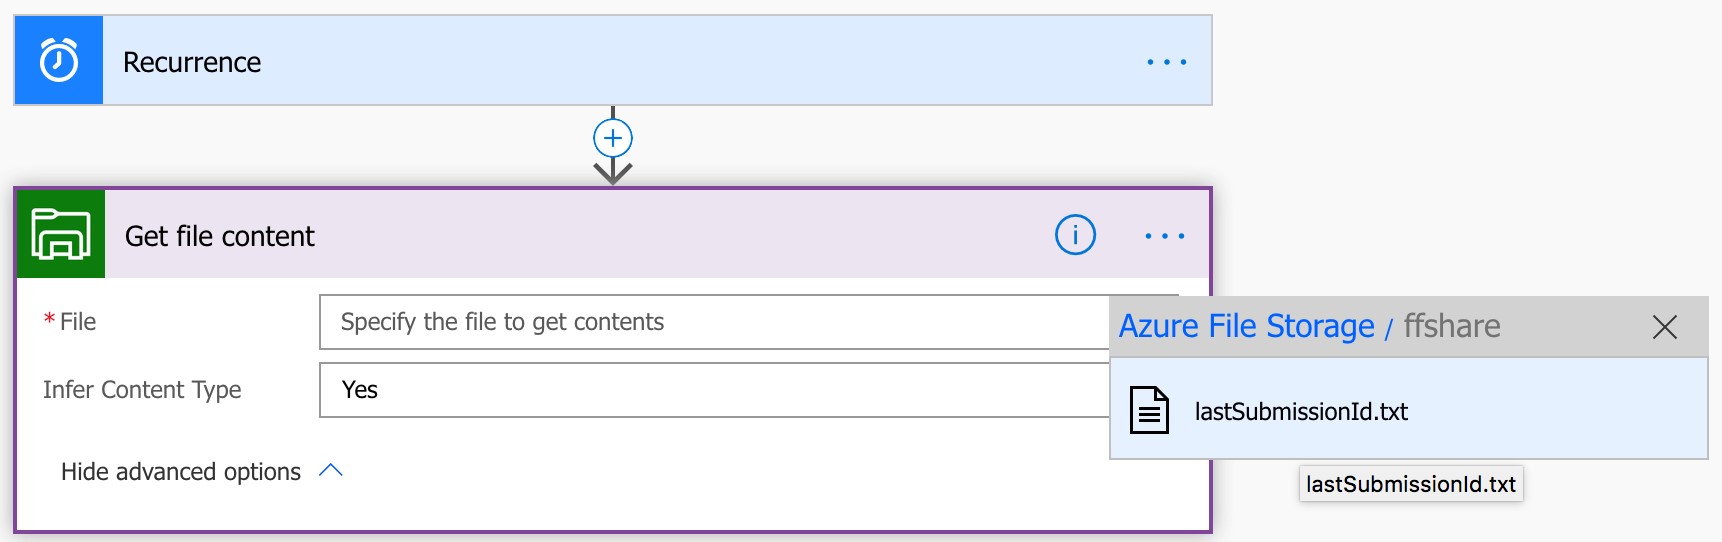
Add a 'New step' to 'Get file content' from Azure.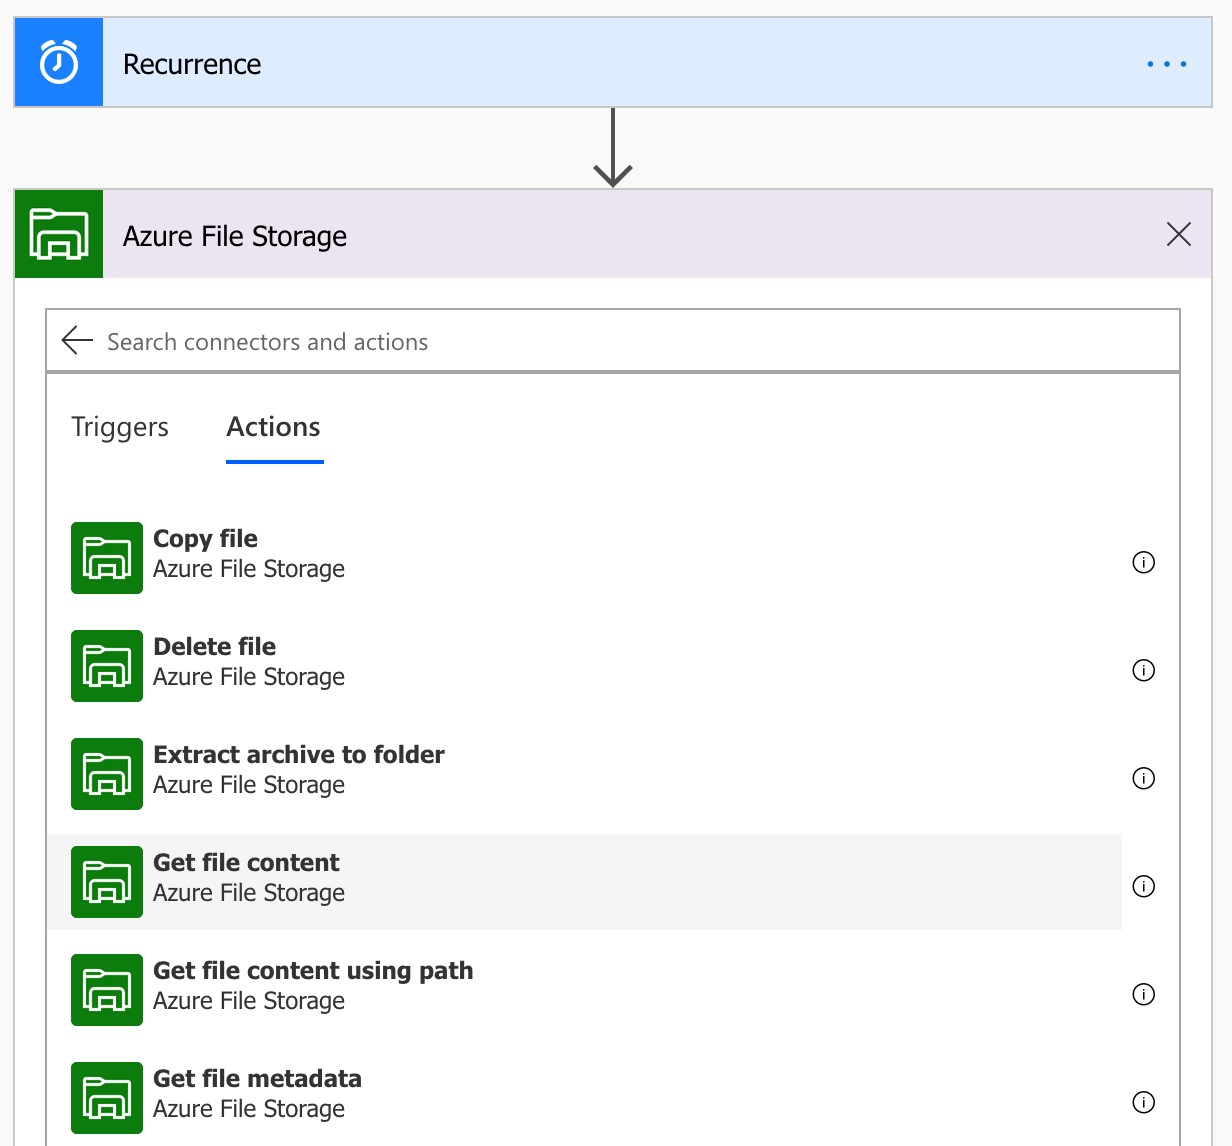
- Next, we need to tell the step which files to read.
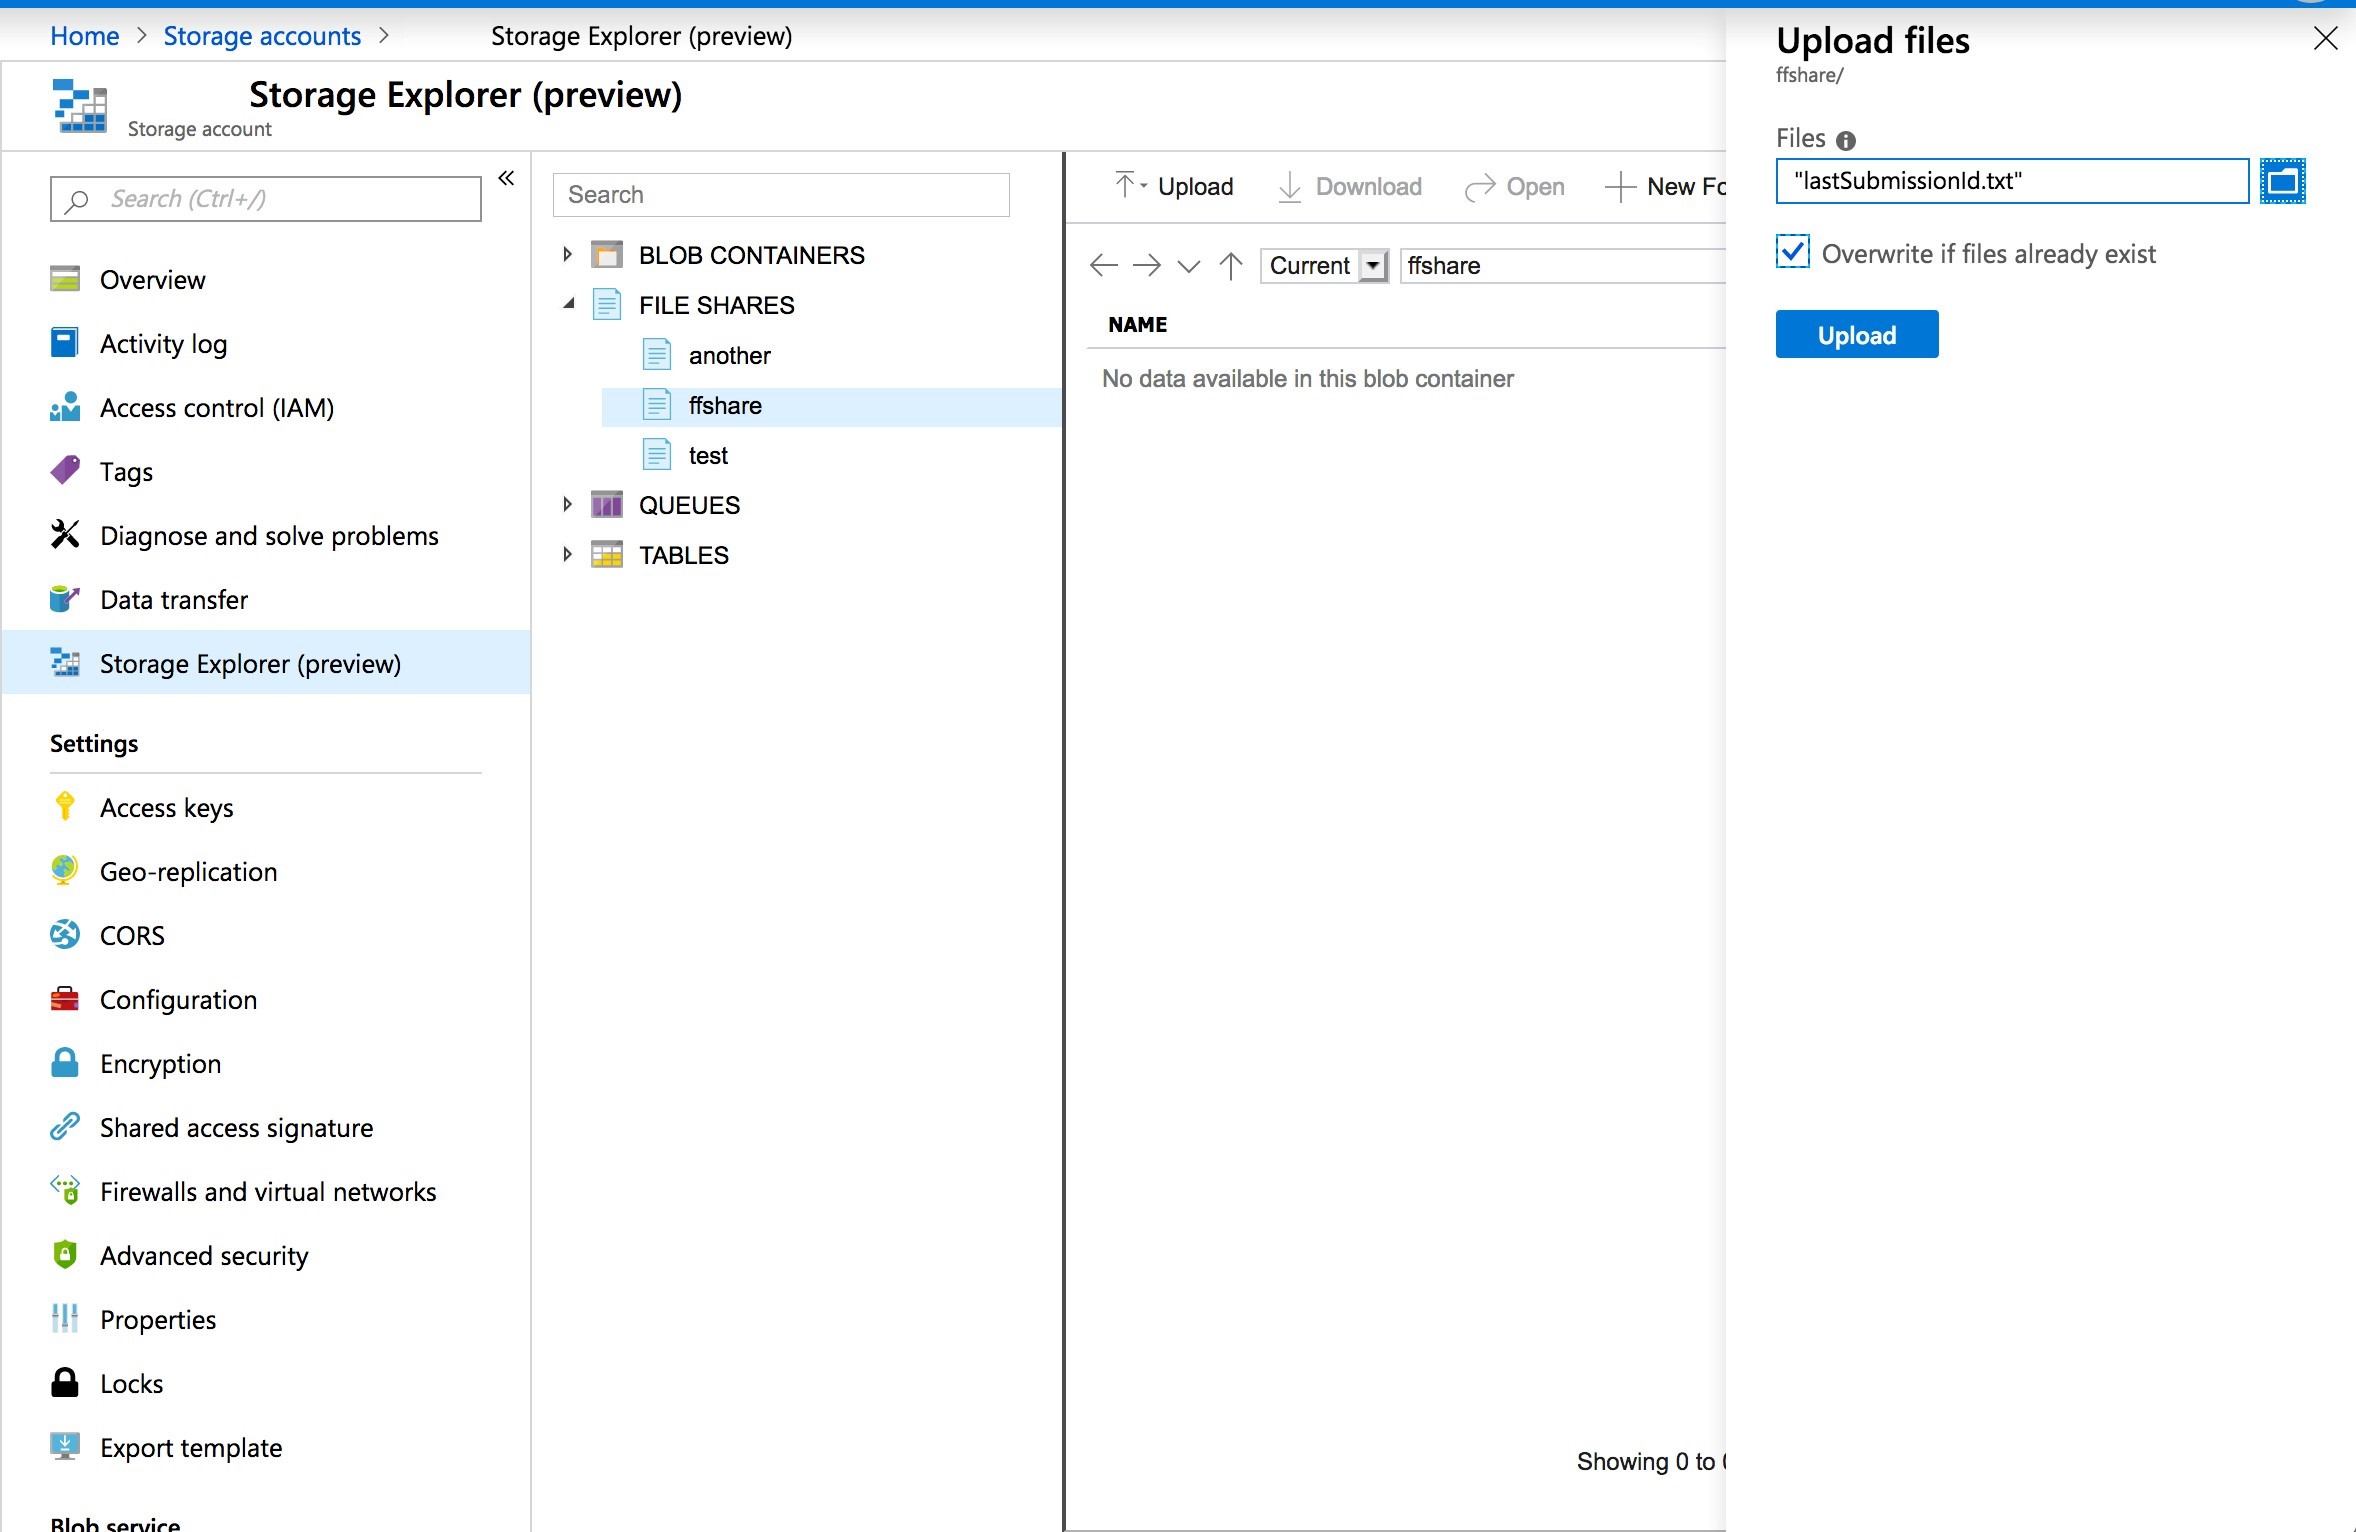
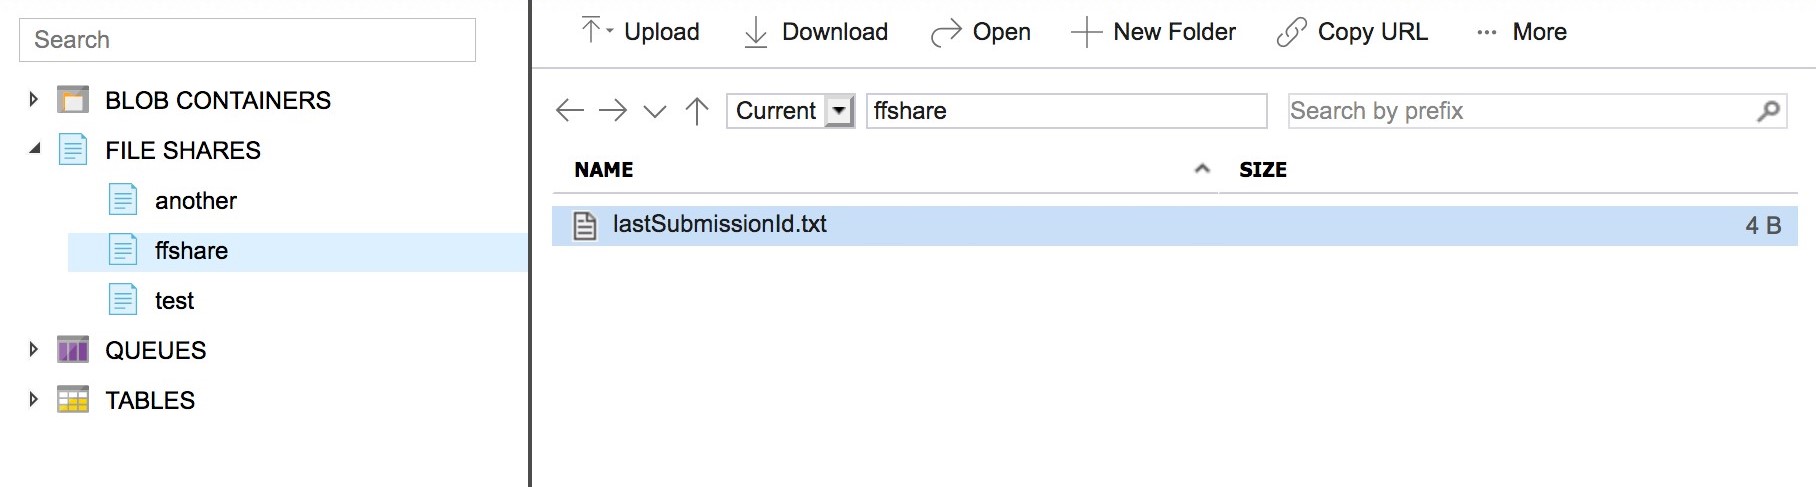
- Since a file should already be present for the above step to work, you now need to prepare an empty file and upload it to your desired Azure File share. To do this, create an empty TXT file using any desired text editor and name it 'lastSubmissionId.txt.'
Next, log in to your Azure web access and upload the file to the file share that you would like to use:
- Now you need to configure the flow block to access the shared file by specifying the 'Storage Account Name' and 'Key', then selecting the desired file.
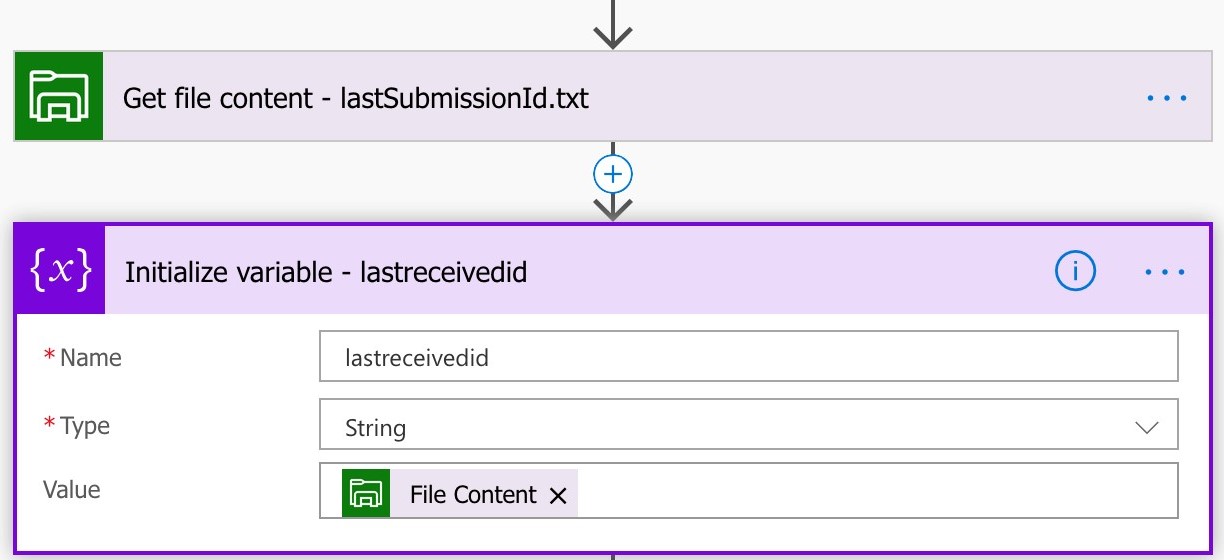
- Add a new block to the flow to store the read value into a local variable that can then be passed as a parameter to the query to the Flowfinity view. Name the variable 'lastreceivedid.'
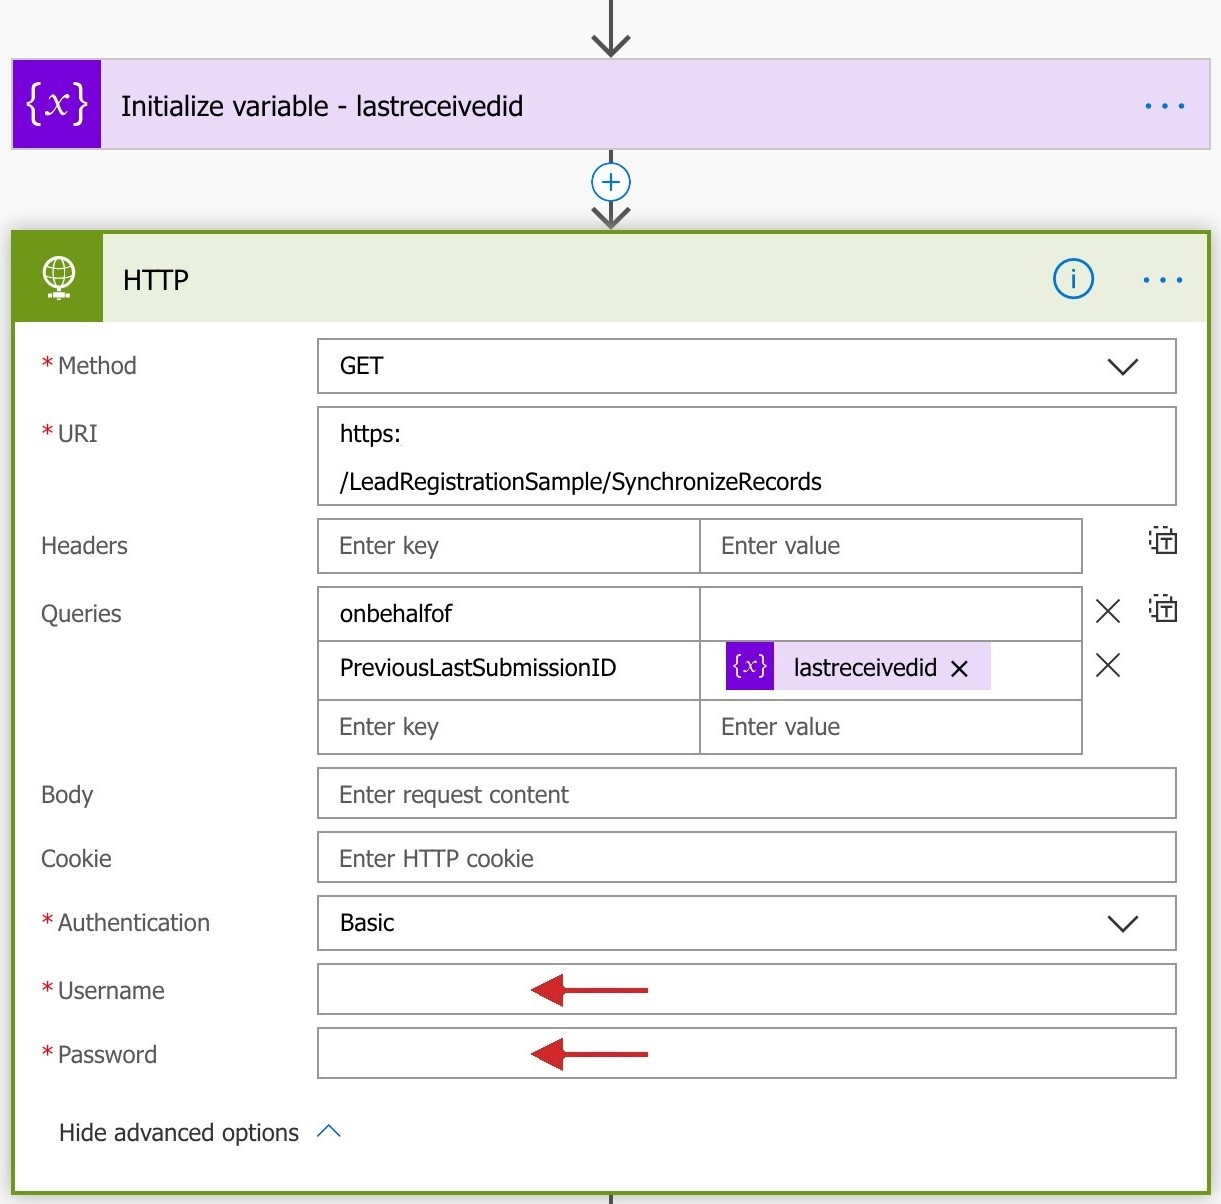
- Now we are ready to call the Flowfinity view. Add an HTTP request flow block and configure its parameters as follows:
1. Method: 'GET'
2. URL: Copy the value from the 'Details' section of the desired view listed in Configure > Integration tab of the Flowfinity app.In the query you need to specify two parameters: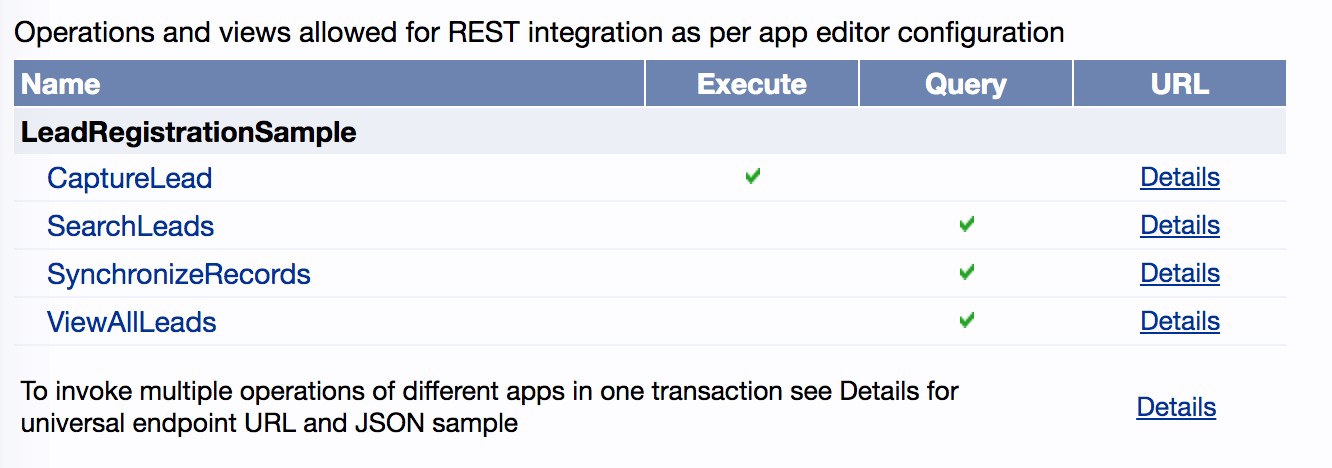
a) 'onbehalfof' containing the user account name in the system which will be used for permission validation.
b) 'previouslastsubmissionid' which is the view parameter configured in the View editor and which must be set to 'lastreceivedid.'
4. Specify the authentication scheme and user/password. For the scheme use 'Basic' and for the user you may use any of the Integration account users listed in the Configure > Integration tabThe resulting configuration should look like this:
- Once the request is received it returns records in JSON format. To have access to the records and their properties in the flow we need to first parse JSON into record objects.
Add a 'ParseJSON' flow block to the HTTP request and set the 'Content' to 'Body.' Enter the JSON schema that can be copied from the 'Details' section of the Configure tab > Integration tab in the 'SynchronizeRecords' view in Flowfinity. (See 'Step 1: Enabling REST API surface configuration' at the top of this document).
- Once the records are parsed we need to process each record to obtain the 'lastSubmissionId' for the last record and when the request is processed save the value back to the Azure file.
Note: In this tutorial, we chose to first retrieve the last record's 'lastSubmissionId' and then send the remaining values for processing. If you prefer you can reverse these two steps if you want the final step of saving to be the last in the flow. - Add another 'Initialize variable' block which uses the last() function to obtain the last record's 'lastSubmissionId' and saves it into a variable named 'maxsubmissionid.' You will need to use the expression section of the helper dialog to specify the value of the following expression:
last(body('ParsedRecords'))?['lastSubmissionId']
Note that the 'ParsedRecords' is the name assigned to the previous flow block (where we parse JSON content) and may differ from the name that you used in the flow.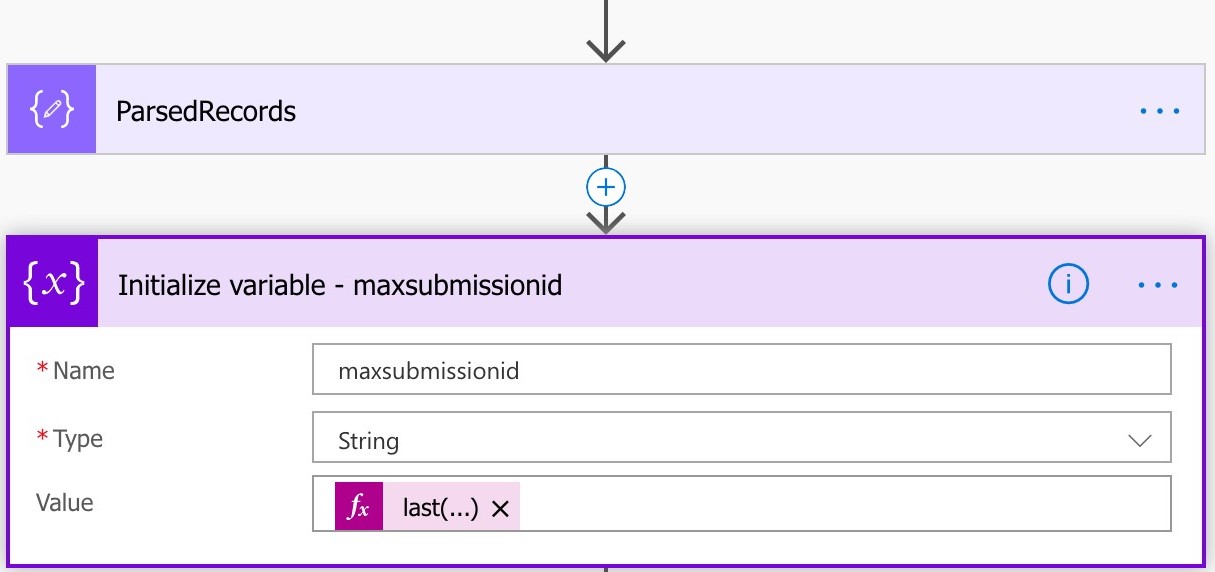
- Now add an 'Apply to each' step which will execute an action for each of the records in the resulting record array. In the output of the previous step, you should select 'Body' of the 'ParsedRecords' step (not the original Body of returned from HTTP request).
In this tutorial, we have chosen to just send an email notification as a demonstration of an action that will be done for each record. In an actual production flow, you need to insert one or more blocks here that will save the record data into an external system.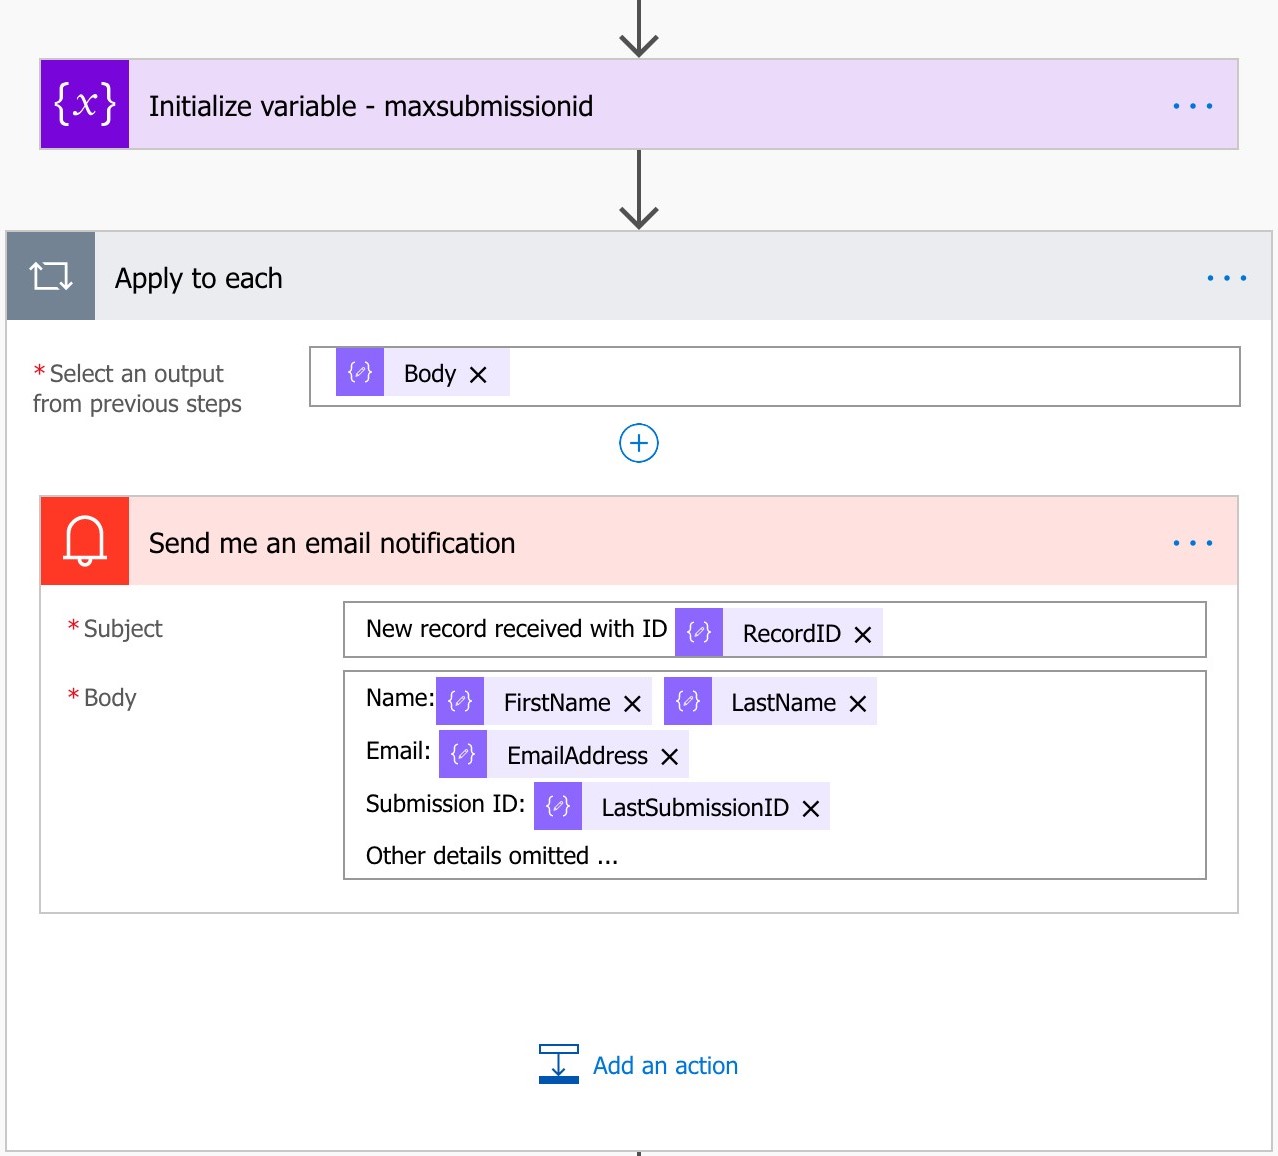
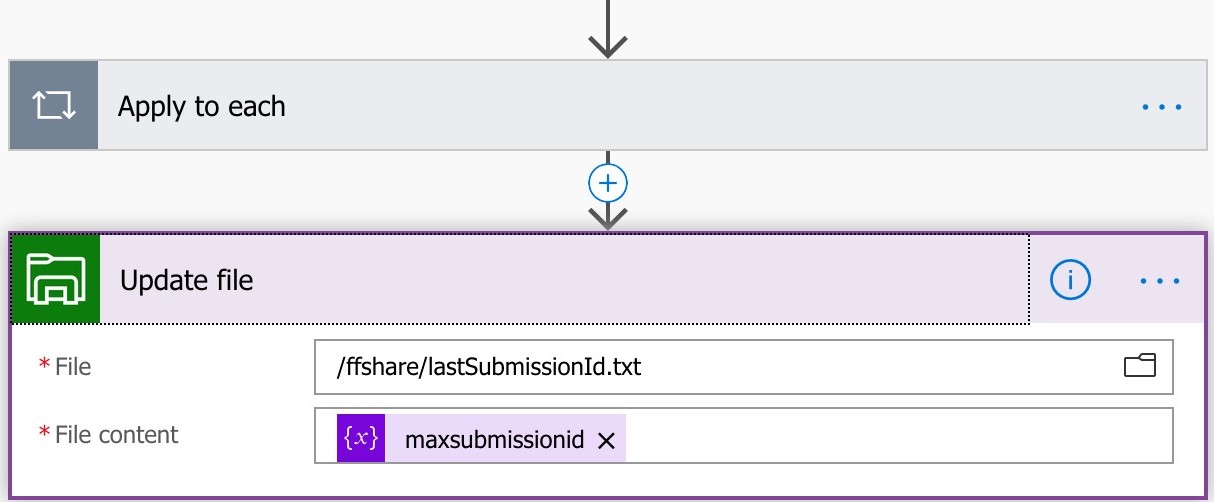
- Finally, we add one last step which will be executed after the 'Apply to each' loop which will save the 'maxsubmissionid' variable value into a file in Azure file share. This way when the flow runs next the value read from the file will cause the view to return only new records (if any).


Step 4: Test the configuration
Now you are ready to save and run the flow. Here is an example of the successful run of the flow for one of the successive runs which has returned a couple of records.

Special considerations when saving records received from Flowfinity Actions
Each record that you receive from Flowfinity Actions has two unique identifiers: 'RecordID' and 'lastSubmissionId.'
Analyze the values of both of those IDs when saving the records to an external system to avoid creating duplicate records or updates to ensure data integrity.
For example, let's assume that the flow received 3 records from Flowfinity with 'RecordID' 1,2 and 3 and 'lastSubissionId' 12345, 12346 and 12347 respectively.
If the connection between the flow and the external system was interrupted when records with Ids 12345 and 12346 were already saved but before 12347 was saved; the flow is designed to stop execution with an error and not save the 'lastsubmissionid' value back to file.
So, when the flow runs again, the same 3 records will be returned. Unless the external system knows that the changes with 'lastSubmissionId' of 12345, 12346 are already there it will attempt to save (or create) he records again which may result in a potential override of the already changed data or even creating duplicates.
A simple check for the last synchronized 'lastSubmissionId' for the record will ensure that the records that were previously updated can be skipped avoiding any duplicates or data overwrites.