Submit records to Flowfinity using Power Automate (formerly Microsoft Flow)
Flowfinity provides the ability to integrate with external systems by enabling access to views in apps via Representational State Transfer (REST) Application Programming Interface (API) services. When access is enabled, programmers can use an HTTPS request/response-based REST API model to query view data in Flowfinity.
This article outlines how to configure submitting records to a Flowfinity app from Power Automate (Microsoft Flow) and also describes special considerations that will help improve data reliability.
This tutorial uses a demo Lead Registration app as an example. To follow along you may download and import an FTF file of the Lead Registration app to your Flowfinity site.
Introduction
When implementing a system that uses REST API services for performing updates, consider that REST HTTPS based architecture is non-transactional by design and can potentially be prone to losing data due to the nature of Hypertext Transfer Protocol Secure (HTTPS).
Flowfinity includes several built-in features that allow for reliable updates from external tools (e.g. Power Automate) while avoiding data duplication errors.
Flowfinity can stamp each record with a unique and persistent ID 'ExternalTransactionId', which is used to identify a submission and avoid the creation of duplicate records.
If a request is received with a transaction ID that has already been processed successfully Flowfinity will skip the request and return the HTTP success response of 200. All record and system fields will be returned as they were created or updated in the initial successful operation submission.
In addition to preventing duplicate records, further steps should be taken to avoid losing records in Power Automate before they are submitted to Flowfinity.
A common way to retransmit failed submissions in Power Automate is to set the 'Do until' function to run until the HTTP status code equals 200, indicating a successful return. Alternatively, you may achieve similar results without using the 'Do until' flow block by configuring the HTTP element retransmission setting to attempt retransmissions before returning from the HTTP block.
If you plan to deploy this approach be aware that there is a 30 day time limit on how long an individual flow can run. If using 'Do until' it will execute only up to 5000 times and the maximum number of retries for an HTTP element is 90. As soon as any of these limits are met, the respective element block ('Do until' or HTTP) will exit even if there is no successful response received and the flow will end.
If you need to ensure that data keeps retransmitting for longer than the limits imposed by Power Automate, and no records are discarded regardless of time passed or number of retries, you can design a flow that keeps records due to be synchronized in a separate, persistent queue or database table.
Flows can be configured to run on a schedule, querying the queue, then submitting or updating the records with results read from Flowfinity. If you chose this option you will still need to use 'ExternalTransactionId' logic to avoid duplicates, however this method avoids the time limit on flows and execution limits on the 'Do until' function.
Step 1: Enabling REST API surface configuration
Enable REST integration by assigning a dedicated integration user, providing access to app operations and creating a view in the App Editor by following these steps.
Once external integration is enabled the REST URL endpoint address for submitting operations to Flowfinity will be displayed in the Configure > Integration > REST Integration section. Click the Details link to see the JSON payload request and response which you will need to set up Power Automate.


Step 2: Overview of the Power Automate steps

To follow this tutorial, you will need to import the 'Lead Registration' app FTF file to your site. The app has already been enabled for REST access.
We will use the incoming email body specified in JSON format as the source of fields to submit to the 'Capture Lead' operation, instead of the data retrieved from an external system.
The flow will use HTTP to make a request and receive a response from Flowfinity. To handle potential HTTP errors we analyze the HTTP status code and conditionally retry submission attempts in a 'Do until' loop after 10 minutes, with all failed attempts (not equal to '200') generating an error alert email to the user.

Step 3: Configure a Power Automate workflow
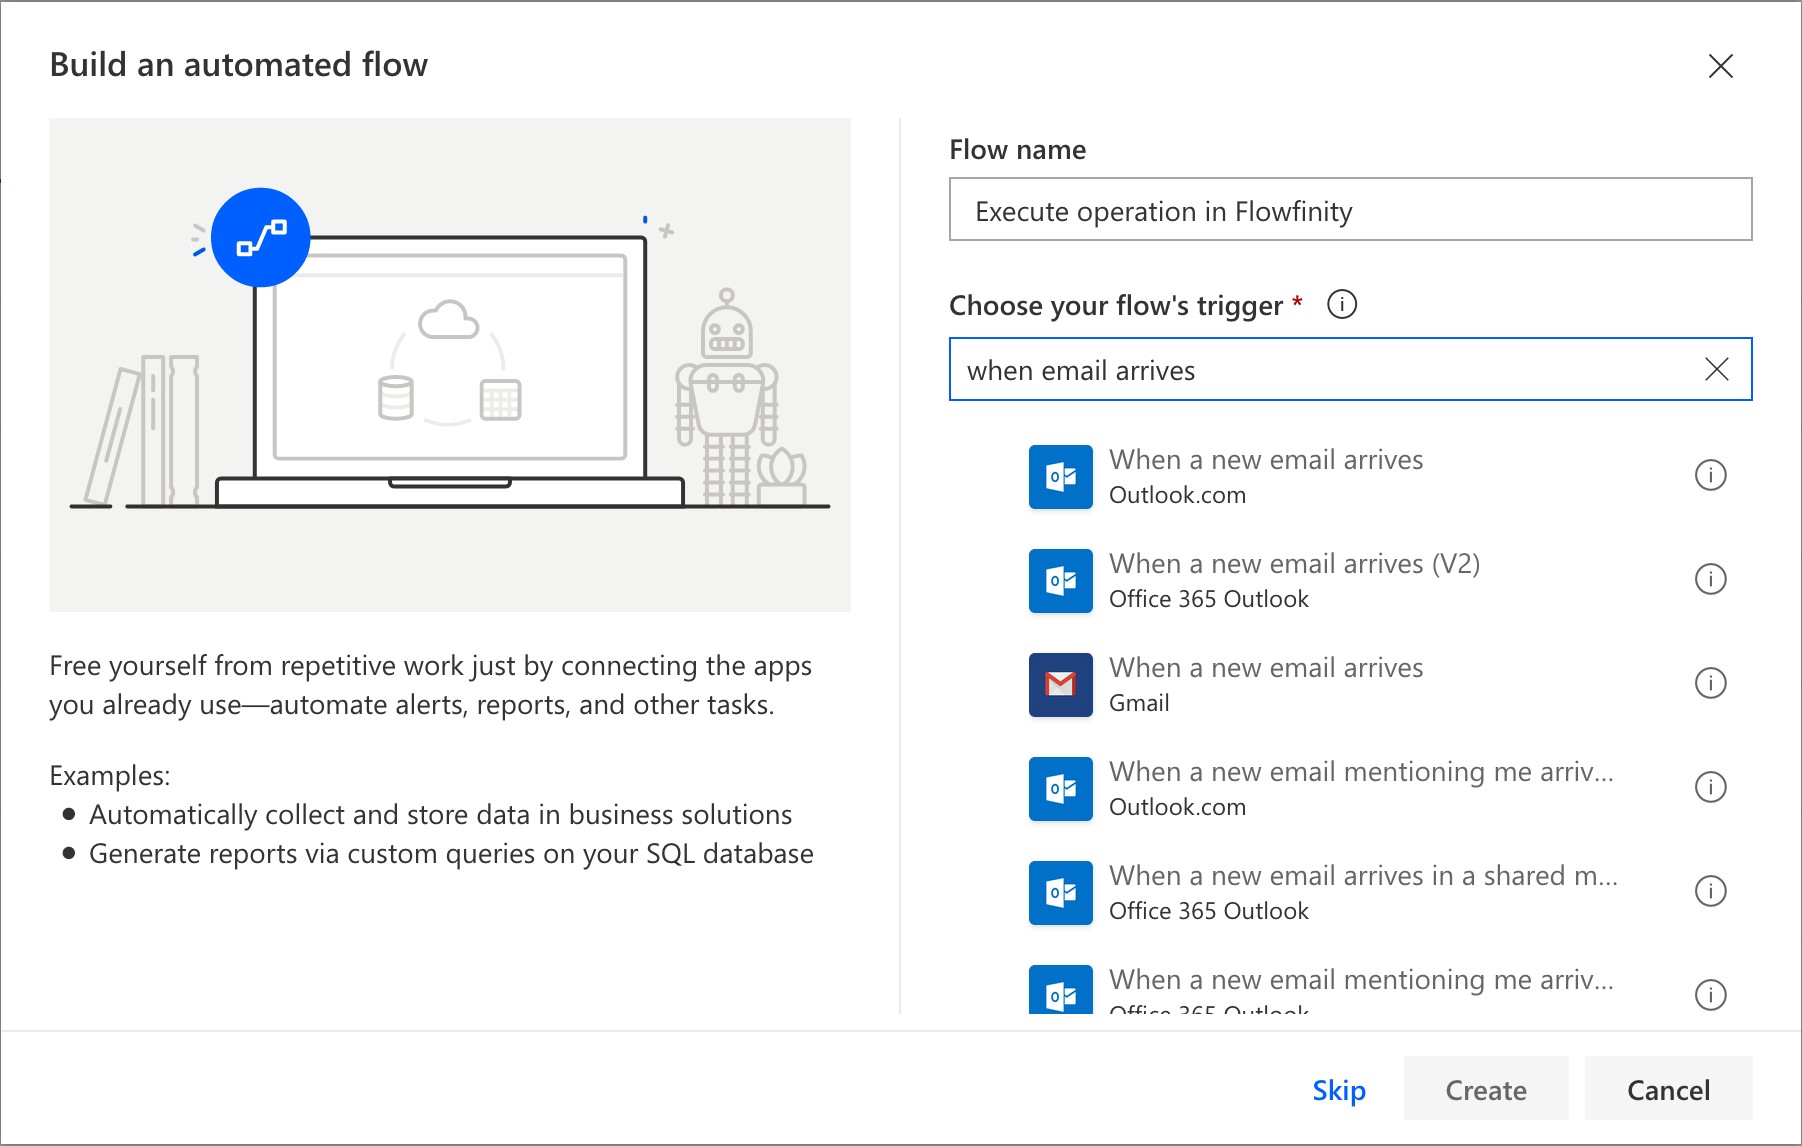
- Start by creating a new Flow. Click 'New' and then select 'Automated – from blank' from the dropdown menu.

- Name the flow and select 'When a new email arrives' as the trigger.
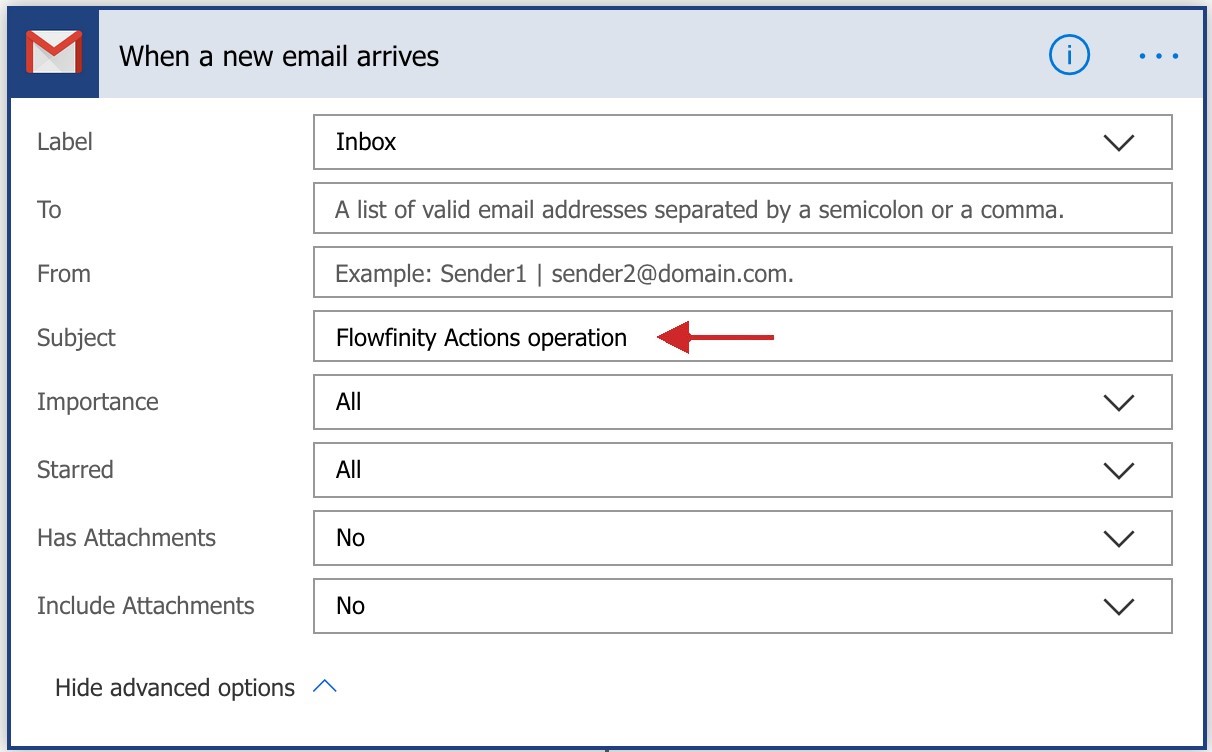
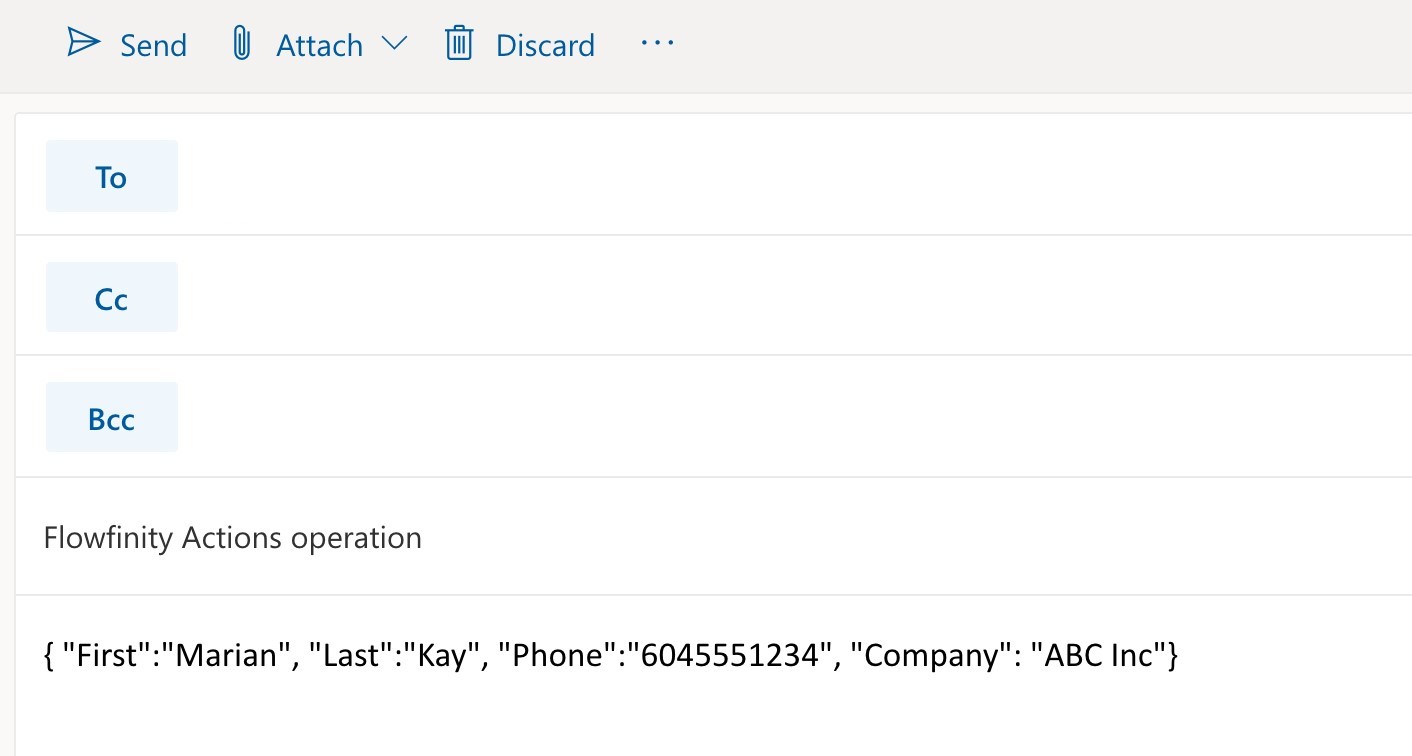
- Configure the rules by which an email triggers the flow, which in turn executes an operation in Flowfinity. For this tutorial, enter 'Flowfinity Actions operation' in the subject line field.
- As the body of the email is in JSON format it needs to be parsed before the flow can proceed.
Add the 'Parse JSON' step and configure it with the following schema. For demonstration purposes we will use a simple JSON of 4 values:
'First'
'Last'
'Phone'
'Company'
Click the 'Use sample payload to generate schema' link to generate the schema from this sample JSON:
{'First':'John', 'Last':'Smith', 'Phone':'123456', 'Company':'Example Inc'}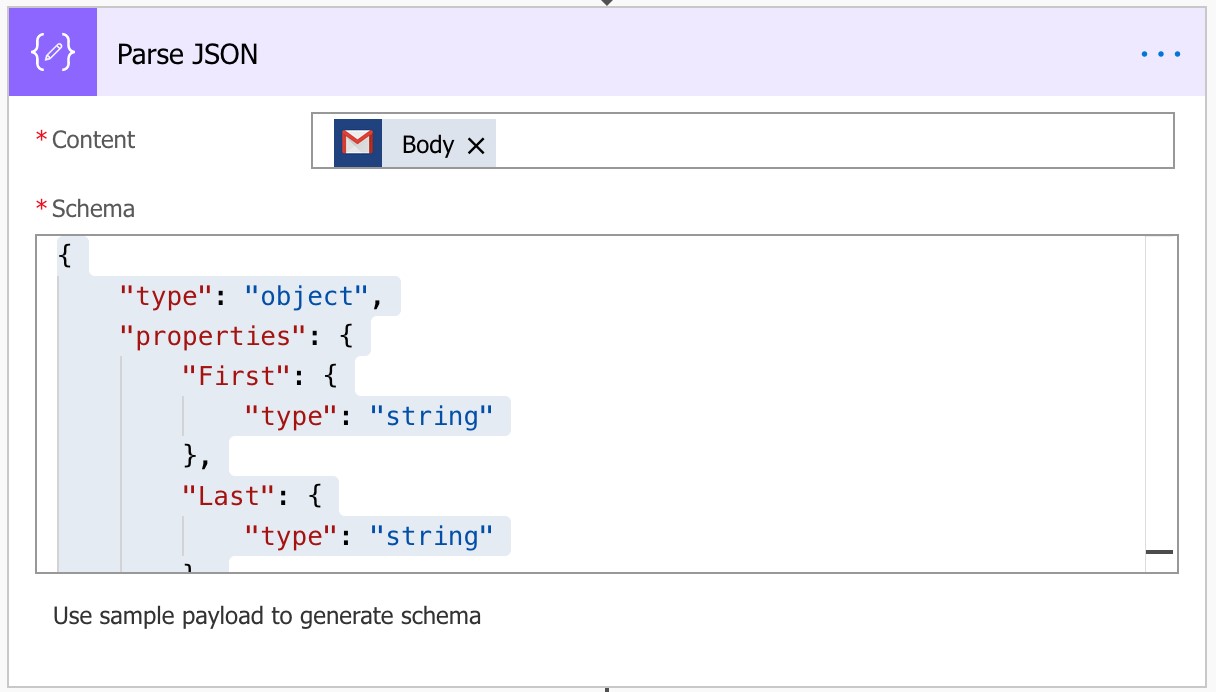
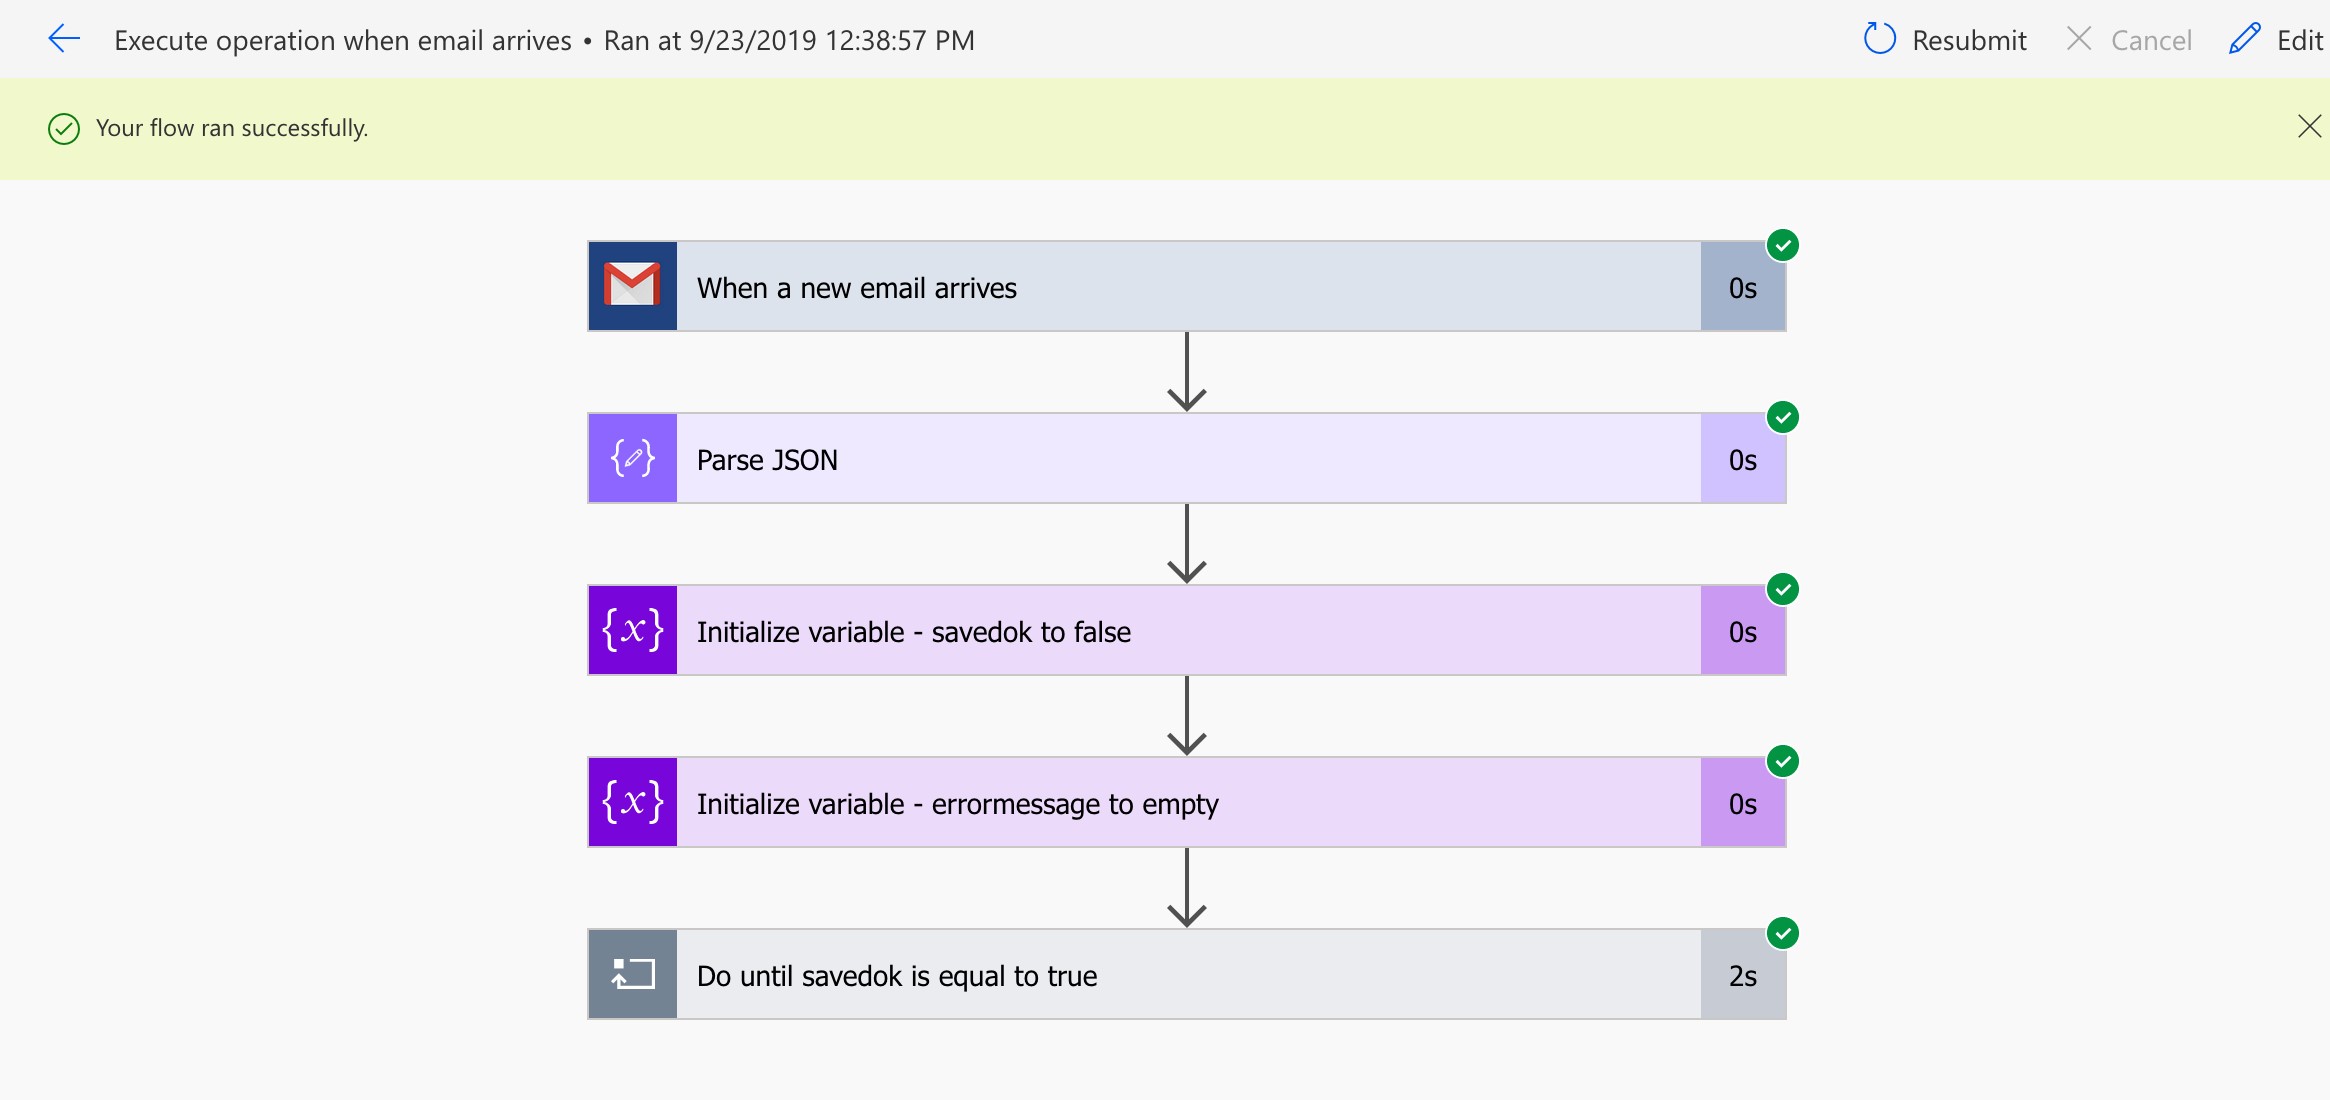
- The next step is to initialize two variables that will be used in the 'Do until' block. To start, add two 'Initialize variable' blocks to the flow.
First, name the variable 'savedok', choose Boolean from the dropdown type menu, and enter 'false' as the value.
Then, name the second variable 'errormessage' and select String from the dropdown type menu. Leave the value empty.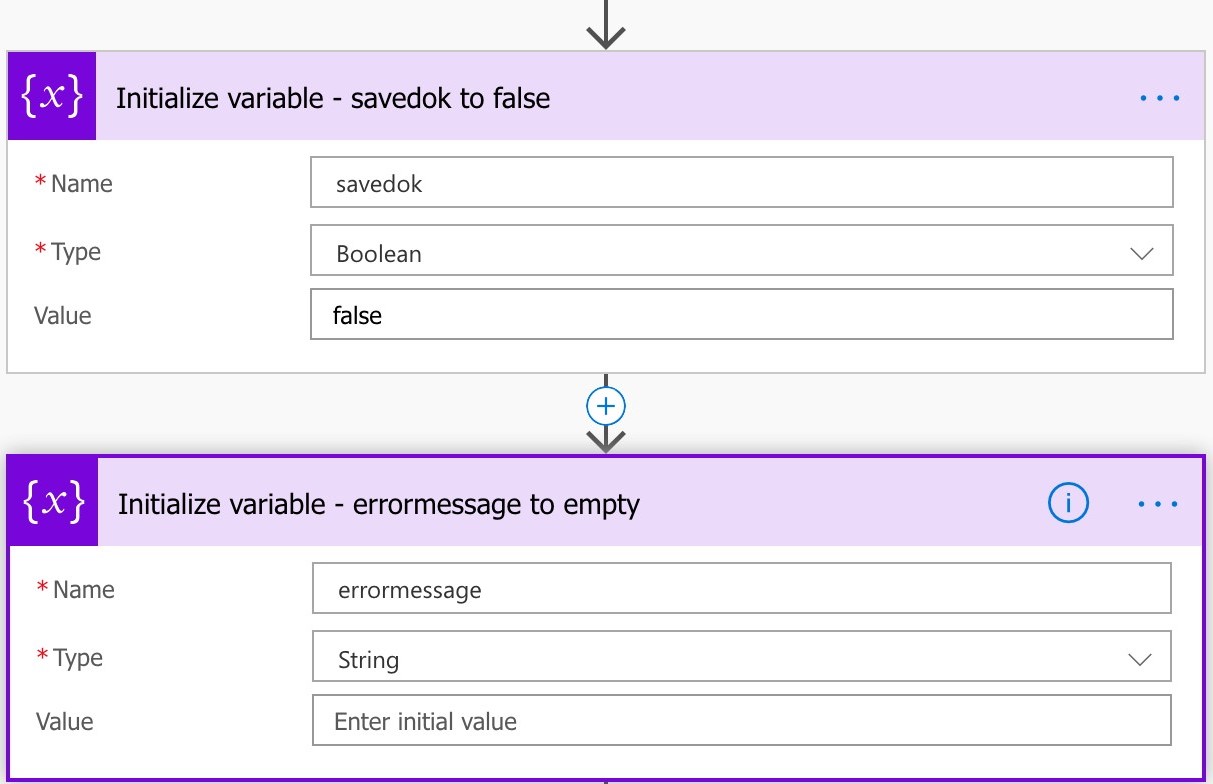
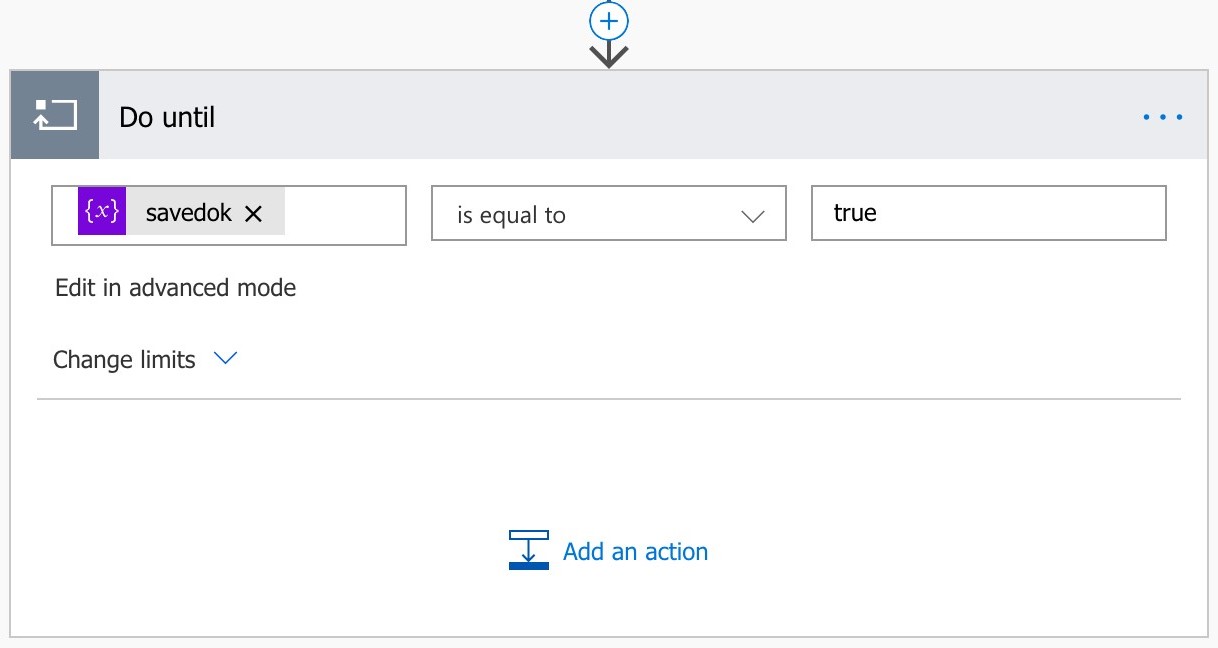
- Next, add a 'Do until' loop block and set configure the loop to run until 'savedok' becomes 'true.'
- The following steps should be added inside the 'Do until' block.
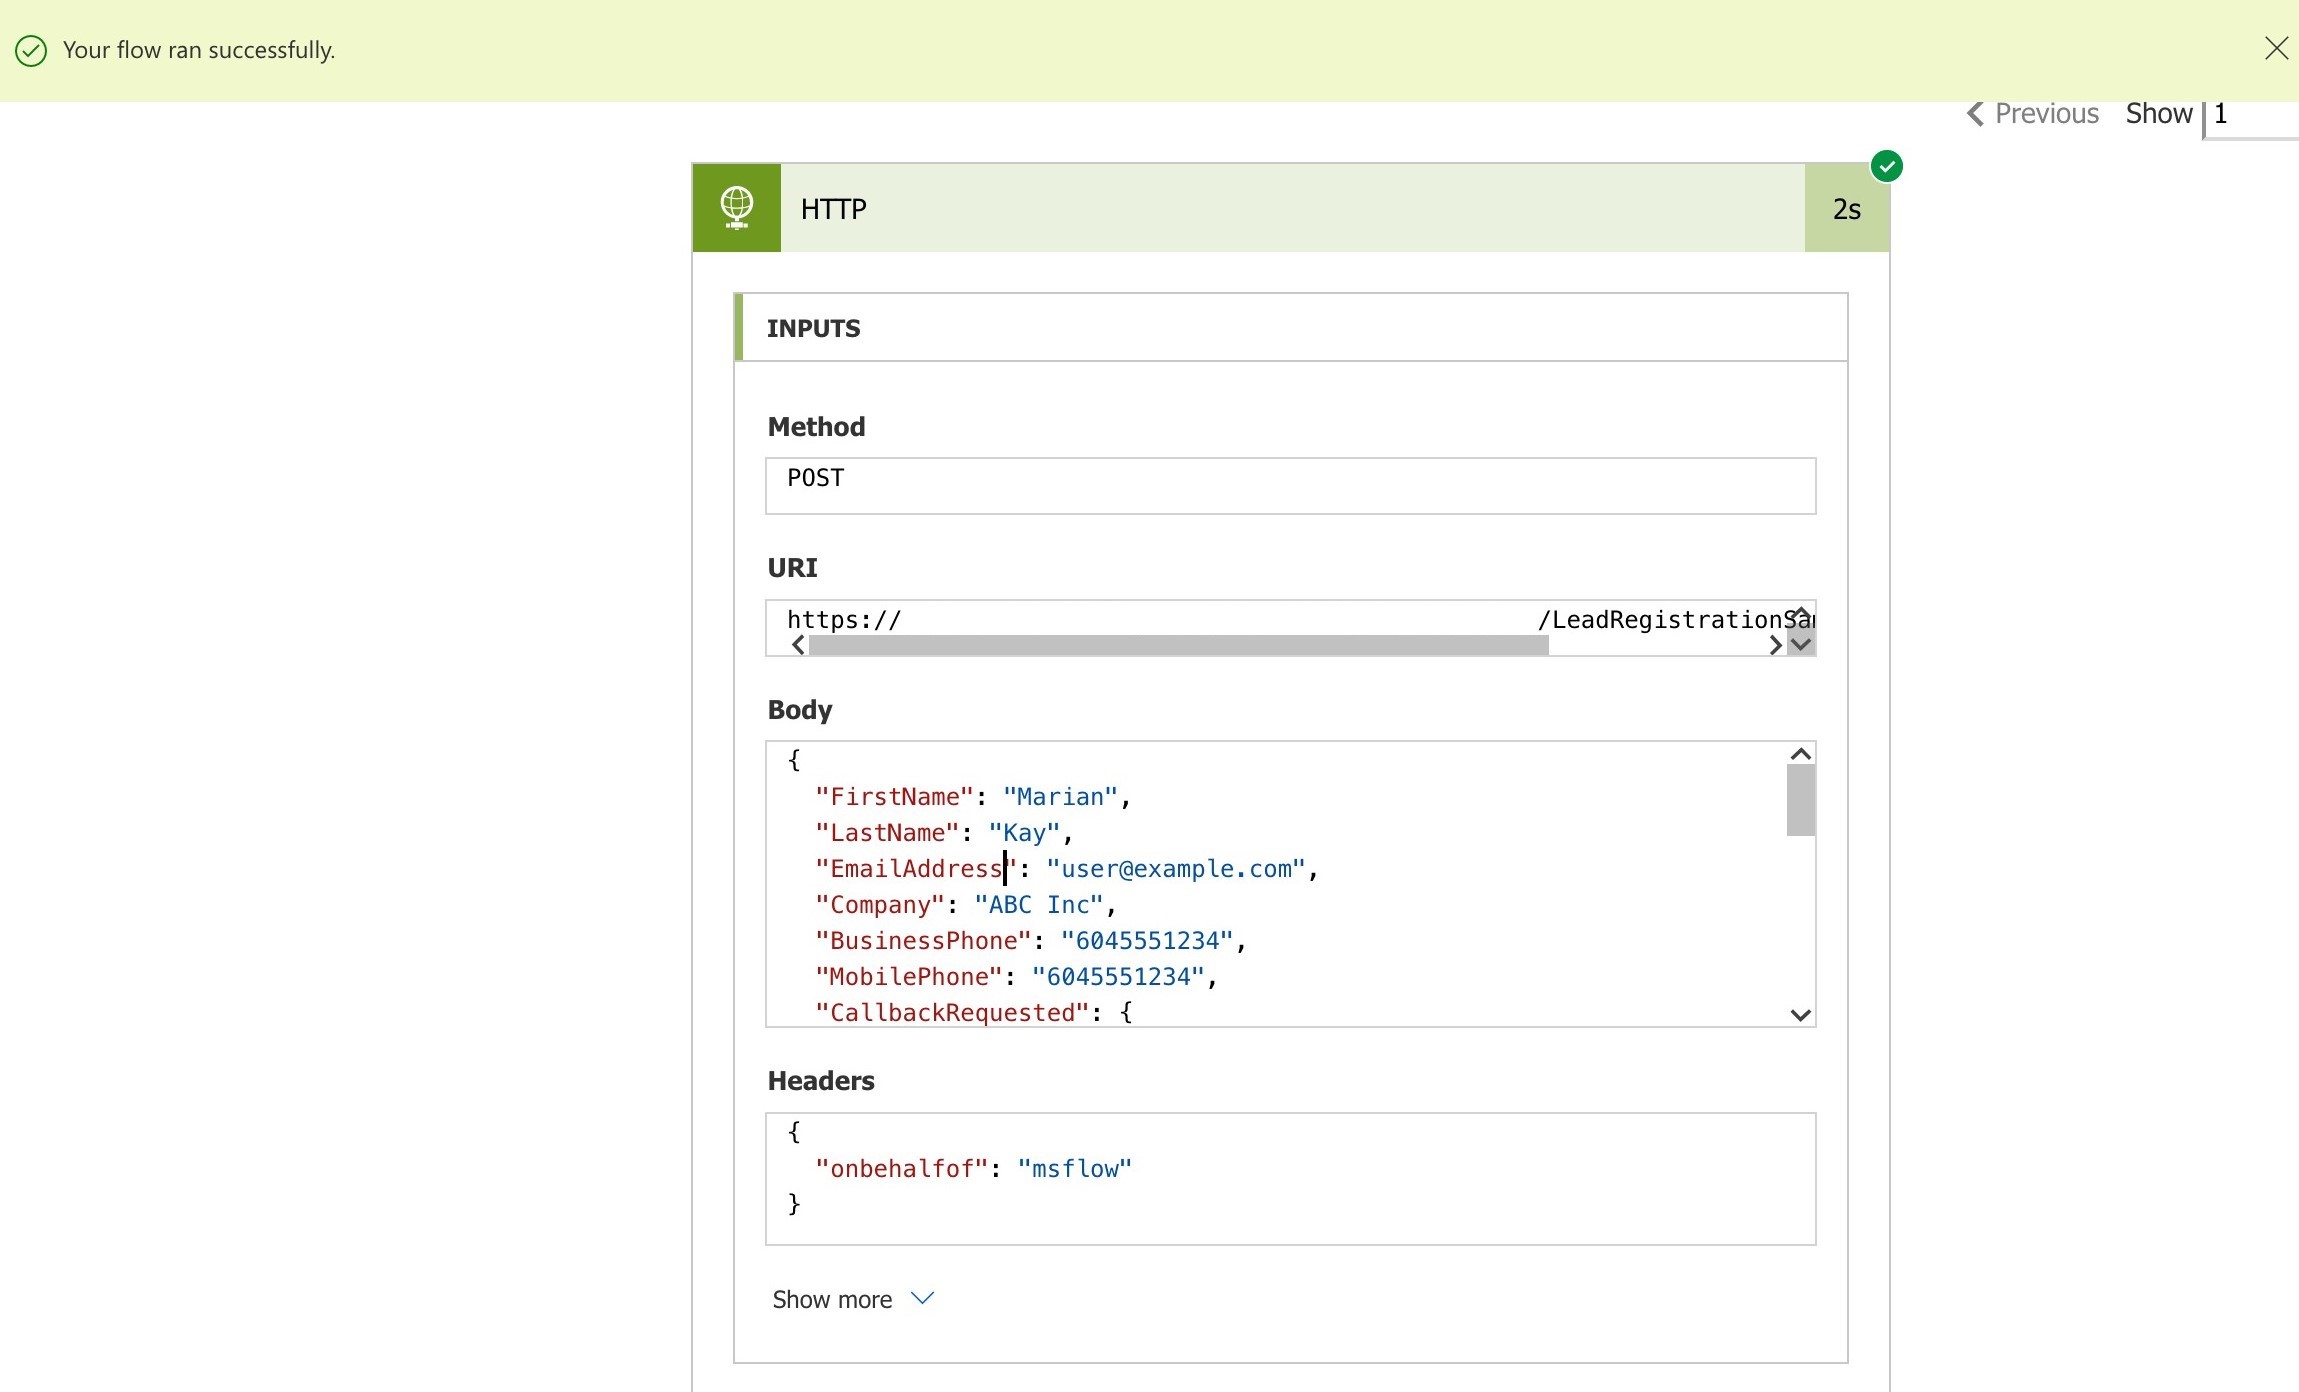
Add an HTTP element to the flow and configure the element to make a POST request, using the universal endpoint URL from Step 1 of this tutorial.
Next, complete the Header fields. Specify the fields as follows:
'onbehalfof'
'msflow'
To complete the Body field, copy the sample request JSON from Step 1 of this tutorial and enter this into the Body field. Replace the values for 'First', 'Last', 'Business Phone', and 'Company' with those parsed from the email body.
Set the 'First contact' field to 'Received Date-Time.'
We will reuse the unique email 'Message ID' for 'ExternalTransactionId' value. Leave all other fields with the sample values or provide alternative texts or values as desired.
When complete, the HTTP step should look like this: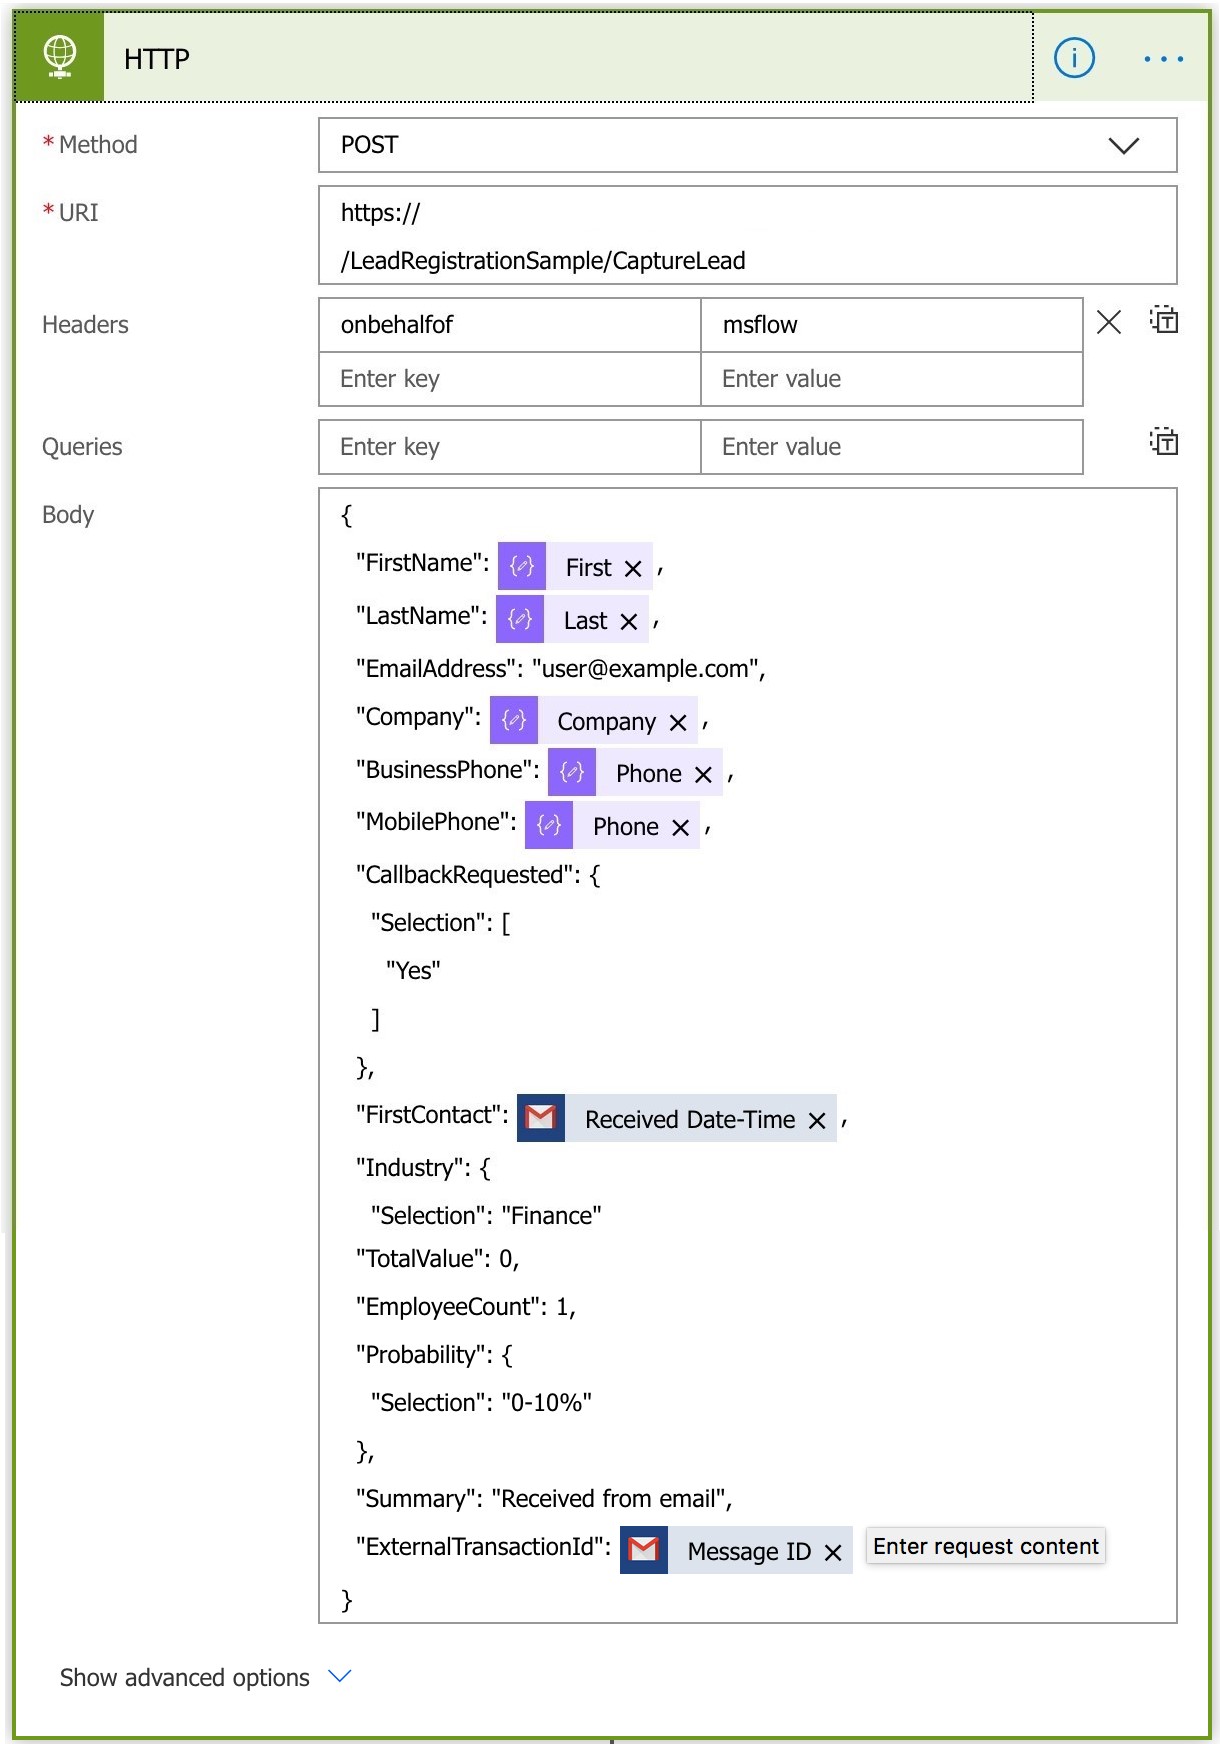
- Once the HTTP request executes, it's necessary to read the status code and branch logic depending on the result. Add a Condition element and configure it as follows:
'Status code'
'is equal to'
'200'
- For the Condition element, it's necessary to provide conditions for both branches of logic.
- For the 'if yes' branch, assign the 'savedok' variable as 'true.' This will stop the 'Do until' loop and ensure the flow ends if this condition is met.
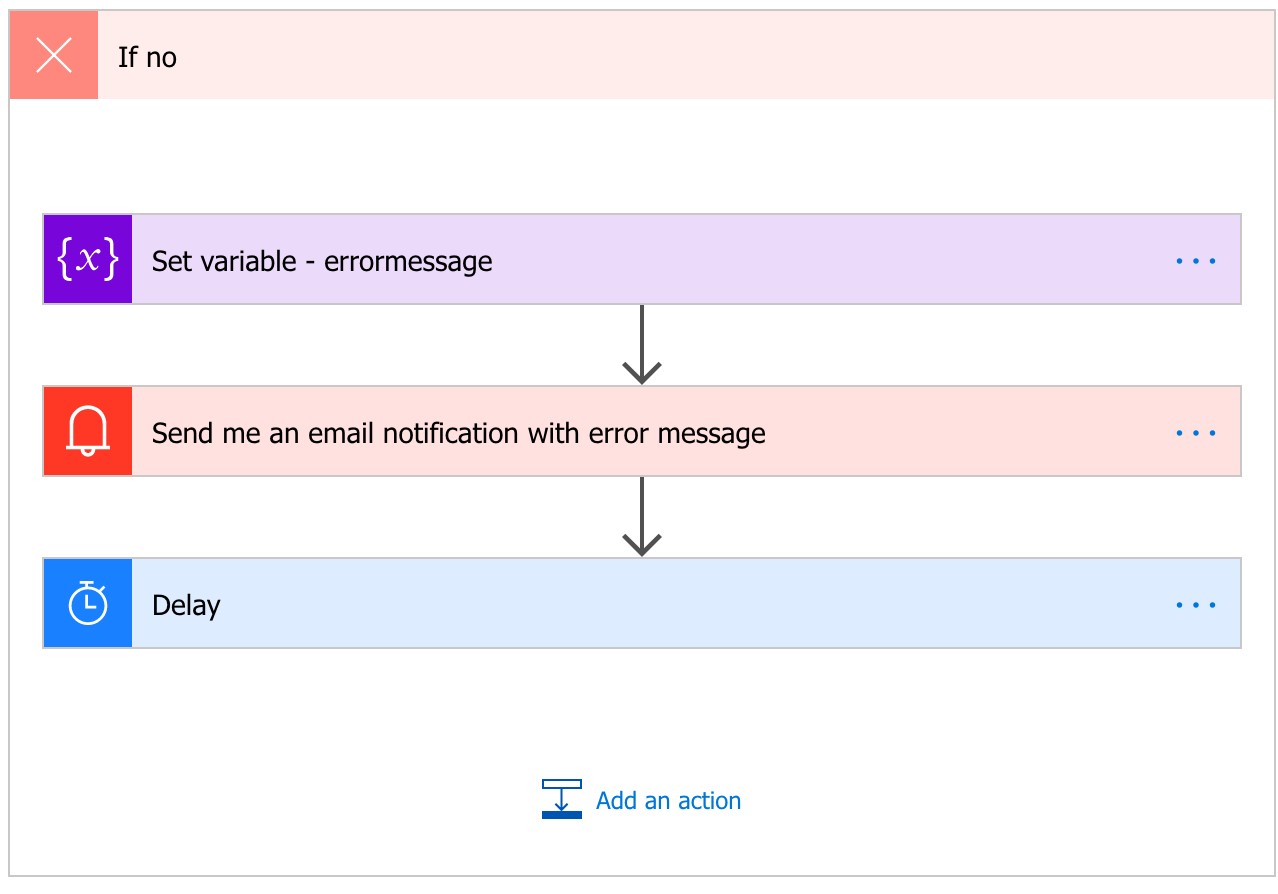
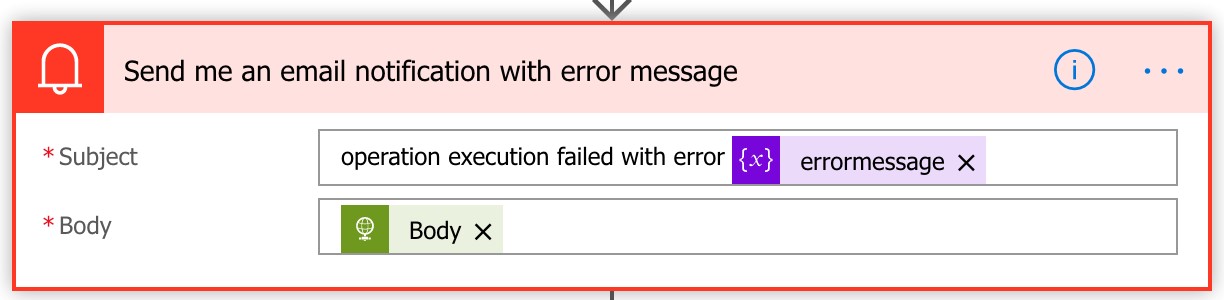
- For the 'If no' branch the logic will need to be more complex. The following steps will outline how to configure the 'if no' branch to retrieve an error message, send an email notification, and add a short delay before the next attempt to complete the flow.
- In the 'Set variable' block use the following expression to retrieve the header value as it is not available in the list of standard dynamic content fields:
outputs('HTTP')['headers']?['x-error-message']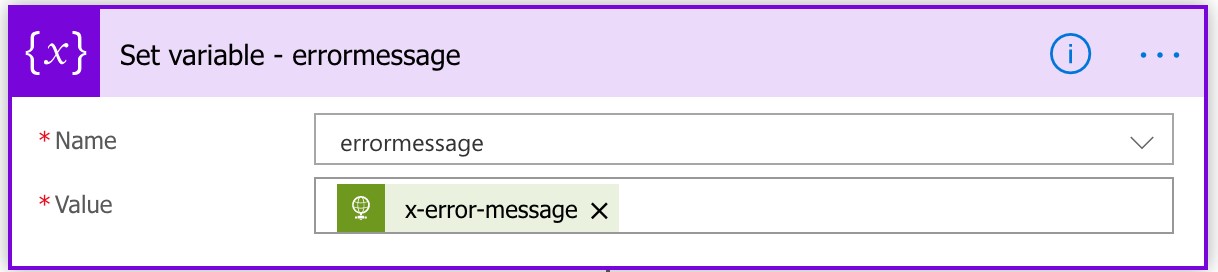
- Add an email notification element to the flow and configure as follows:
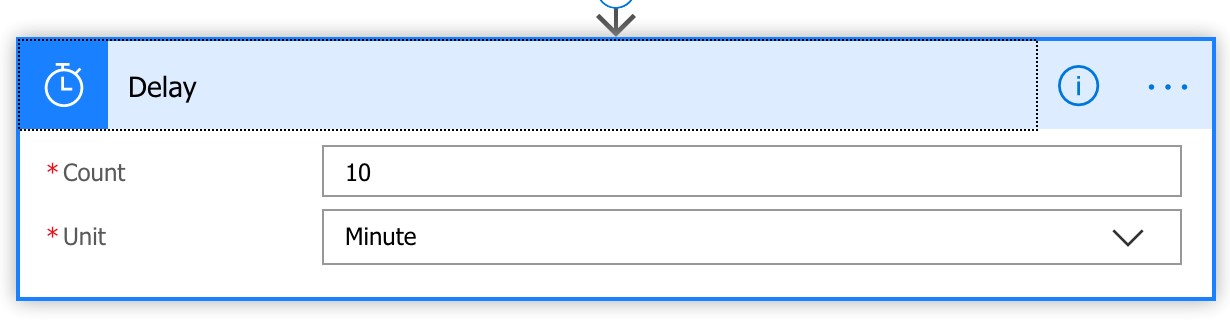
- Add Delay control element and configure a 10 minutes delay:
- The final step in creating the Flow is to configure the advanced properties of the 'Do until' loop. The time and count values should be set to the maximum values allowed by Power Automate: 5000 attempts to execute for the count and 720 hours for the timeout.
Configure the 'Do until savedok is equal to true' loop as follows: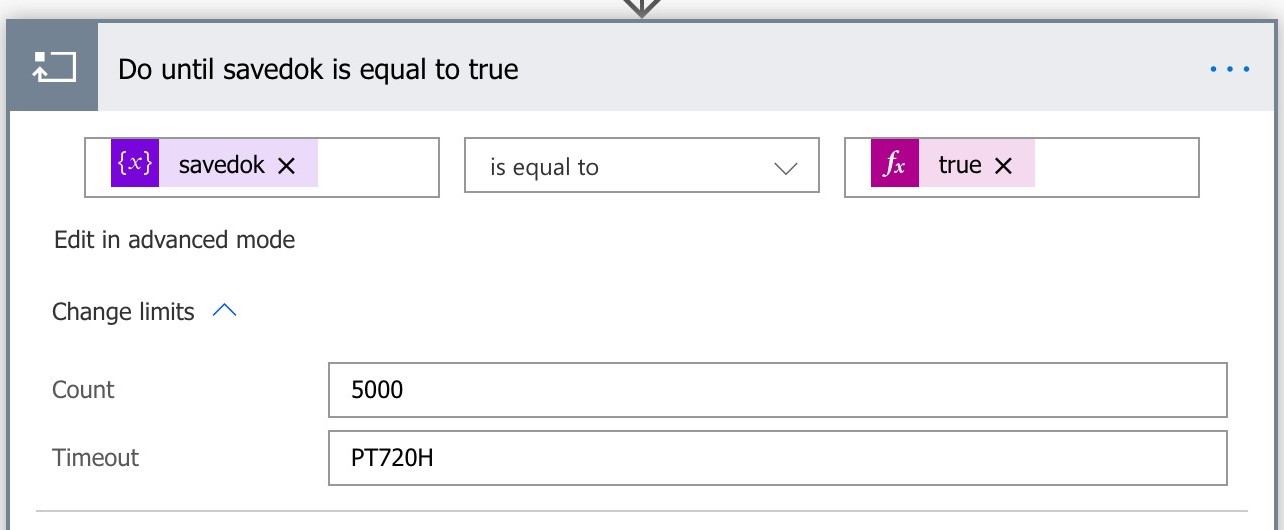
- You are ready to save and then test the workflow.


Step 4: Testing Power Automate workflow
- To test your workflow, send an email like the one below to the mail account configured in the mail connection in Power Automate.
- To check the workflow run status, go to the flow properties. You can review the actual data request and response exchanges.
- The screenshot below shows the actual JSON text that was sent to the Flowfinity CaptureLead endpoint.
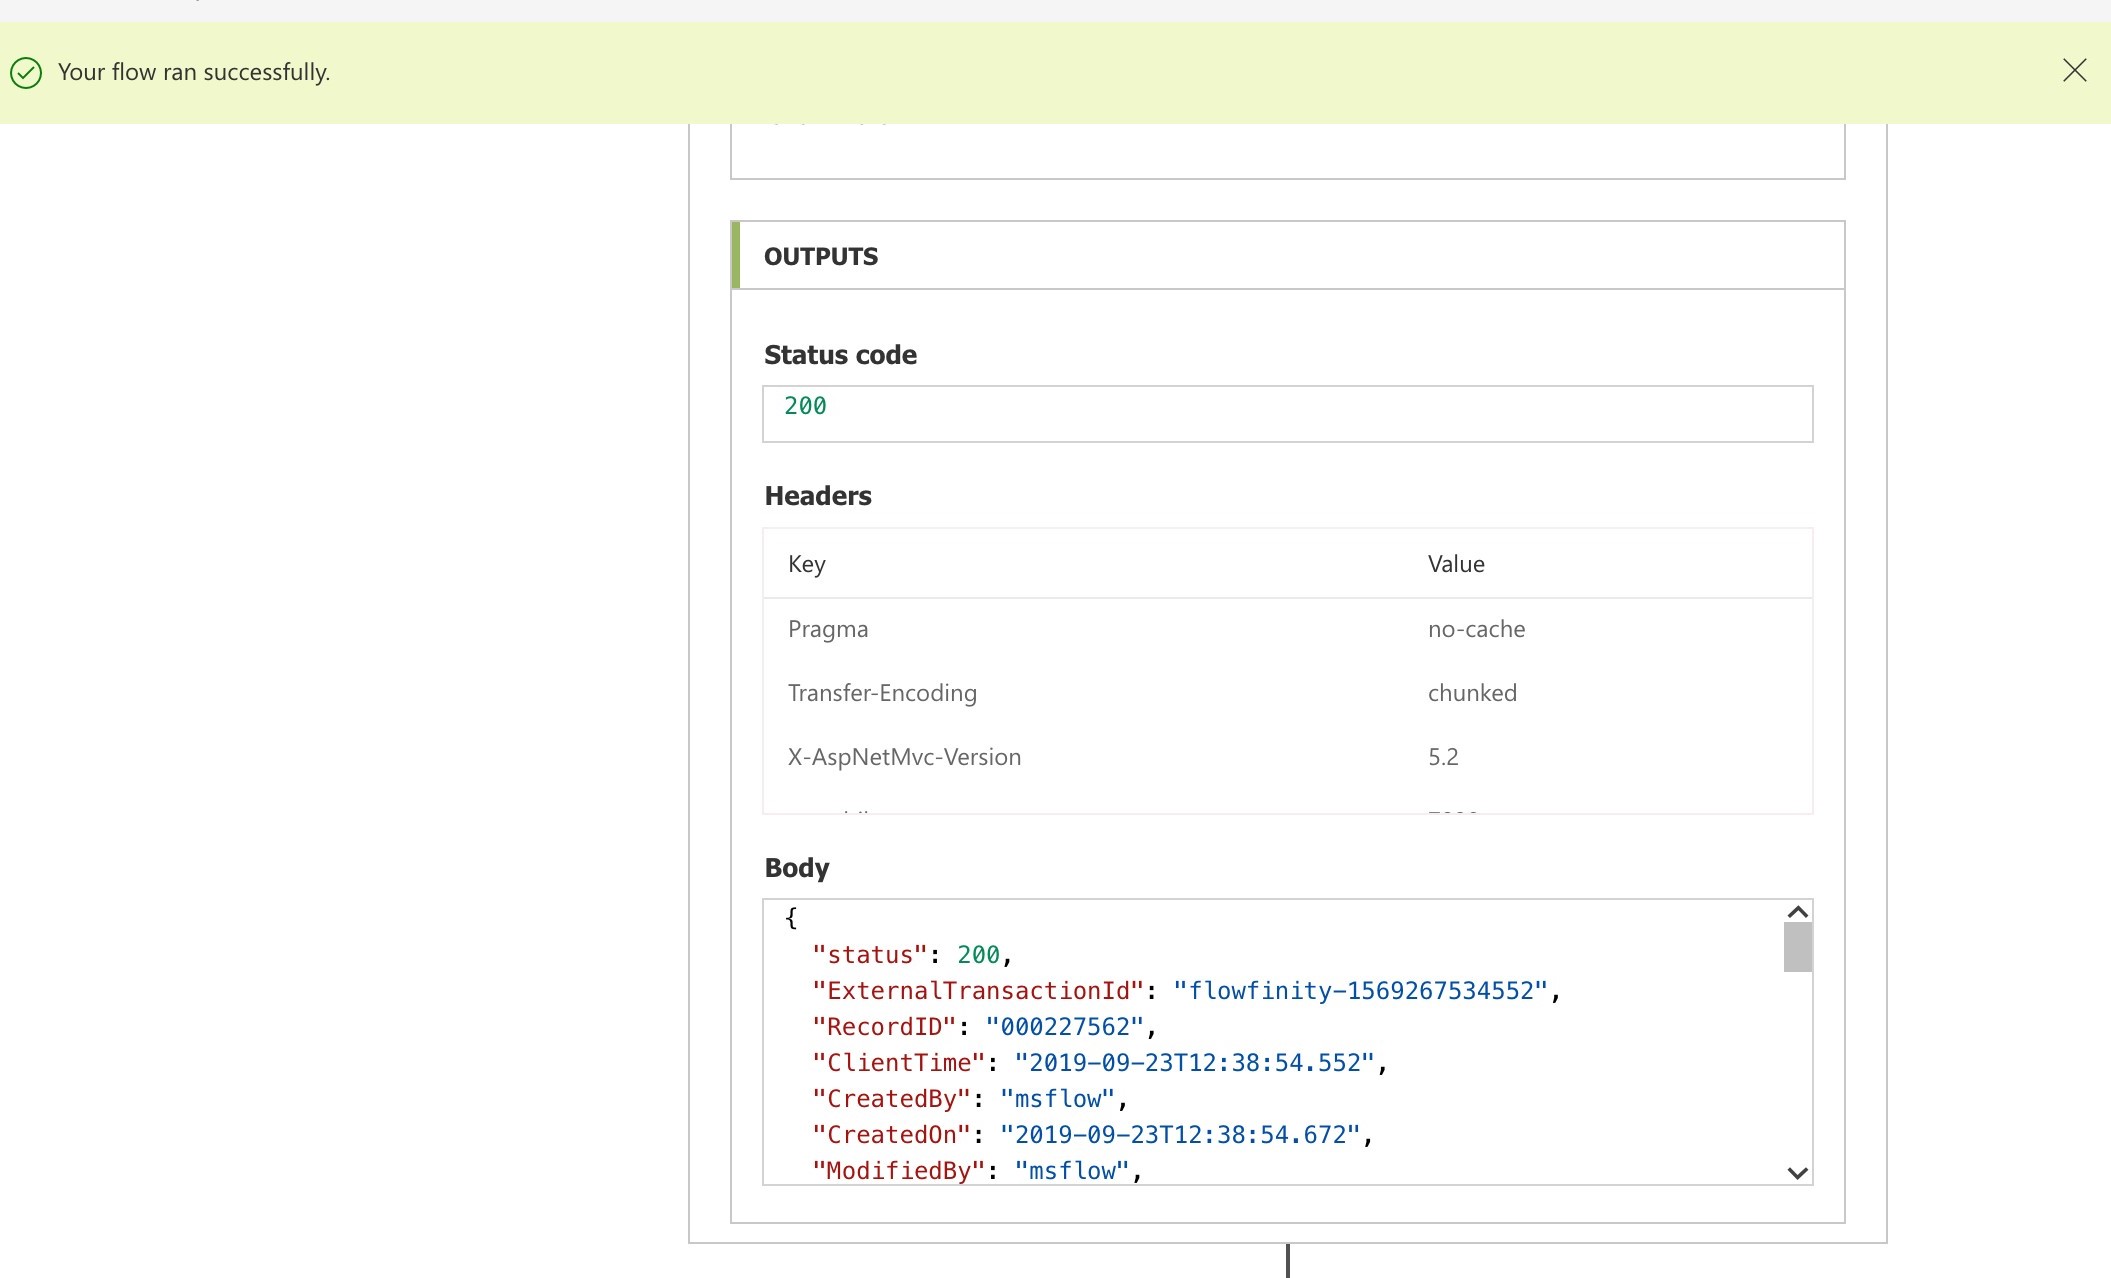
- The following screenshot shows the response generated by Flowfinity.
- In Flowfinity, navigate to the Lead Registration app. You will see a new record populated with the data supplied in the email.


