Using REST to submit records to Flowfinity with Zapier (Write)
Flowfinity provides the ability to integrate with external systems by enabling access to Operations in apps via Representational State Transfer (REST) Application Programming Interface (API) services. When access is enabled, programmers can use an HTTPS request/response-based REST API model to submit record data to Flowfinity.
This article outlines how to configure submitting records to a Flowfinity app from Zapier and also describes special considerations that will help improve data reliability.
When implementing a system that uses REST API services for performing updates, consider that REST HTTPS based architecture is non-transactional by design and can potentially be prone to losing data due to the nature of Hypertext Transfer Protocol Secure (HTTPS).
Flowfinity includes several built-in features that allow for reliable updates from external tools (e.g. Zapier while avoiding data duplication errors).
Flowfinity can stamp each record with a unique and persistent ID 'ExternalTransactionId', which is used to identify a submission and avoid the creation of duplicate records.
If a request is received with a transaction ID that has already been processed successfully Flowfinity will skip the request and return the HTTP success response of 200. All record and system fields will be returned as they were created or updated in the initial successful operation submission.
In addition to avoiding the duplication of records, further steps should be made to avoid losing data records before they are submitted to Flowfinity. Zapier implements a special AutoReplay feature that automatically replays failed Zap steps, up to a maximum of five times.
If the record still cannot be submitted, then an email will be sent. The failed Zap will be saved in Task History and is available for manual submission if necessary.
You can also configure a special Zap with a 'Zap Manager' trigger, which executes when a Zap fails with an error. This can execute custom notifications or trigger additional actions as required.
Note: Zap Manager cannot be used to replay a failed zap from Task History.
Step 1: Enabling REST API surface configuration
Enable REST integration by assigning a dedicated integration user, providing access to app operations and creating a view in the App Editor by following these steps.
Once external integration is enabled the REST URL endpoint address for submitting operations to Flowfinity will be displayed in the Configure > Integration > REST Integration section. Click the Details link to see the JSON payload request and response which you will need to set up Zapier.
Step 2: Overview of the Zapier steps
The Lead Registration sample app already has an operation enabled for REST access, which is done in the 'Integration' tab within the 'Operations' section, as shown in the screenshot below.
In this tutorial, we will use an incoming email body containing formatted JSON as a source of fields to submit to the 'Capture Lead' Operation instead of retrieving data from an external system.
Before we can invoke an operation from a Zap, we need to set up Integration Authentication and add an action for creating a new lead by submitting the 'Capture Lead' operation. Please see the article 'Synchronizing records from Flowfinity to Zapier.'
Note: It is not necessary to set up a Trigger in a Zapier Integration if you do not already have the Integration for synchronizing records configured.
Create a new Integration in the Zapier developer portal and add an Action configuration. To do this, follow the steps for opening an existing integration. Create and configure the authentication as described in the article on Zapier synchronization and proceed to configure an Action.
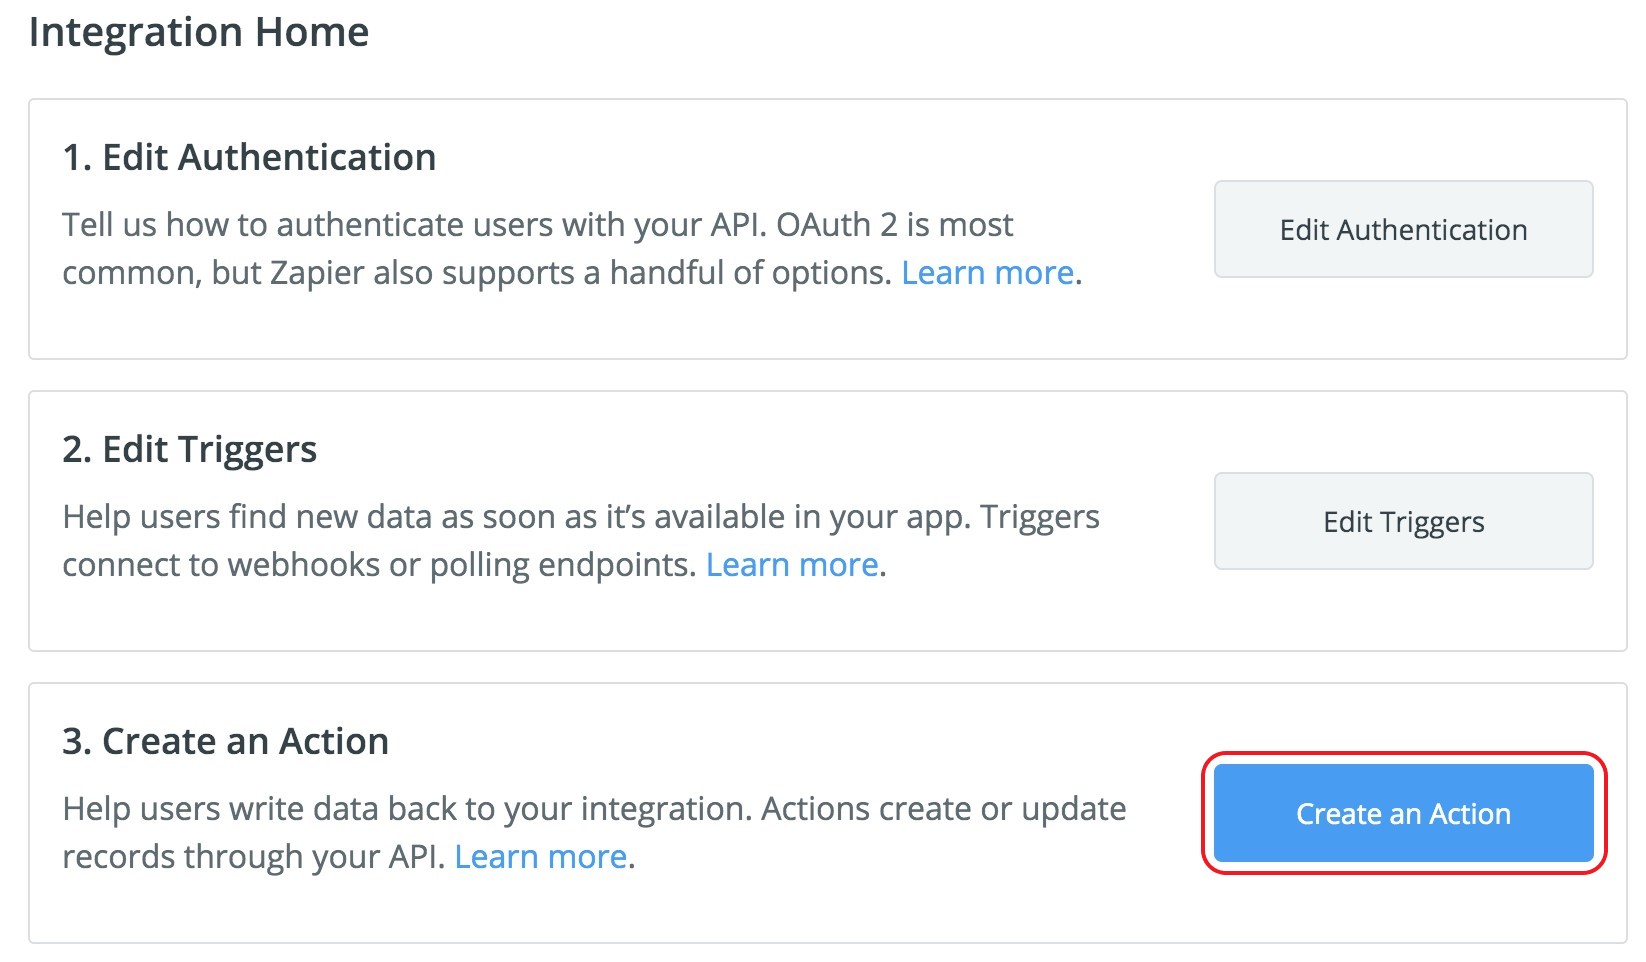
Step 3: Create an Action to integrate Zapier with the Flowfinity Capture Lead Operation
Open the Integration for synchronization with the Lead Registration Flowfinity app and click 'Create an Action' on the Integration Home page.
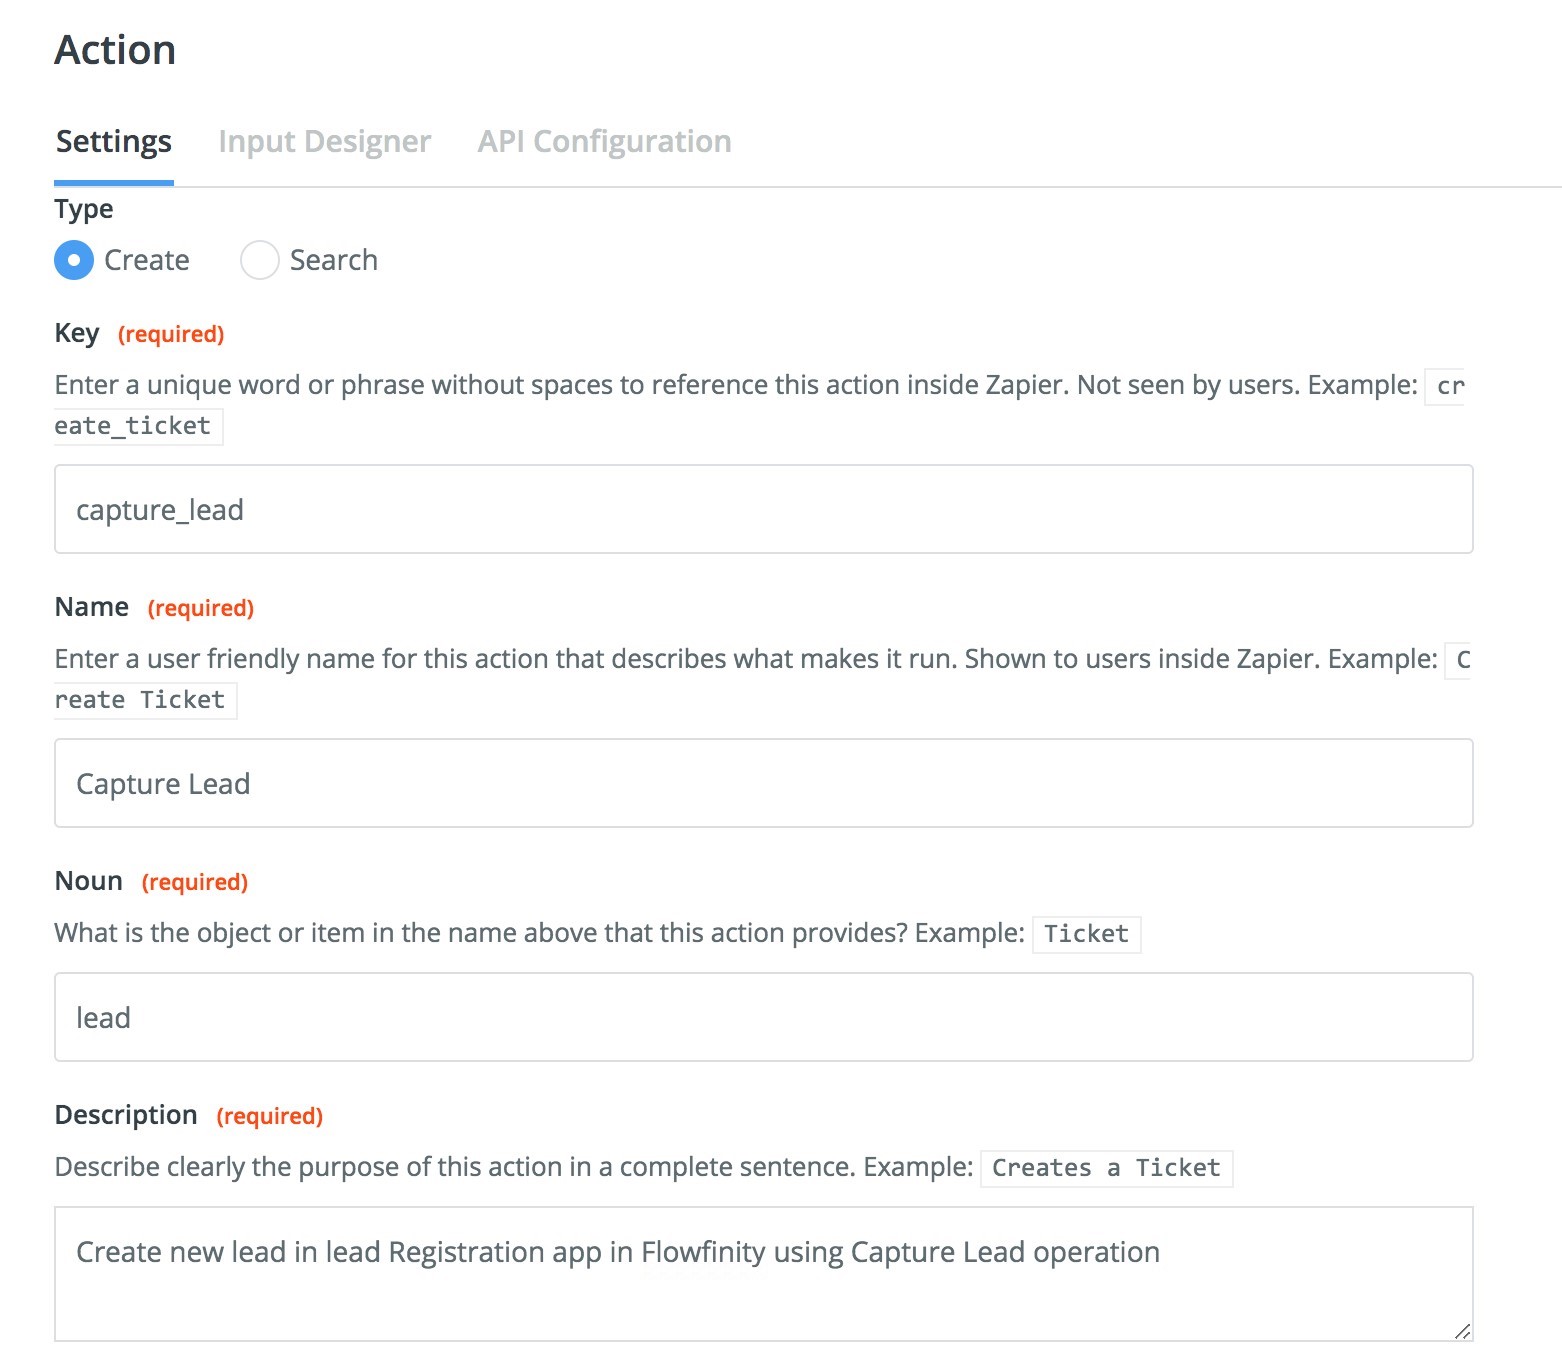
Fill in the Settings fields as shown and click 'Save and Continue.'
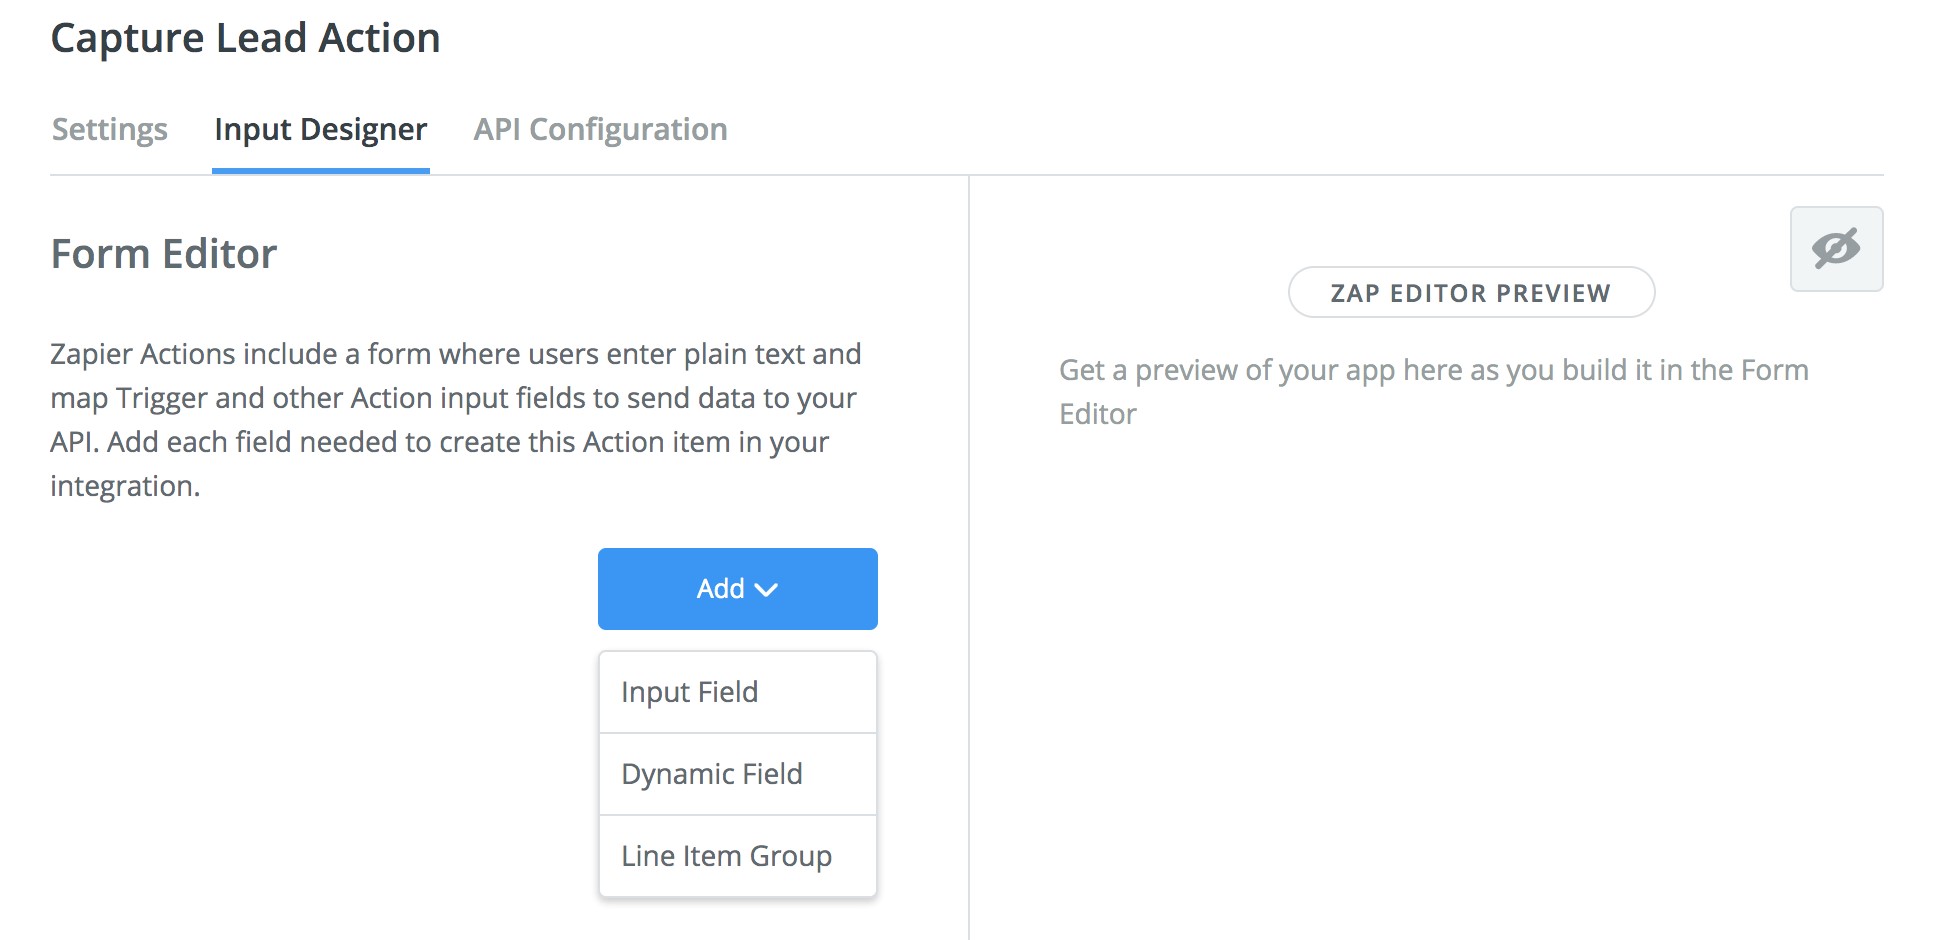
Click the Input Designer tab to add the fields that you would like to be able to retrieve from the user or the previous steps in the workflow.
Typically, these will be fields that are visible in the Capture Lead Operation layout. We recommend that you name the fields by the Labels and IDs that are used in the Flowfinity app. You will need to use Input field types for all field types.
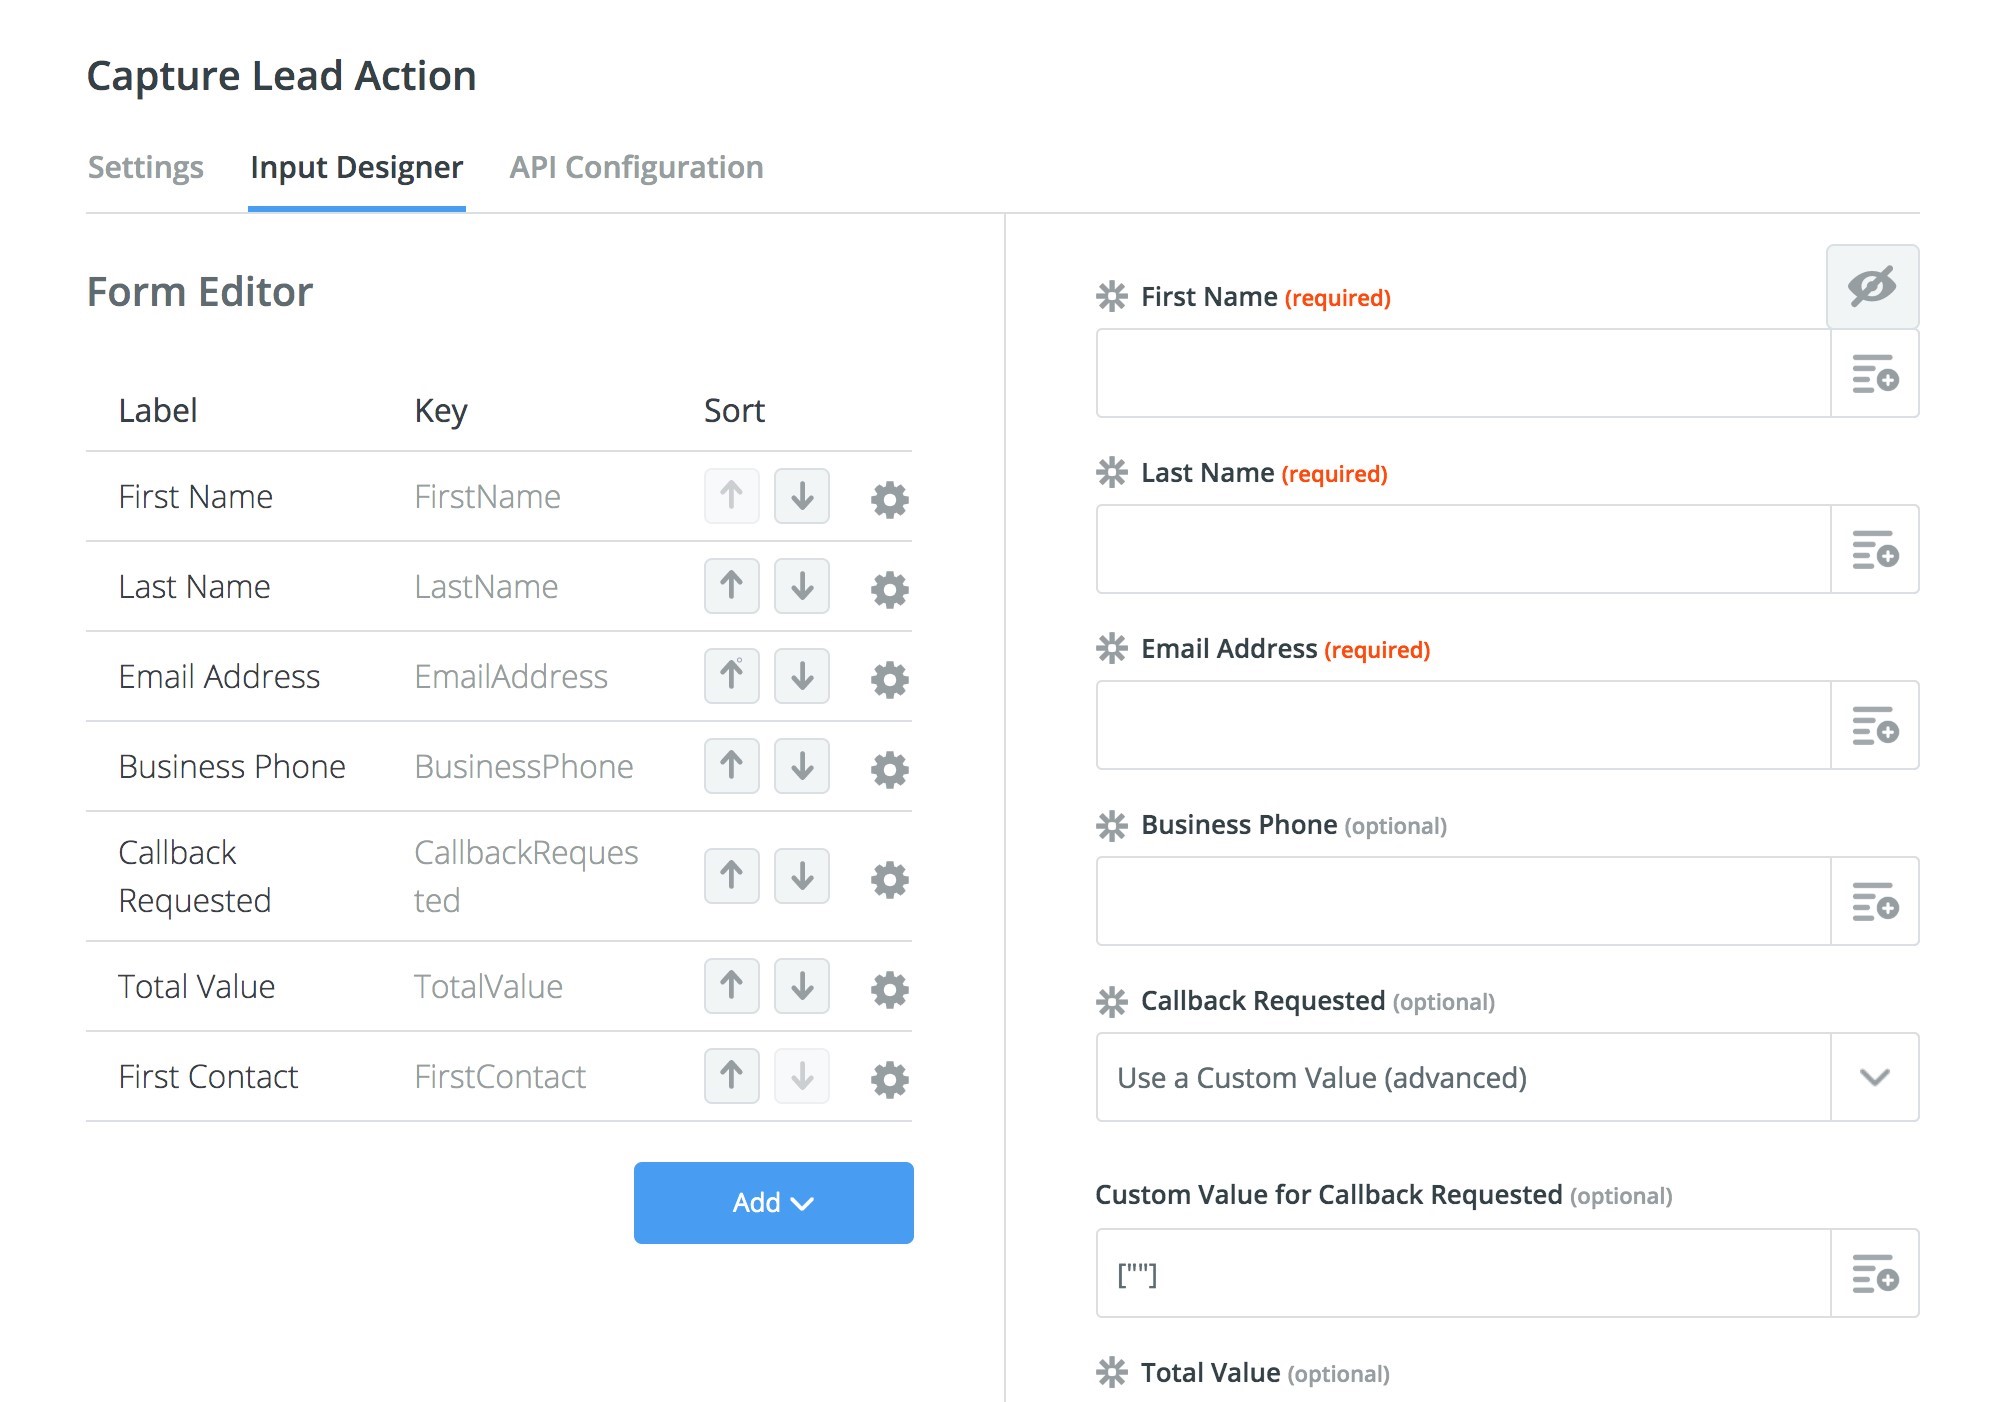
Once you have added the desired fields, your screen should look like the screenshot below. Match the fields to their input types.
For input, email, and phone fields use the String type.
For Callback Requested, select 'Use a Custom Value' from the dropdown menu. Configure this is an optional field. Select 'DateTime' field type for First Contact and 'Number' field type for Total Value etc.
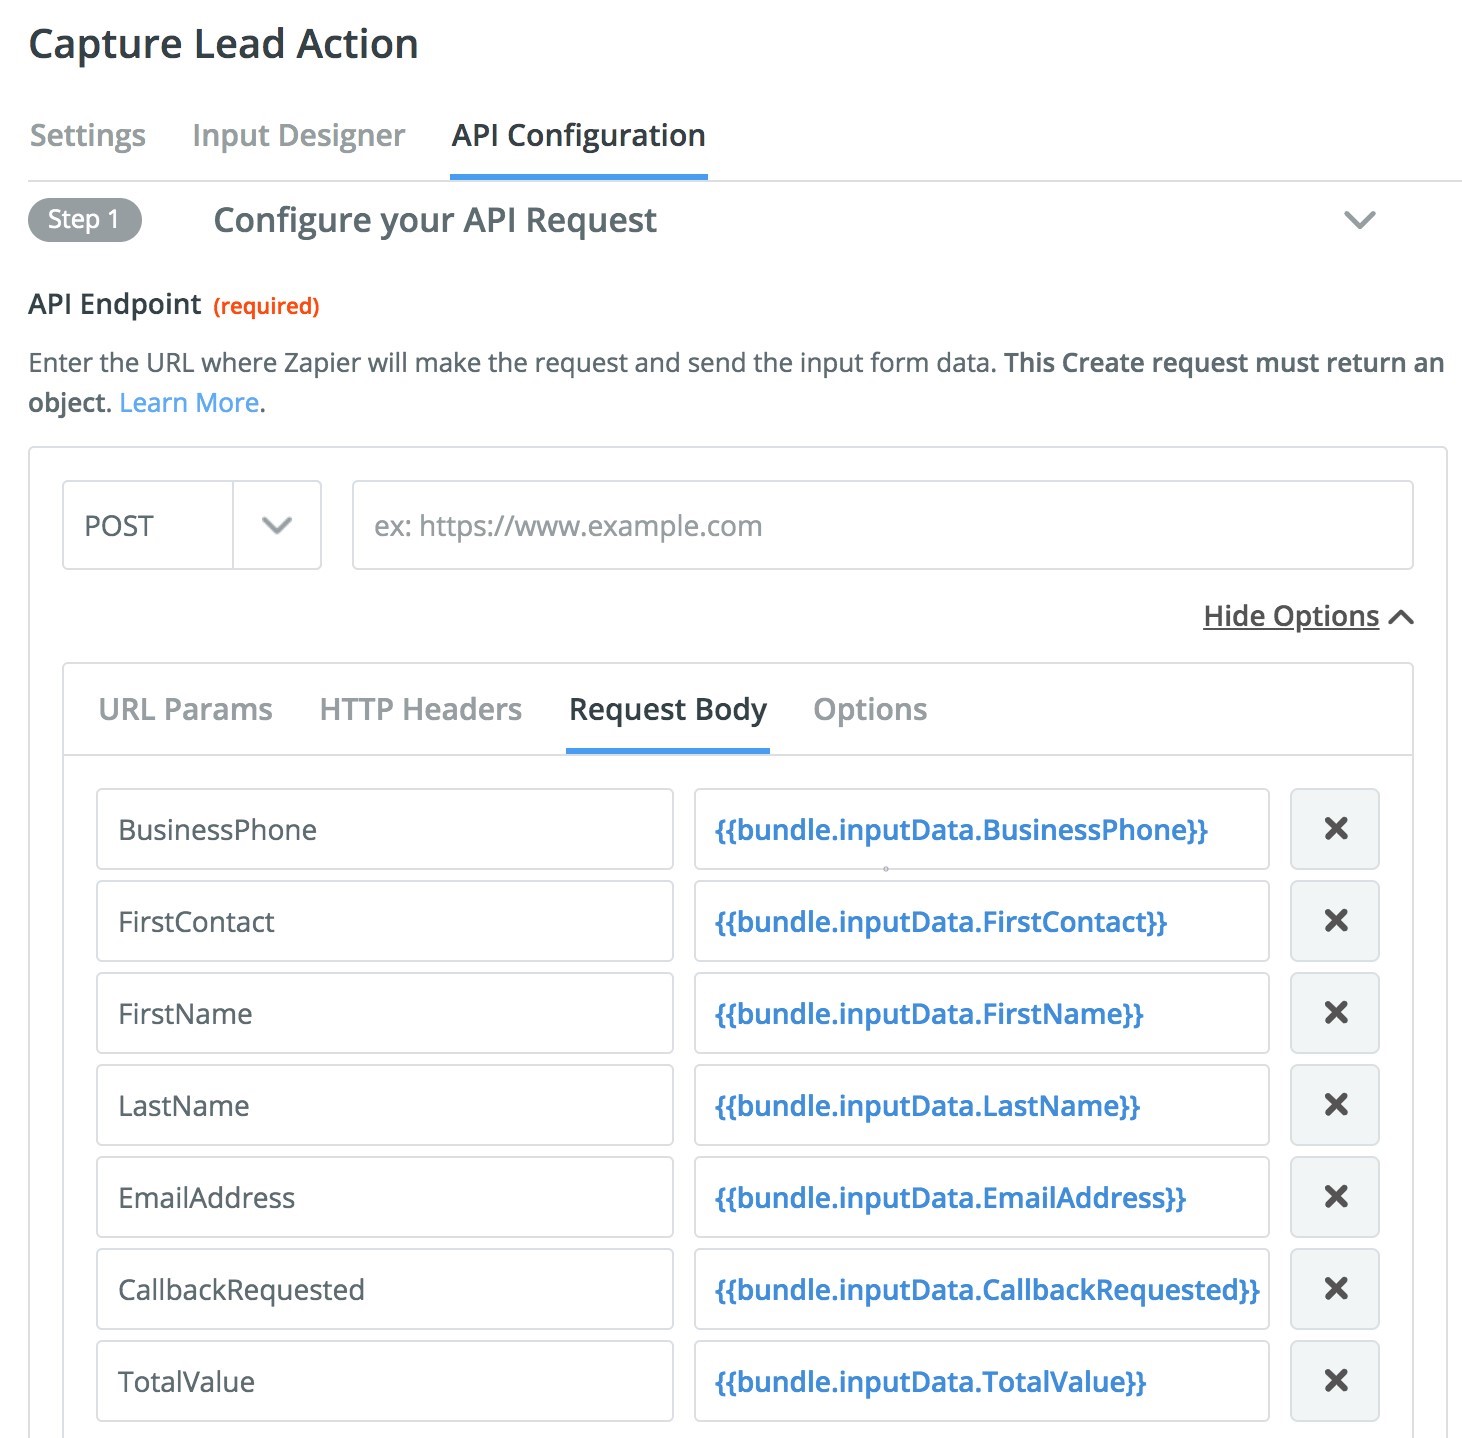
Next, select the API Configuration tab.
Enter the URL for the 'Capture Lead' operation into the API Endpoint field. Click 'Save and Continue' to proceed. Note: to copy the correct URL from Flowfinity, navigate to the Configure tab > Integration tab > REST tab. Click 'Details' next to the Capture Lead operation and then 'Copy URL.'
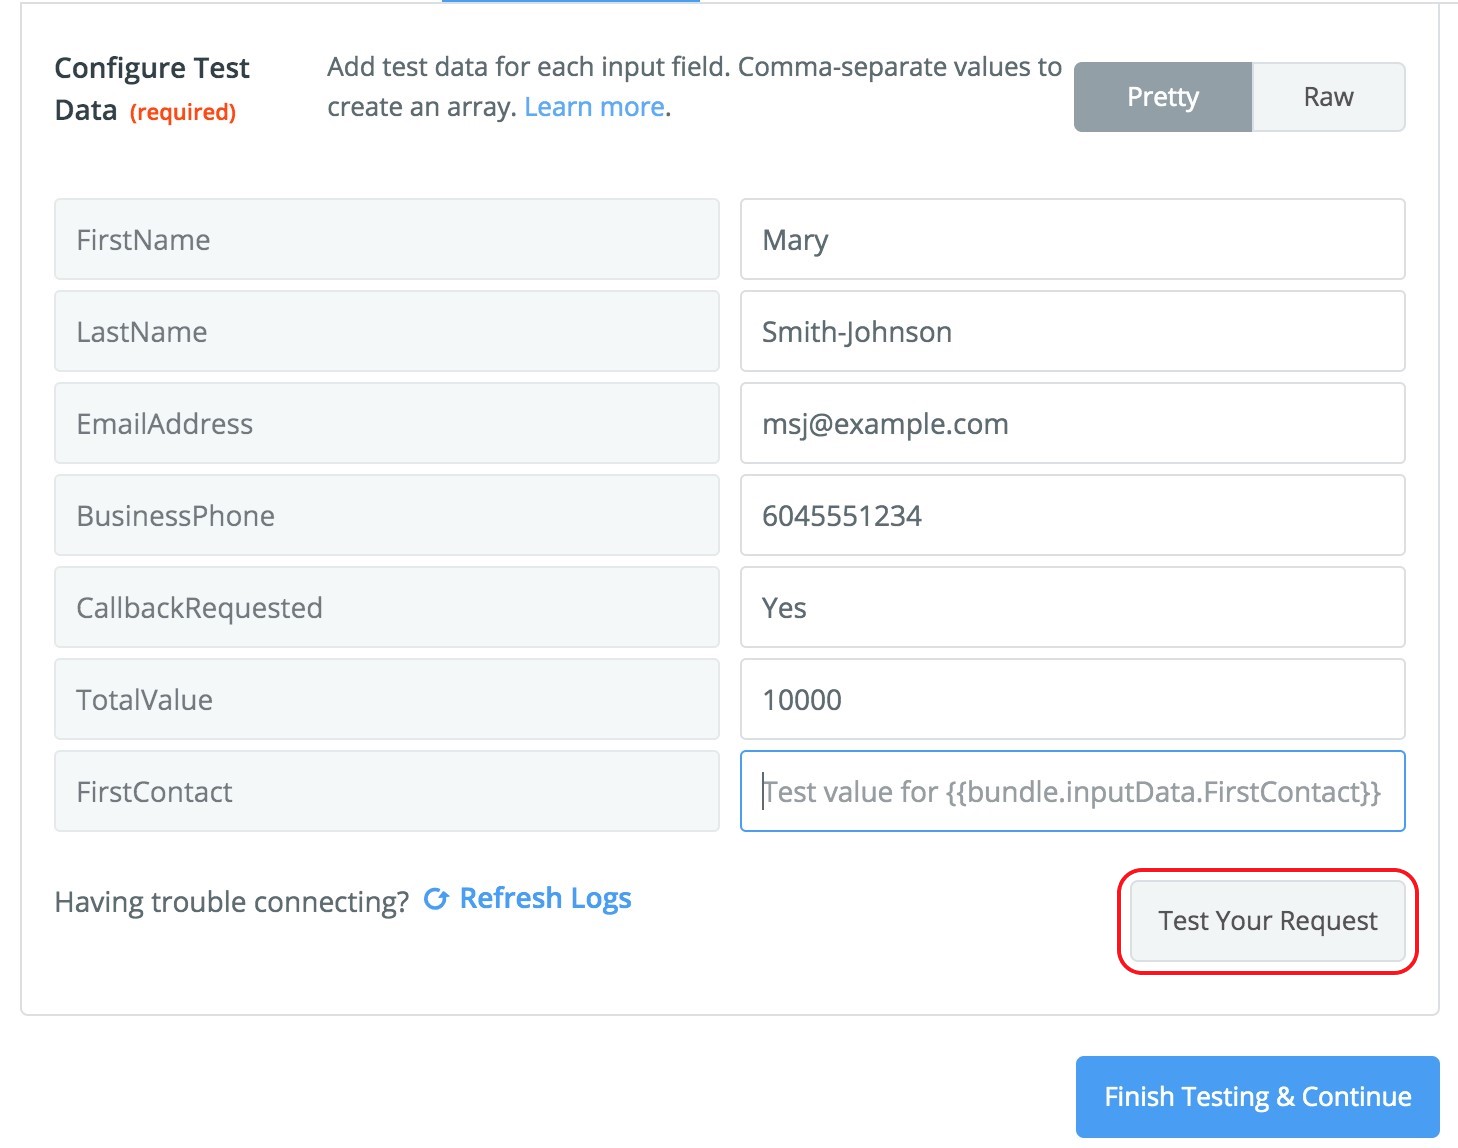
Next, complete the Configure Test Data form. Add test data for each input field and click 'Test Your Request.'
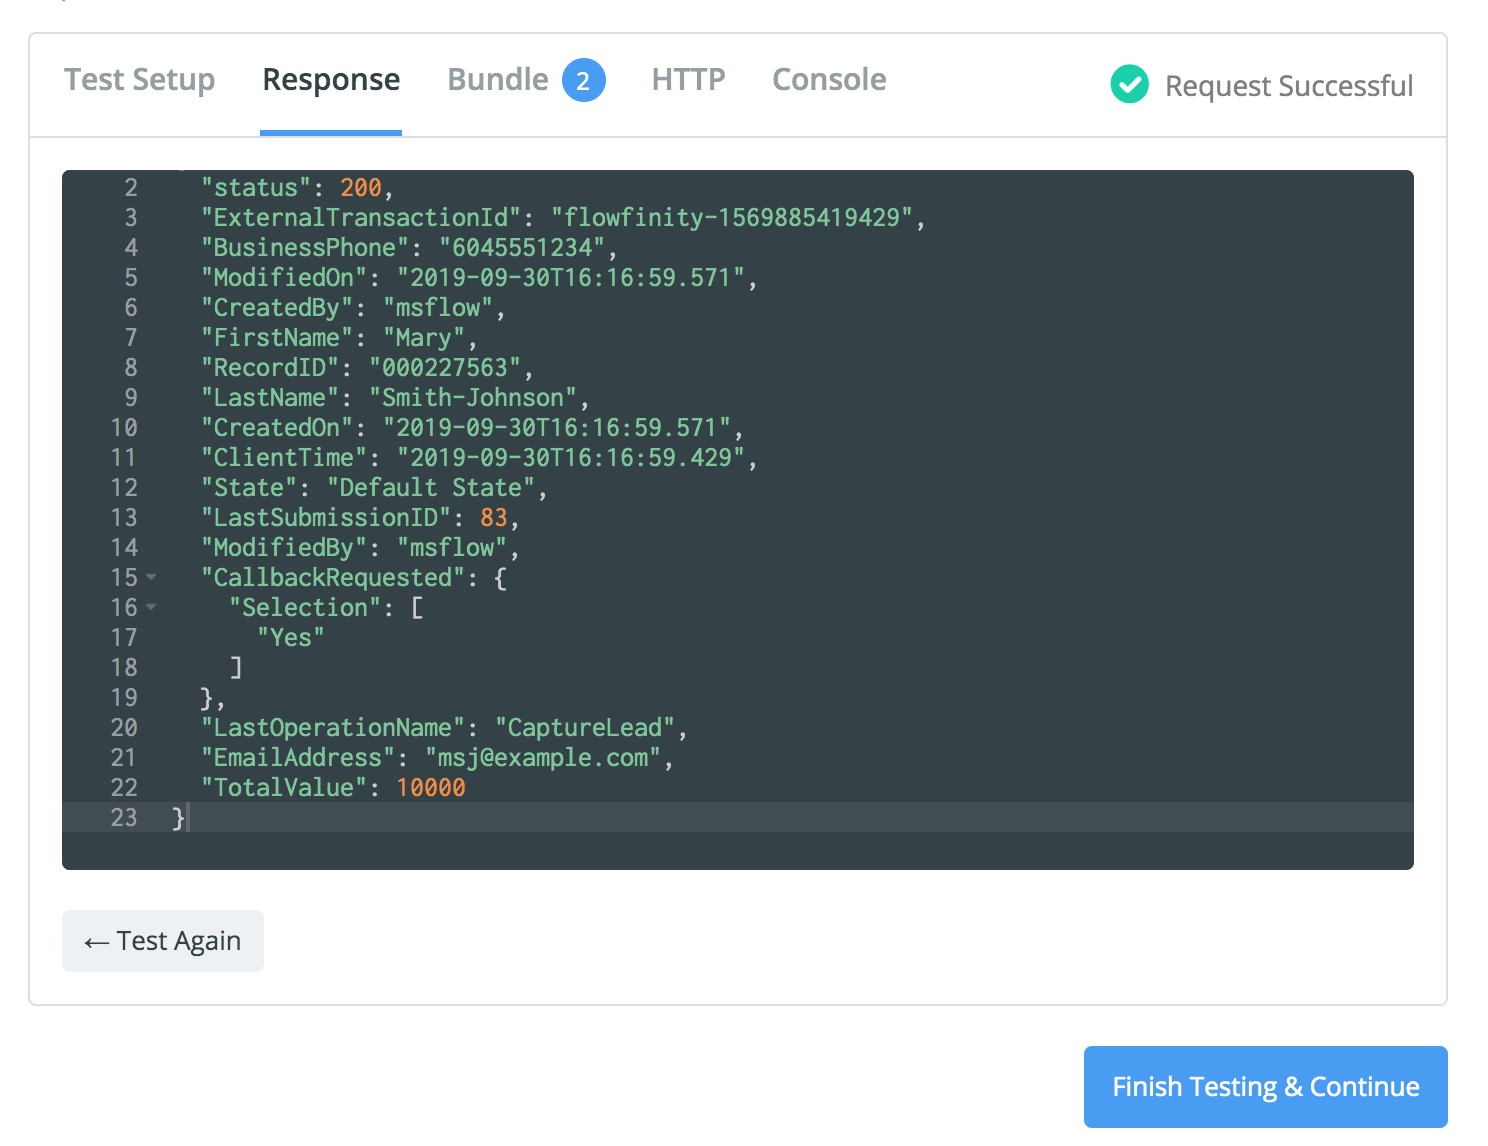
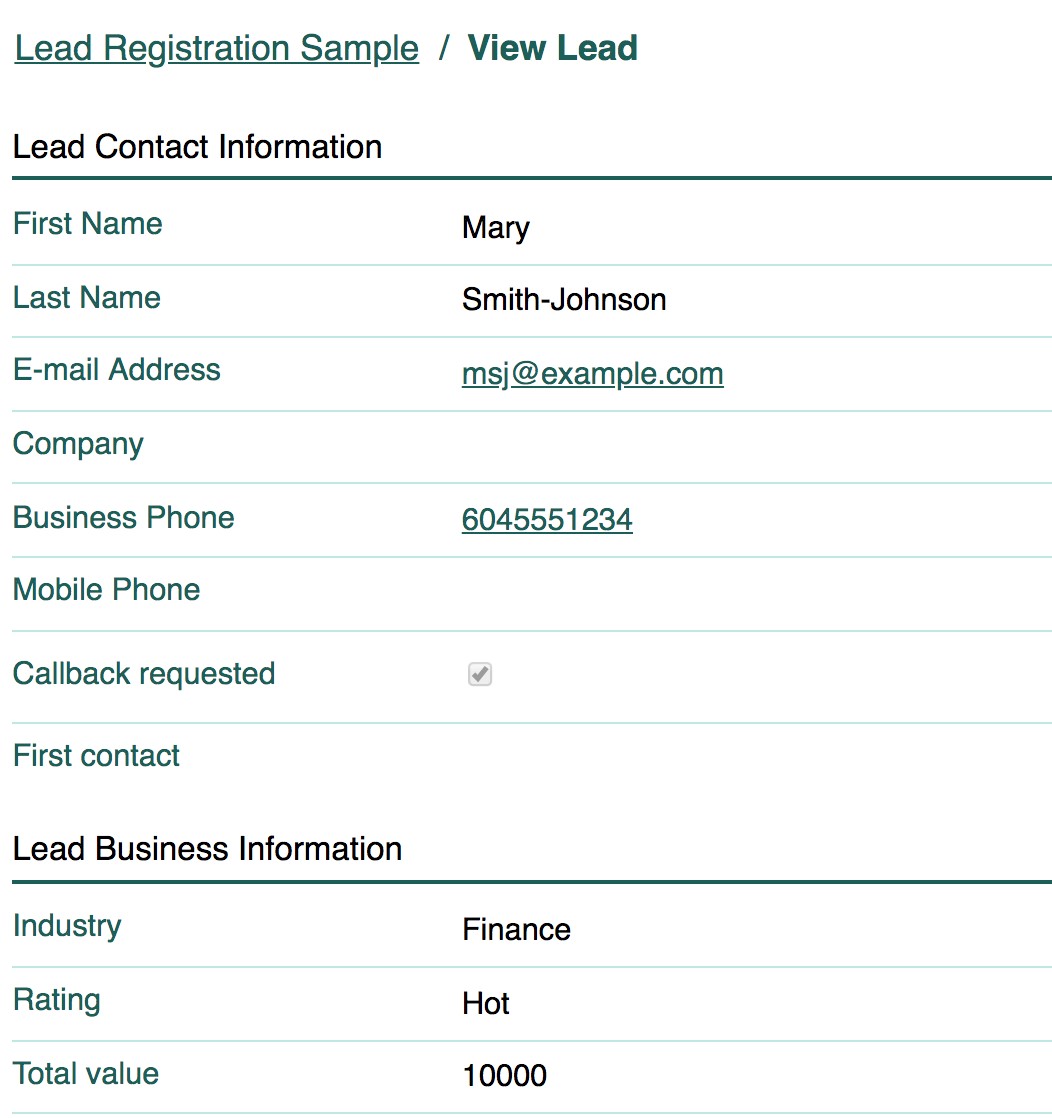
If the test is successful, click the 'Response' tab to view the response returned from Flowfinity. A new record should have been created in the Lead Registration app.
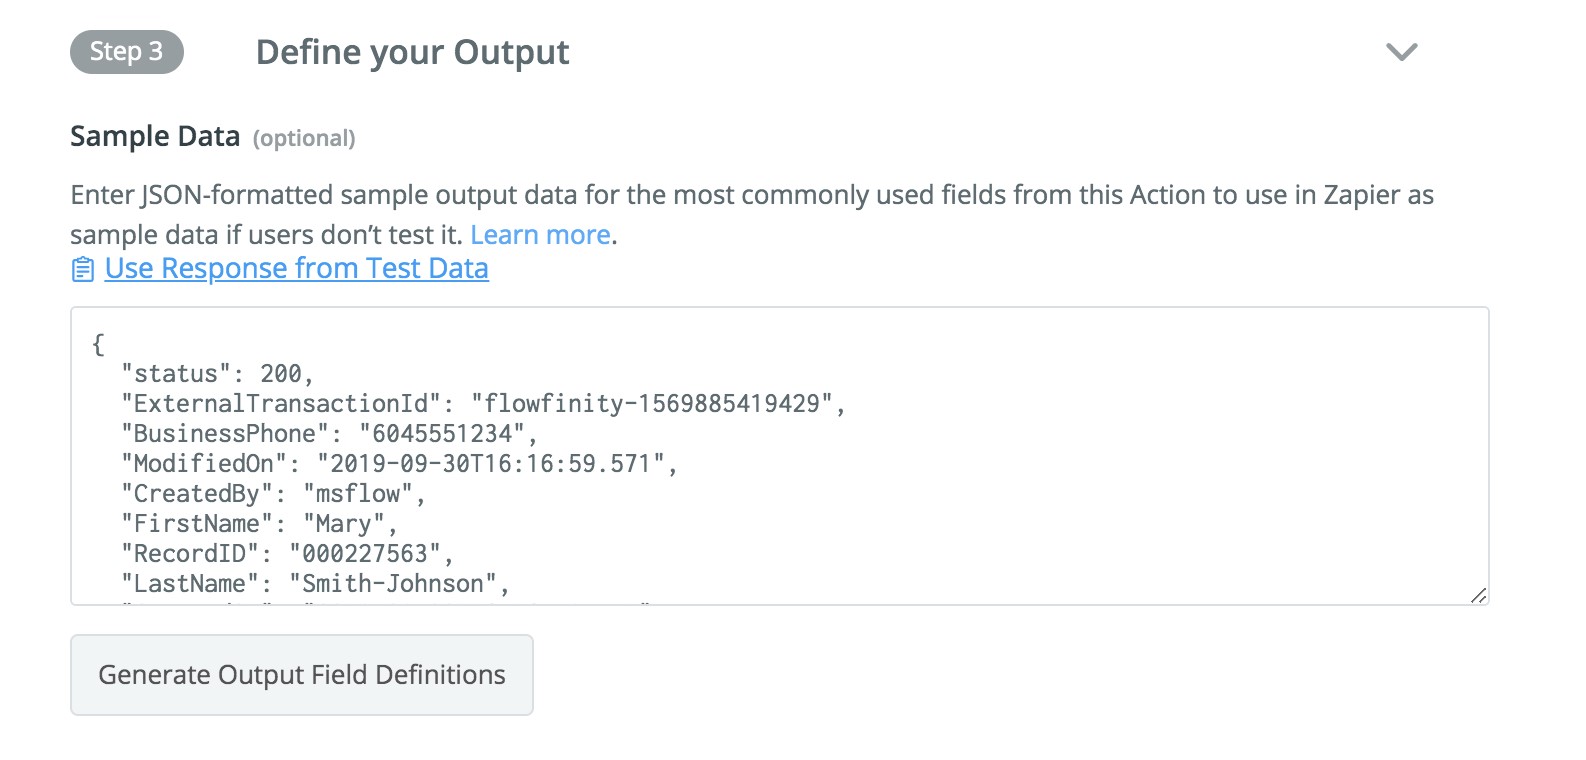
Then, complete the 'Define your output' step. Select 'Use Response from Test Data' to fill in the response with the JSON received from the test data.
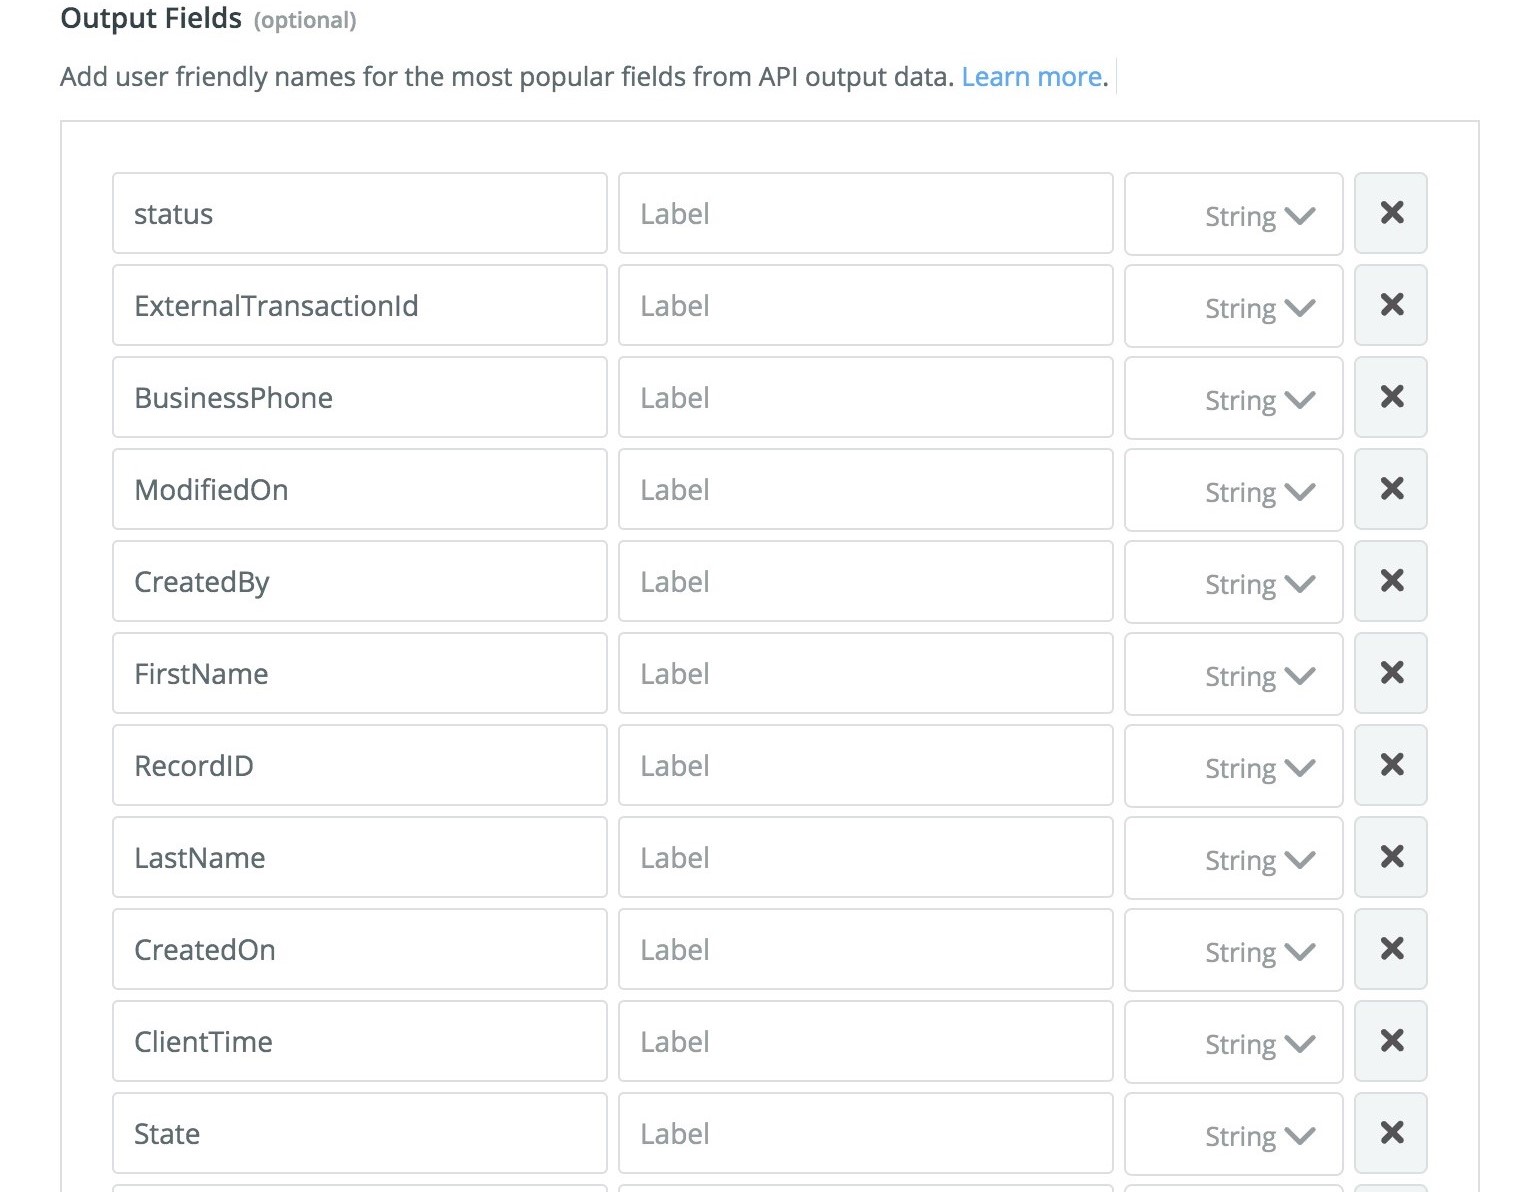
Use 'Generate Output Field Definitions' to prefill the Output fields from the JSON in Sample Data. You can then adjust field types or names as necessary.
Save any changes to complete your Action configuration.
Step 4: Using the Capture Lead Action in a Zap
We will use the New Lead trigger in the Lead Registration app as a source of data values for new records. However, to avoid an infinite loop, we will program the Zap to create a new lead from an existing record if the First Name contains 'copy.'
Note: you can use any other data source such as Zapier Email Parser.
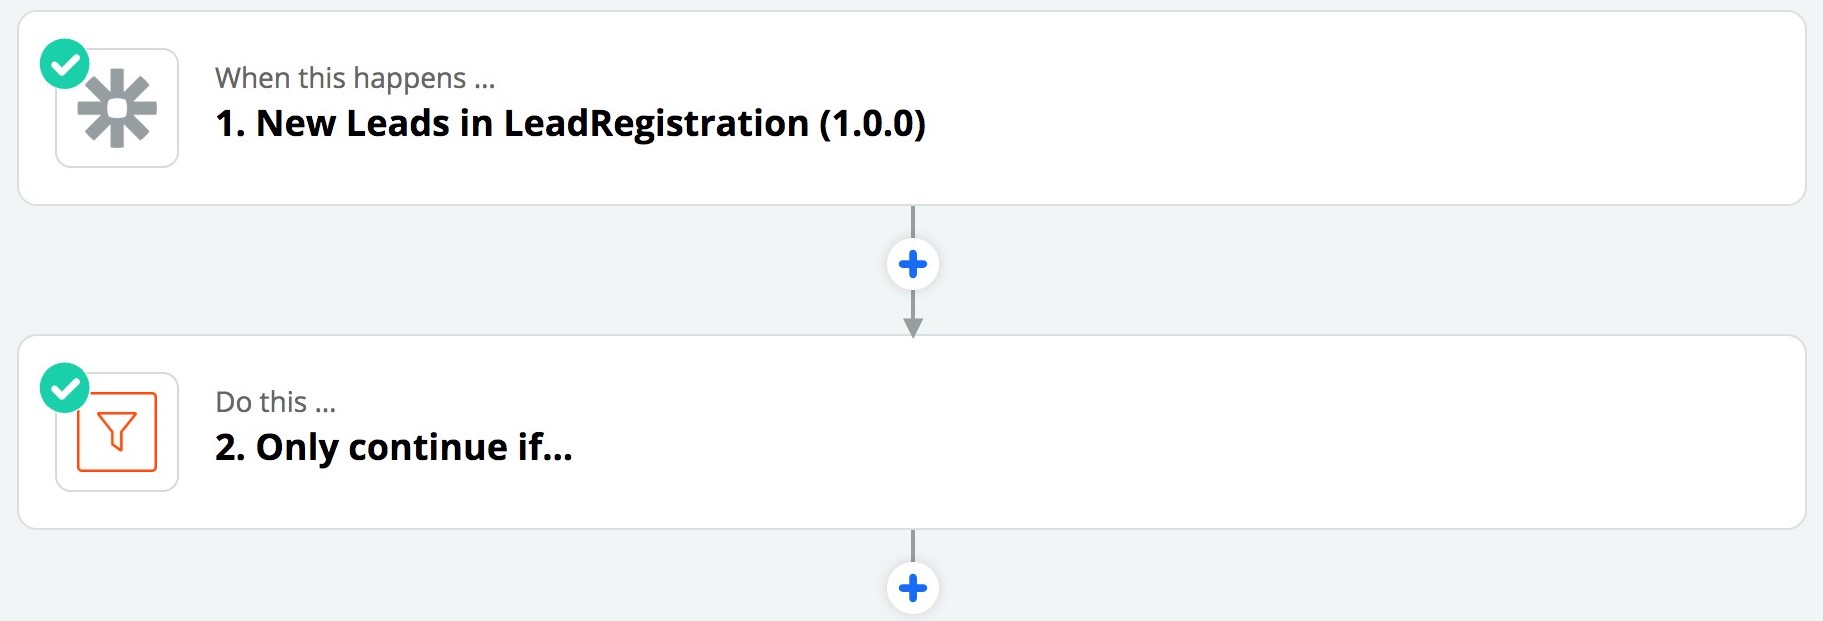
Start by adding a new Zap with the trigger set to 'New Lead' in the existing Lead Registration.
Then add another step using 'Filter by Zapier' integration for a workflow like this:
]
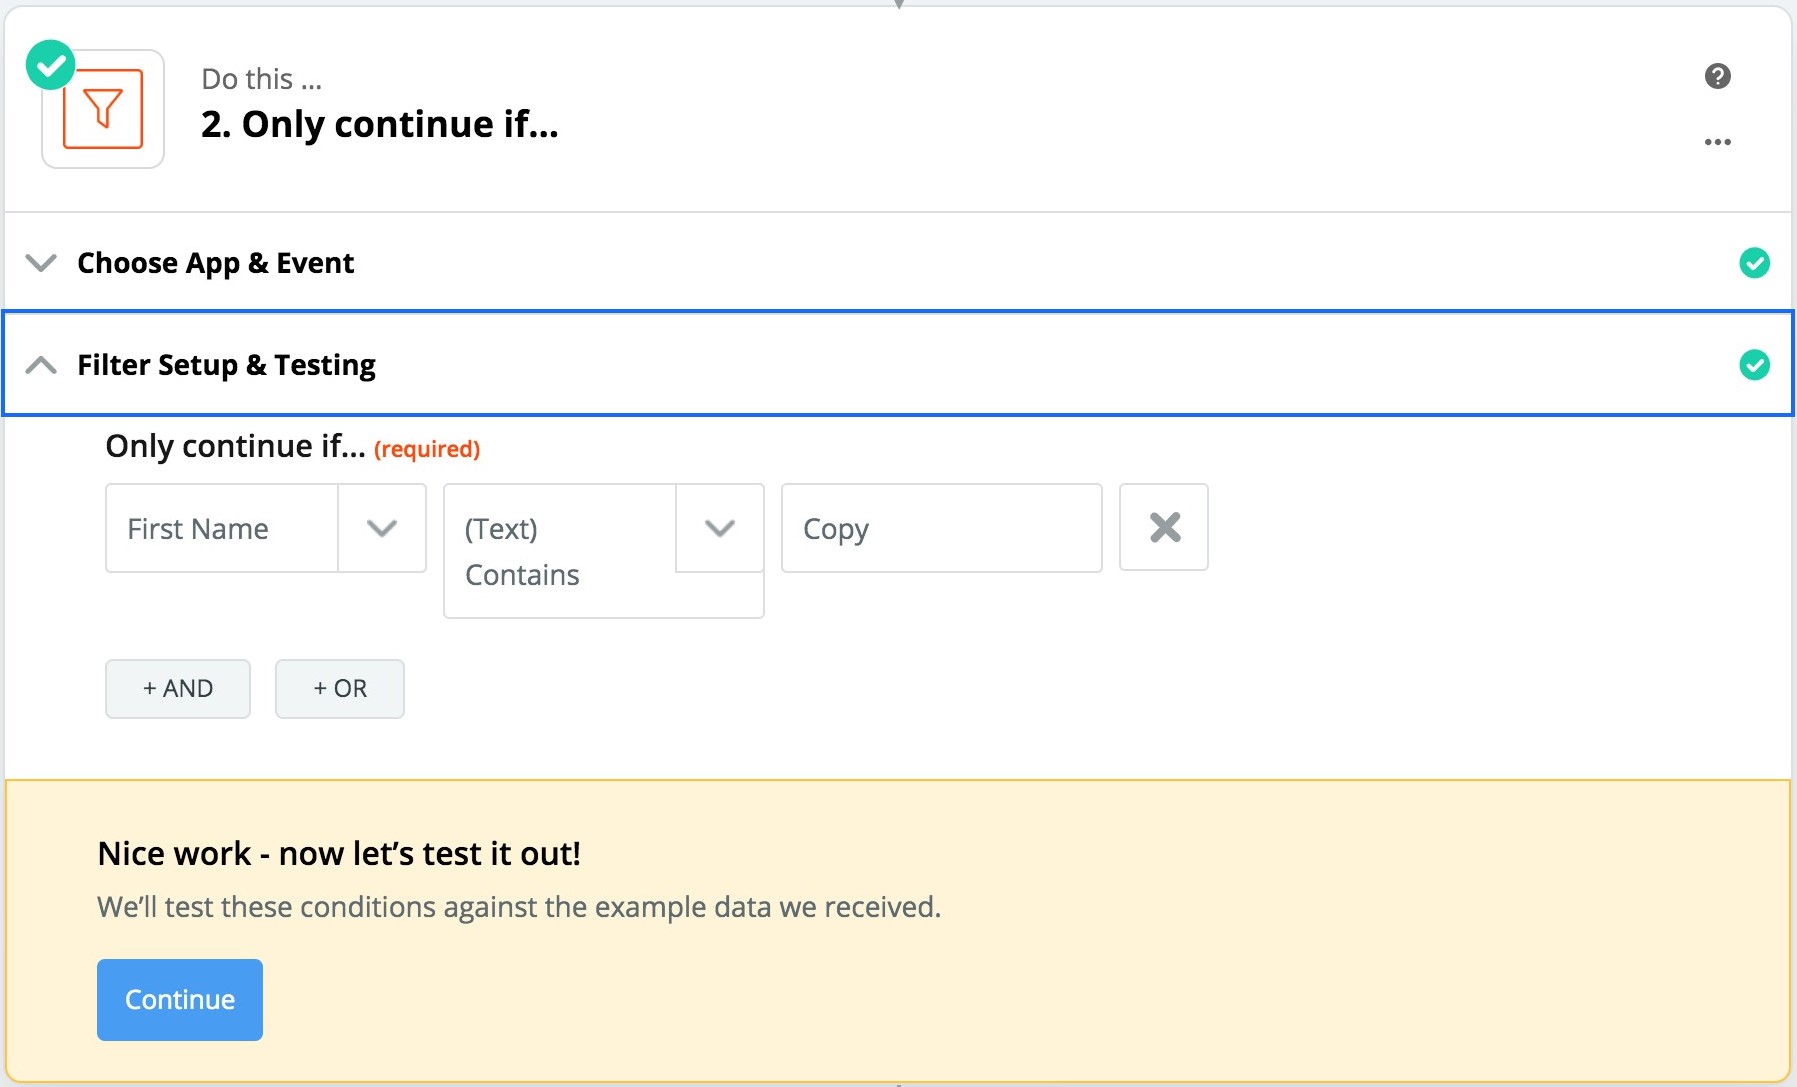
In the filter for the integration, you need to specify 'First Name' contains 'Copy' to proceed only when this text is encountered.
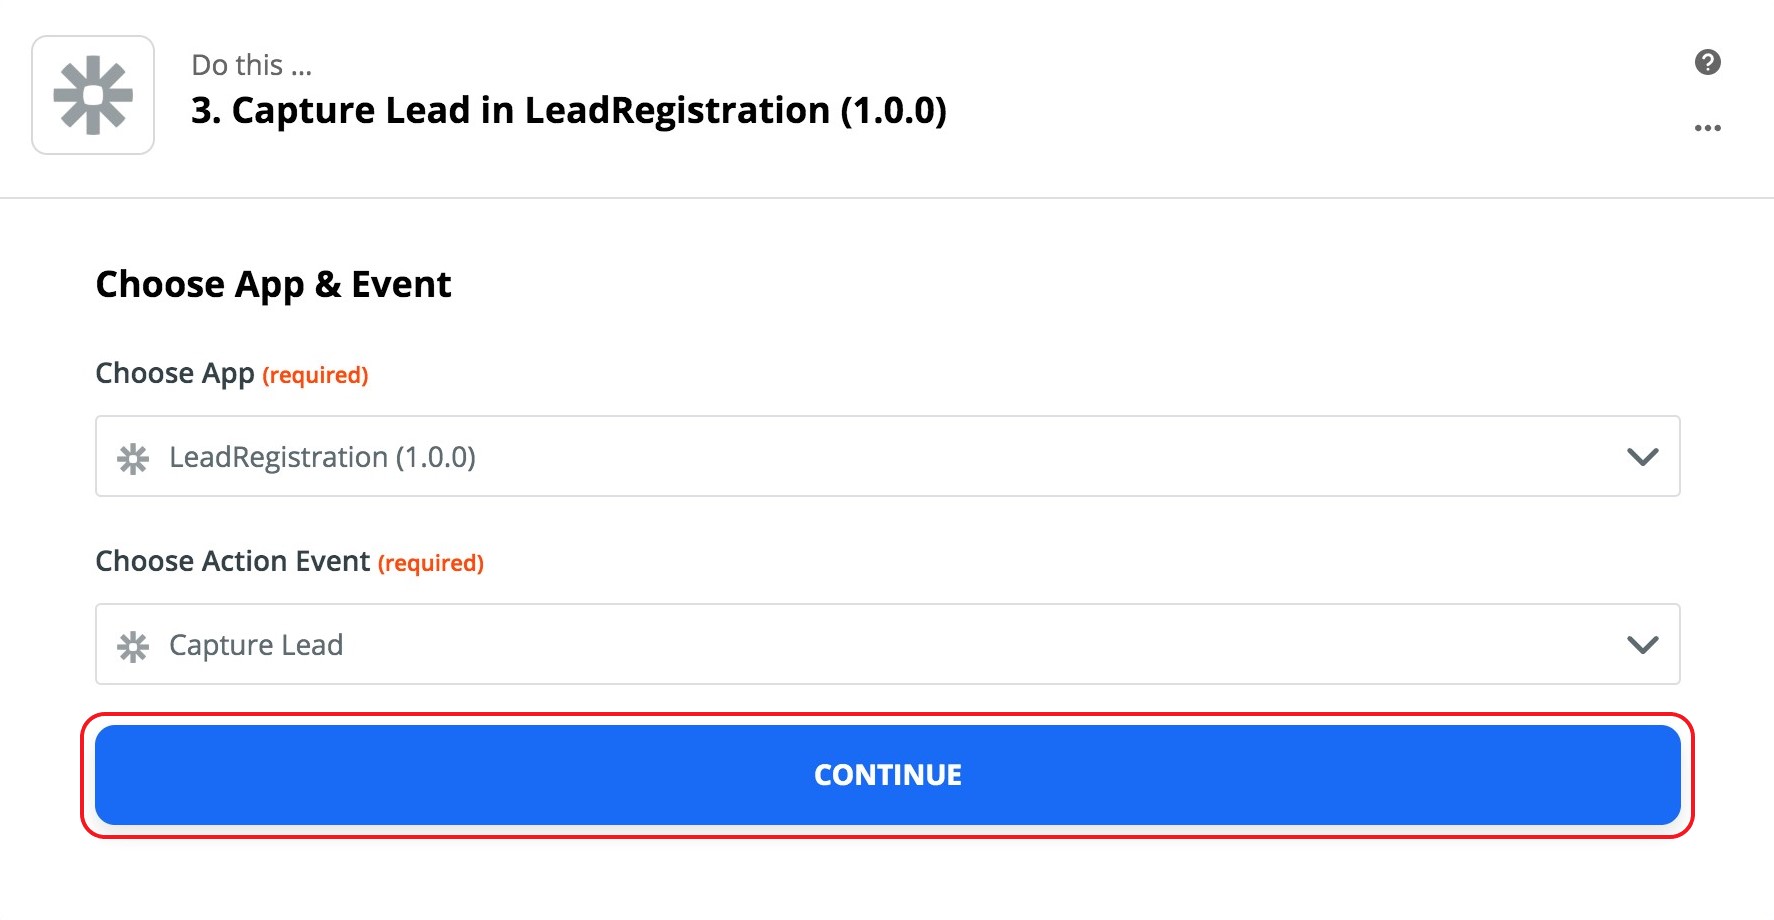
Now you are ready to add a step that uses the new Action Event from the Lead Registration app.
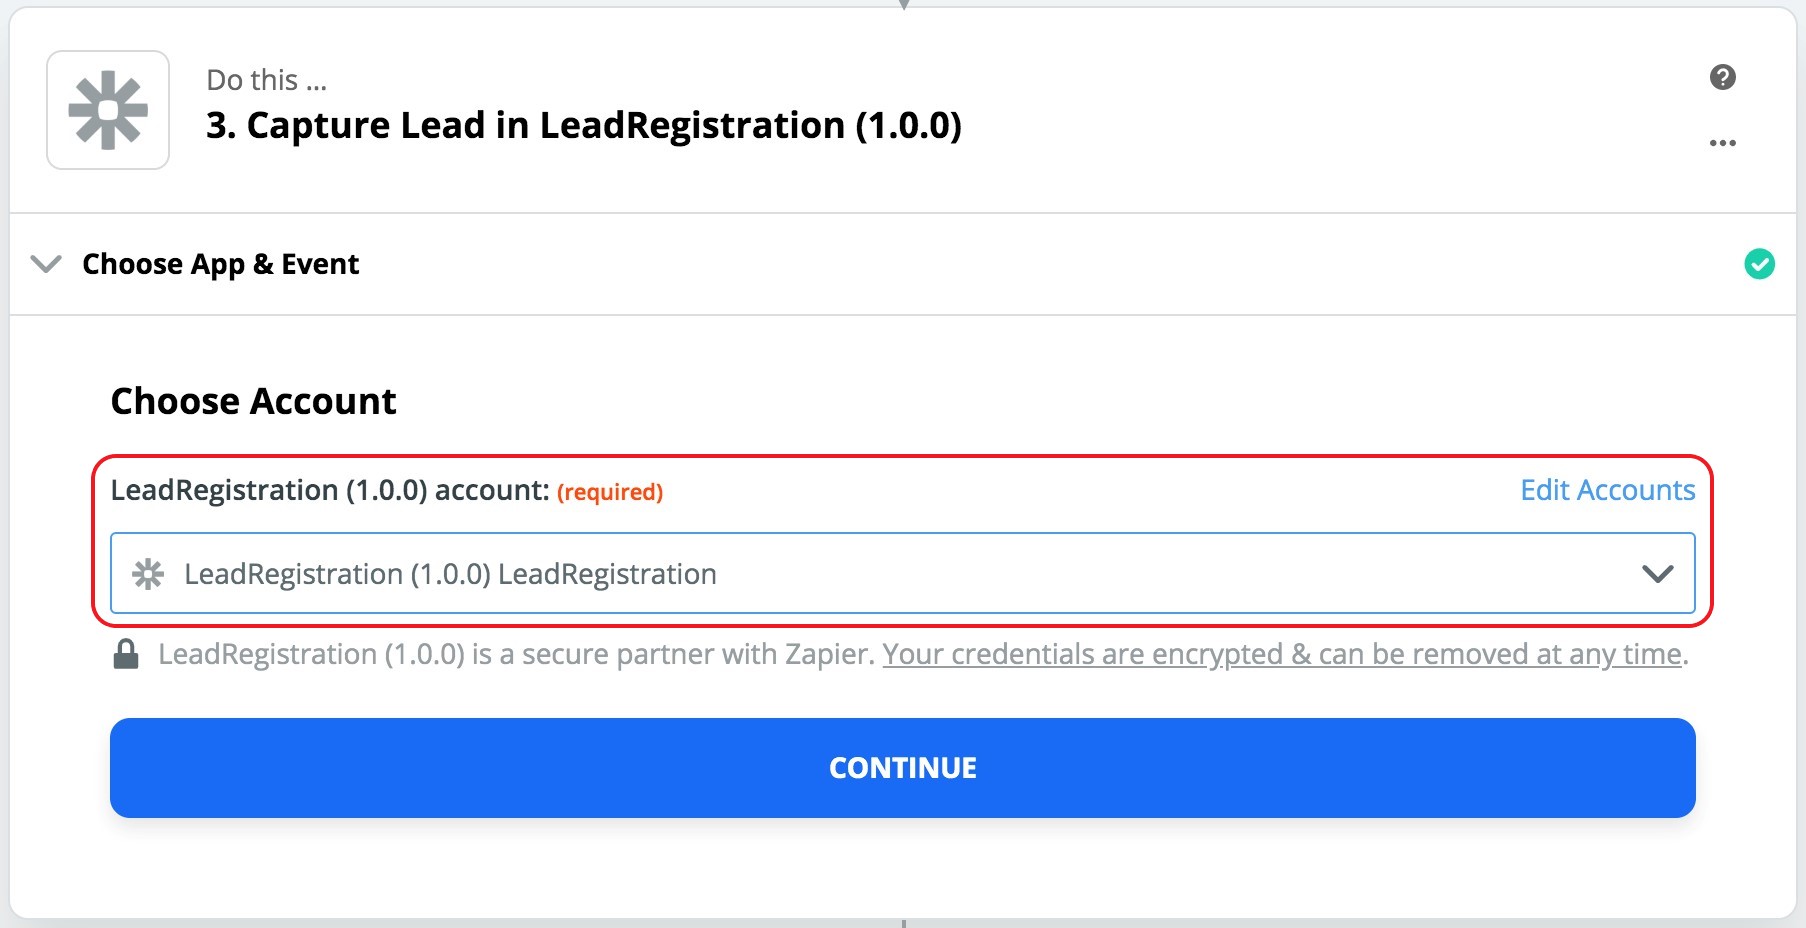
Next, select the pre-configured account.
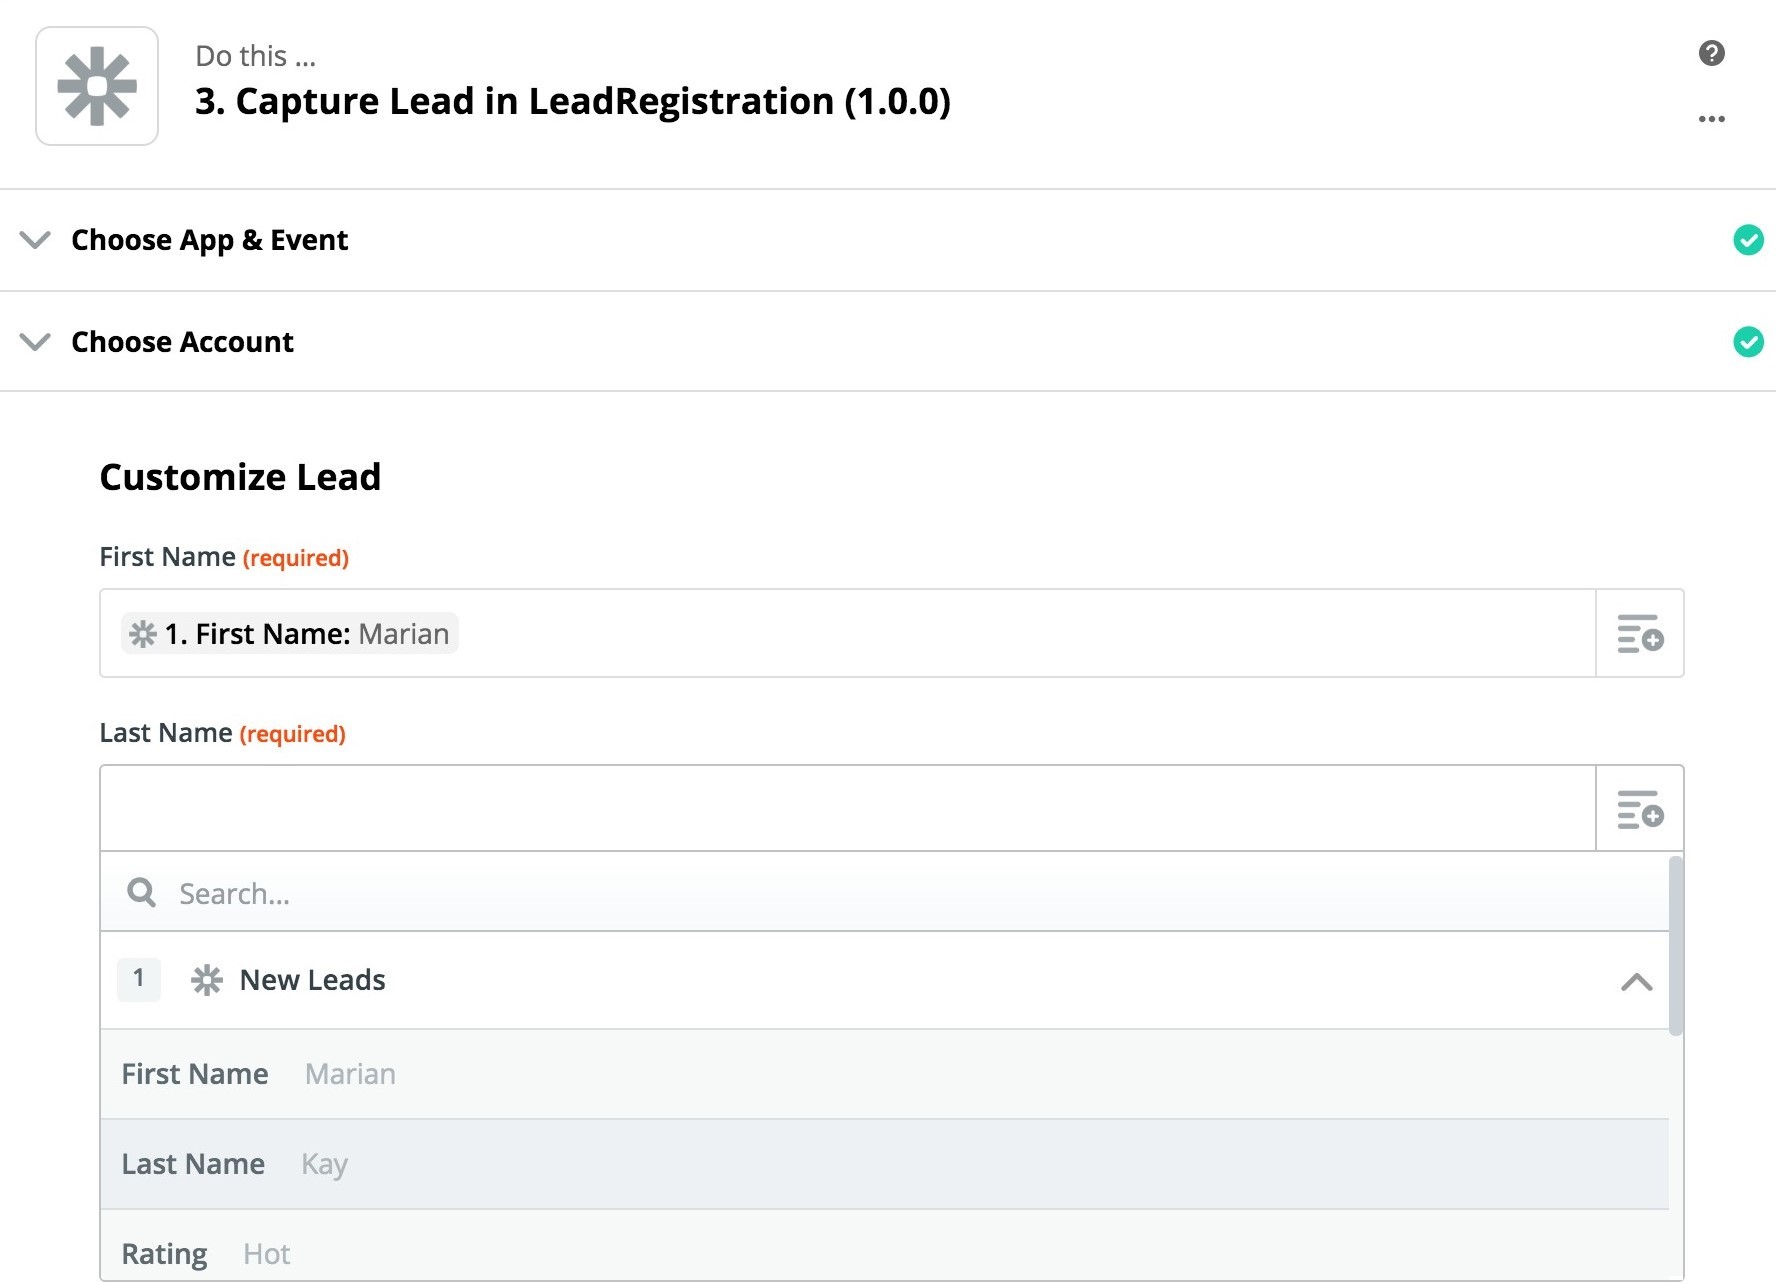
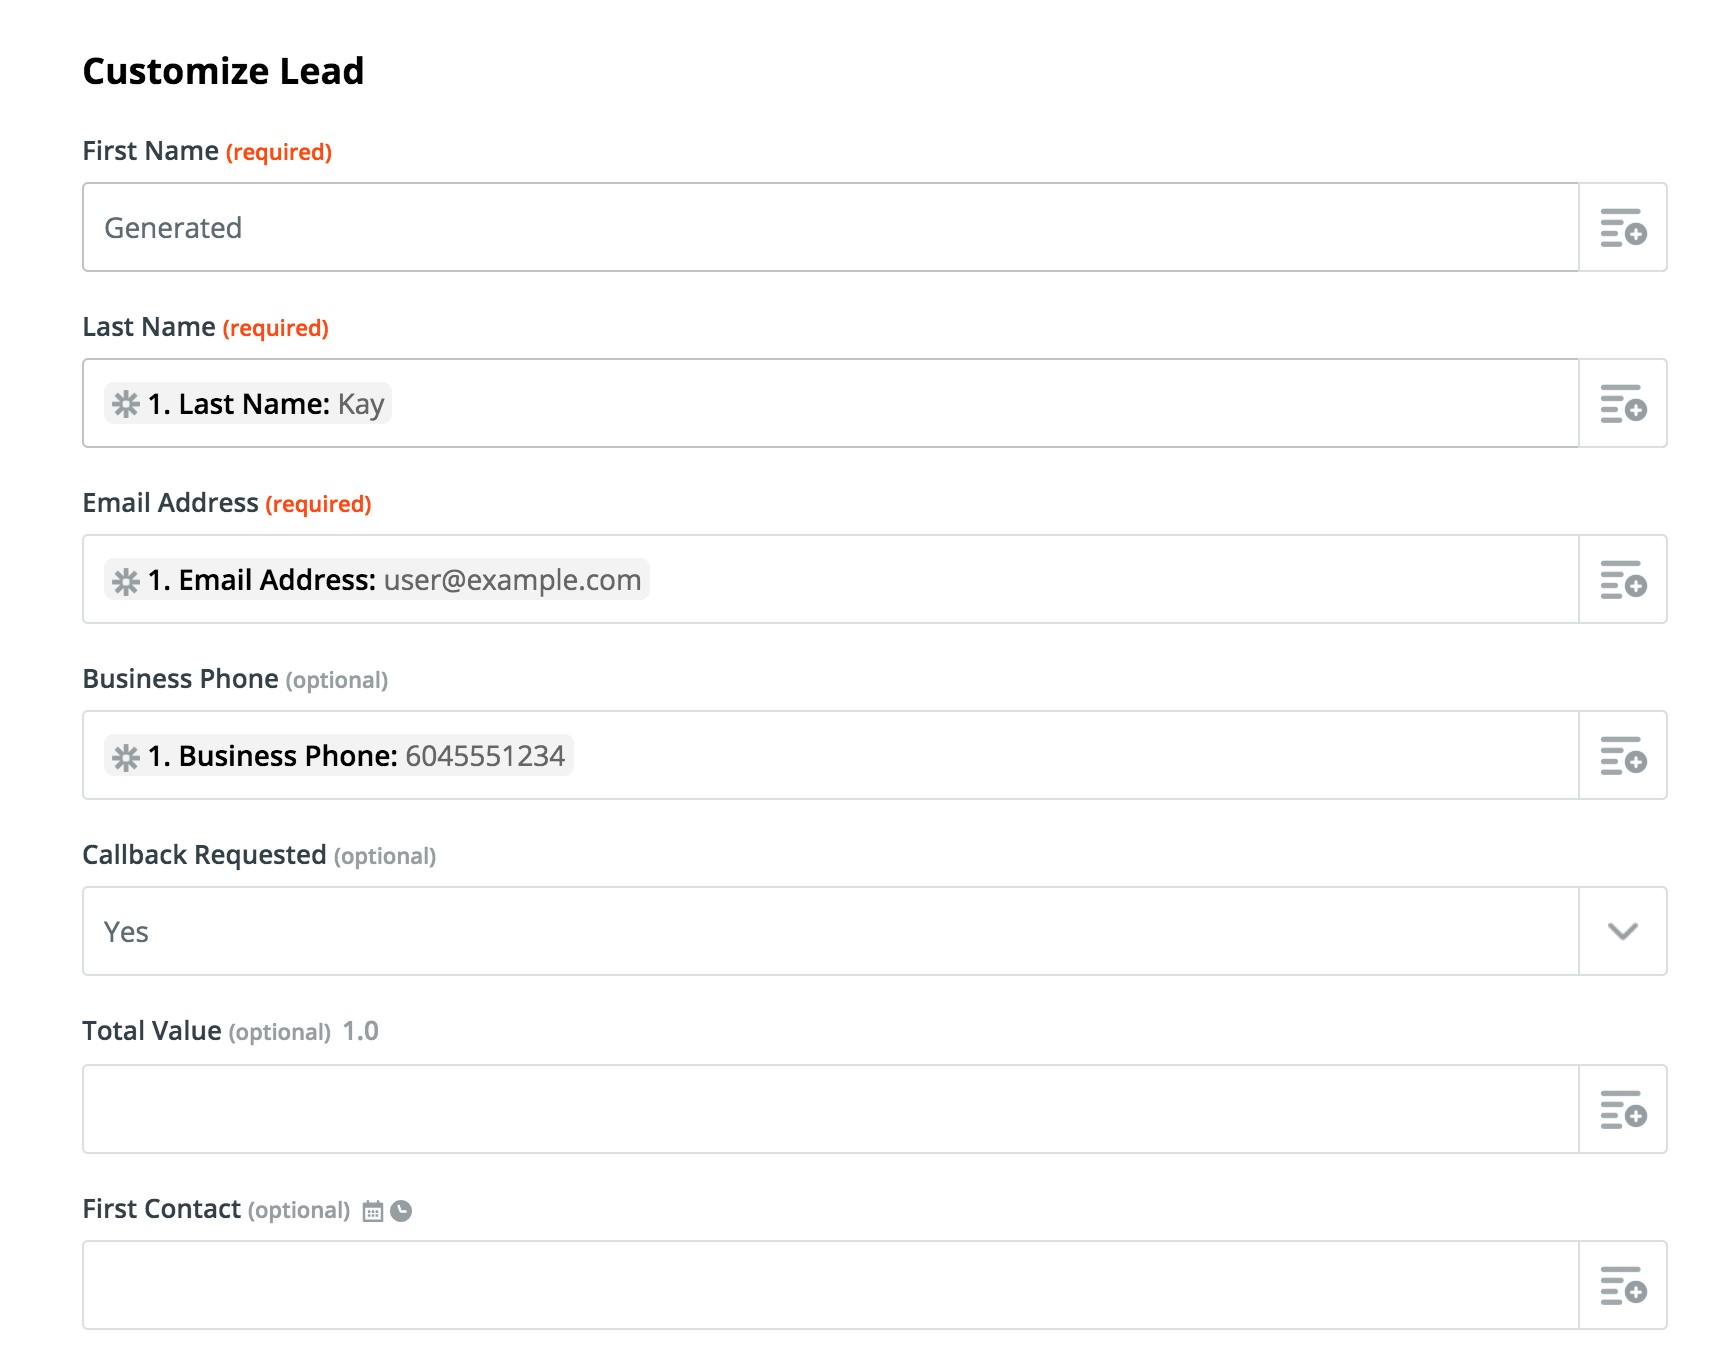
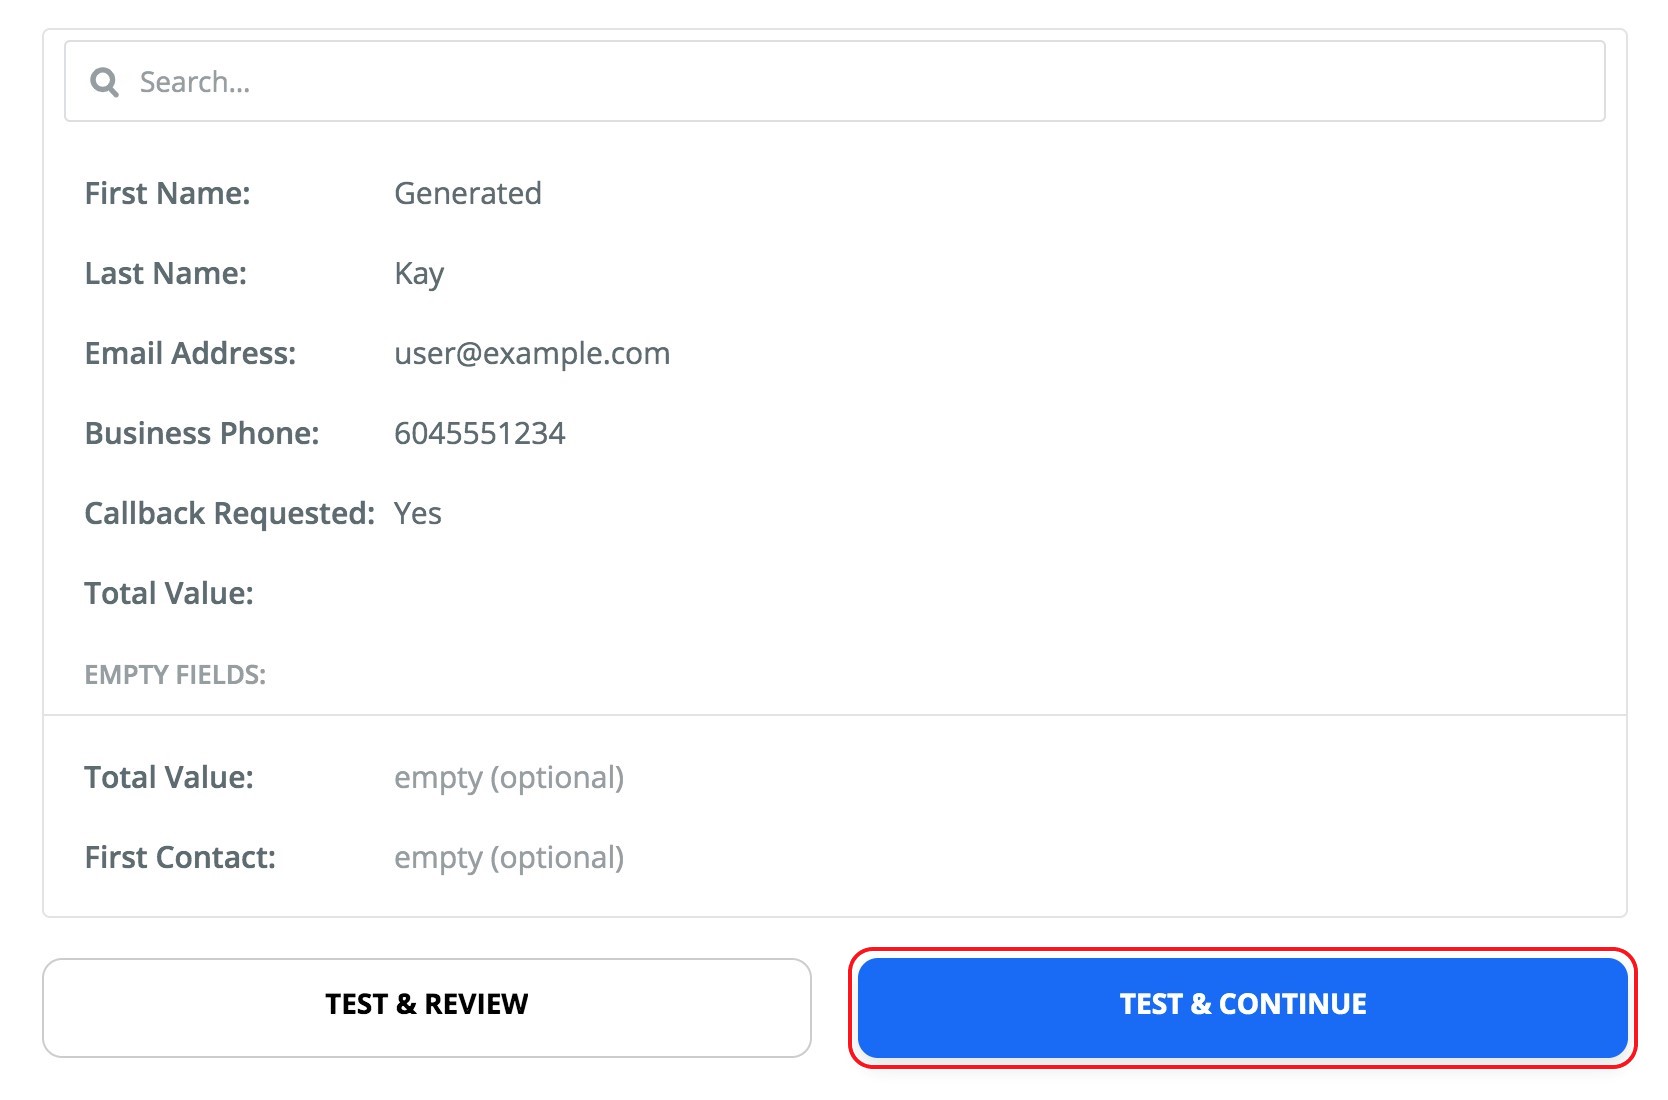
Now you are ready to fill in the new records details. You can use dynamic content from the previous steps as shown. To avoid a loop, make sure to change the name in the First Name not to include the word 'Copy.'
Click 'Test & Continue' to see the results:
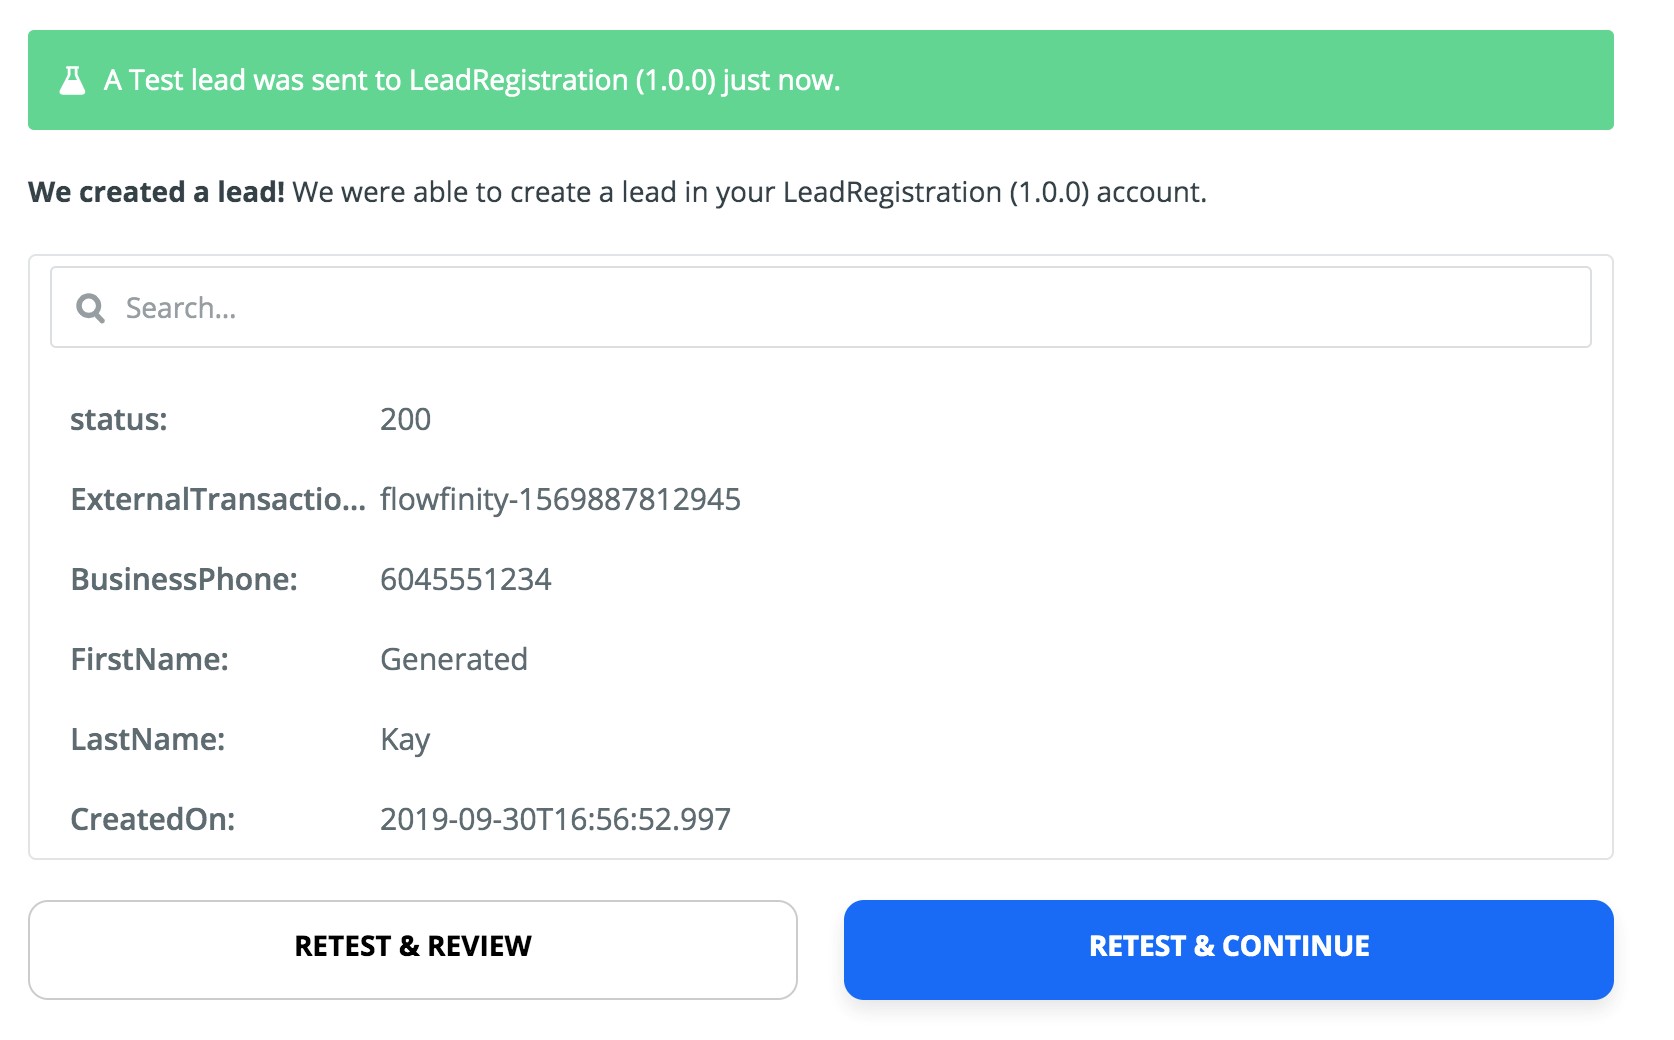
Success! We created a lead.
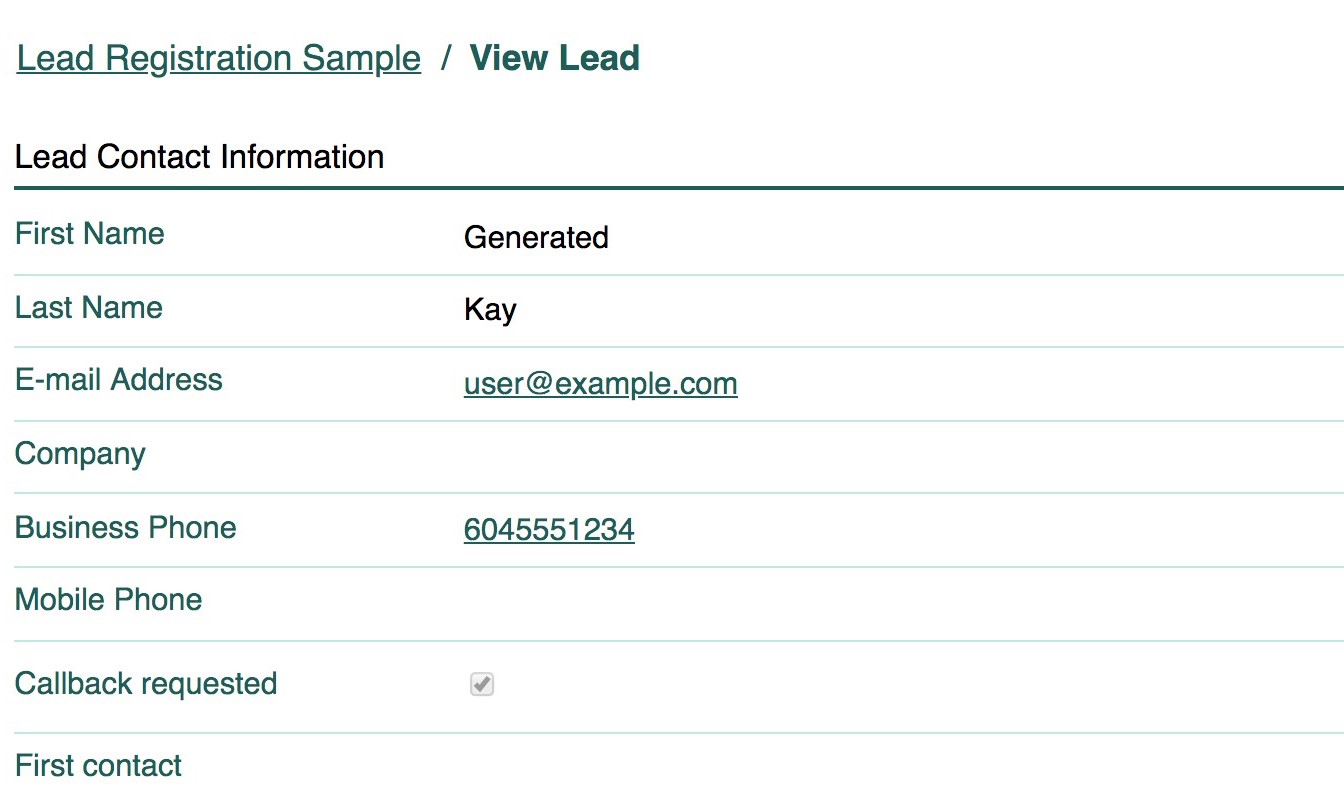
And a new record has been created in the Lead Registration app.
Now turn off your Zap and try to test by creating a new record in Flowfinity app with the names set to include 'Copy' and see how it creates a duplicate with the name 'Generated.'