Create an approval hierarchy
Some approval processes involve multiple steps, where an item has to be approved sequentially by people in different roles. In Flowfinity, you can use roles and states to control when someone in a particular role can see and approve a record.
➤ You can see it in action here.
Example
A company requires expenses over a certain amount to be approved by a Team Lead, as well as a Regional Manager. In this example, you will need to ensure that: all employees are assigned the 'Regular User' role, all Team Leads are assigned the 'Supervisor' role, all Regional Managers are assigned the 'Power User' role.
Please note that if you are using Flowfinity Actions Enterprise Edition, in addition to the default roles, you can create an unlimited number of custom roles such as 'Regional Manager', 'Team Lead', etc.
Instructions
- Create or customize an expense app
-
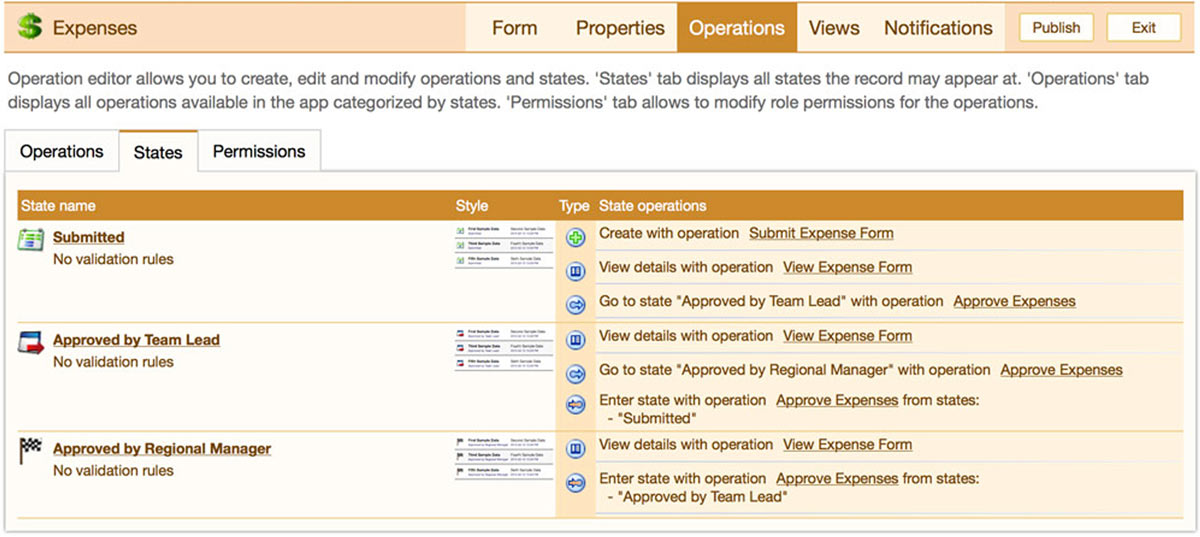
In the Operations section, select the States tab and create three states:
- Submitted
- Approved by Team Lead
-
Approved by Regional Manager
-
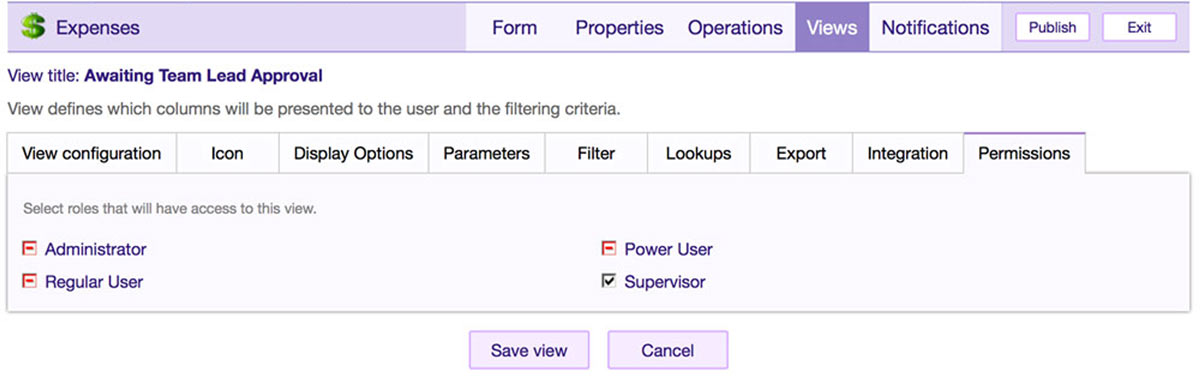
In the Views section, click the 'Add view' button to create a new view to be used by the Team Lead
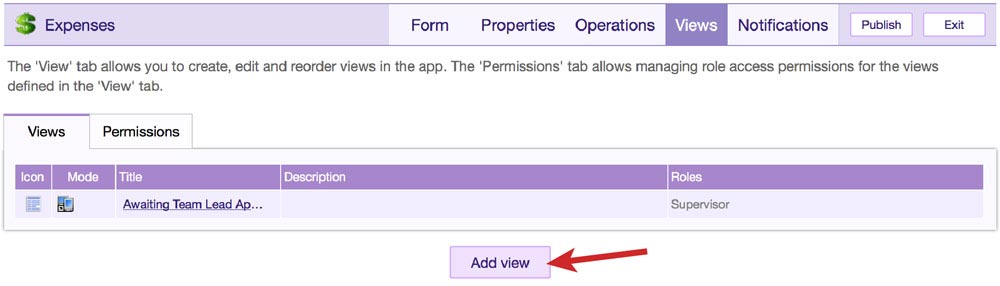
-
In the View Title box, enter an appropriate title such as 'Awaiting Team Lead Approval'
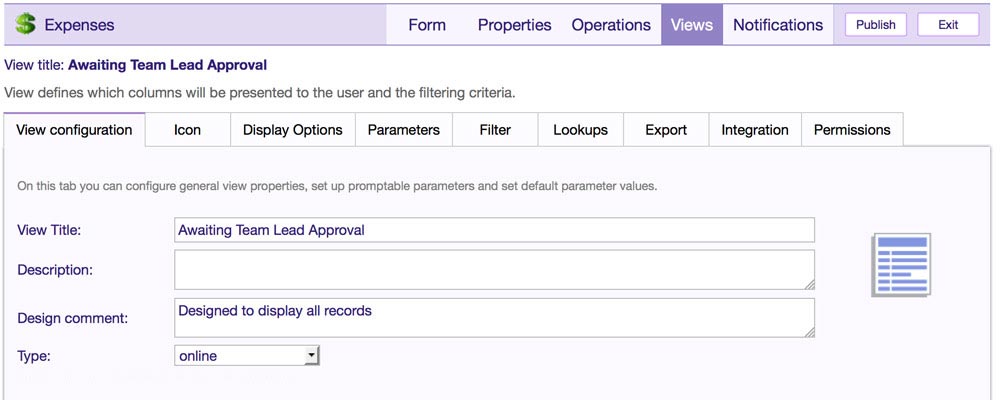
-
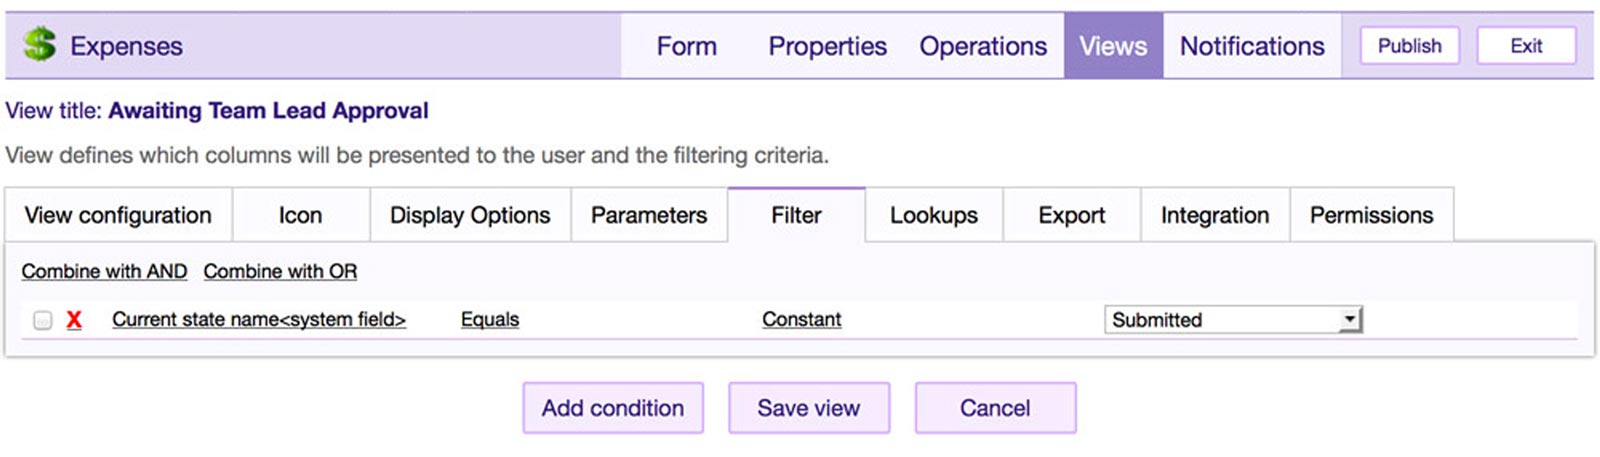
In the view's Filter tab, click the 'Add condition' button to create a filter with the condition: Current State Name, Equals, Constant, Submitted
- In the view's Permissions tab, edit the checkboxes so that only the 'Supervisor' role is able to access the view
-
Click the 'Save view' button
-
In the View Title box, enter an appropriate title such as 'Awaiting Team Lead Approval'
-
Create another view to be used by the Regional Manager called 'Awaiting Regional Manager Approval'
-
In the view's Filter tab, click the 'Add condition' button to create a filter with the condition: Current State Name, Equals, Constant, Approved By Team Lead

-
In the view's Permissions tab, edit the checkboxes so that only the 'Power User' role is able to access the view
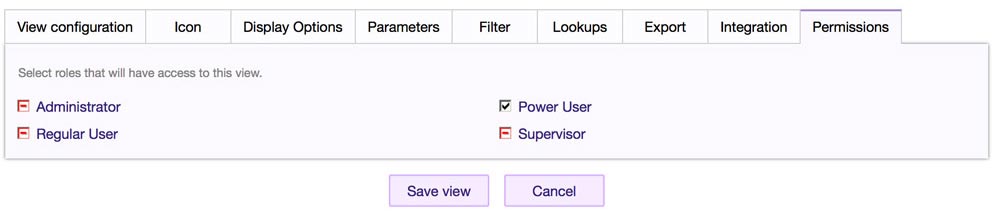
- Click the 'Save view' button
-
In the view's Filter tab, click the 'Add condition' button to create a filter with the condition: Current State Name, Equals, Constant, Approved By Team Lead
-
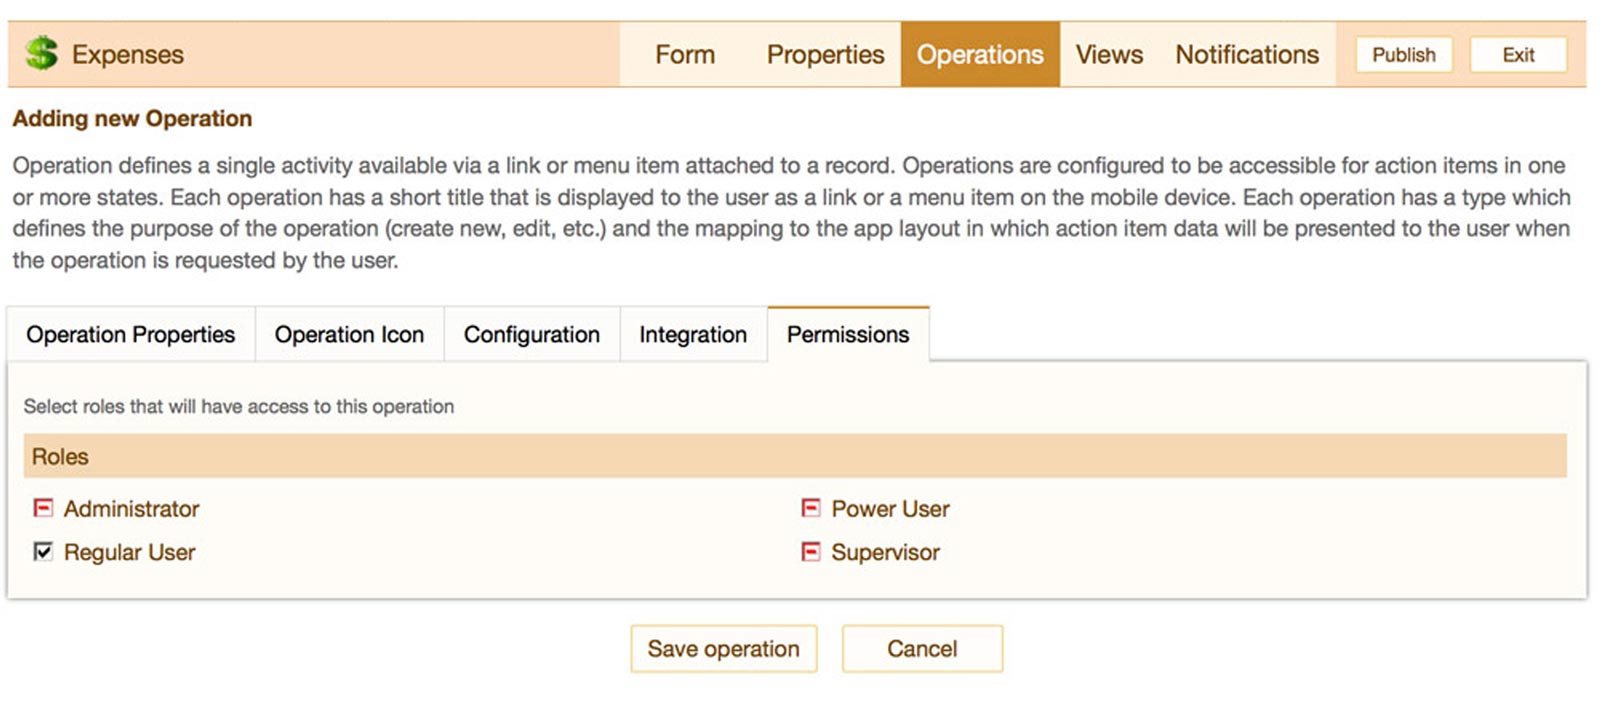
In the Operations section, click the 'Add operation' button
- Give the operation an appropriate Title such as 'Submit Expense Form'
- Select 'Add' from the Type dropdown under Operation settings
-
Under 'After operation executes state is', select 'Submitted'

- In the Permissions tab, Ensure that only the 'Regular User' role is allowed to perform the operation
-
Click the 'Save operation' button
-
Click the 'Add operation' button to create a 'Transition' type operation with the label 'Approve Expenses'
-
Check the appropriate checkboxes to make the operation available from 'Submitted' state, and transition to the 'Approved by Team Lead' state
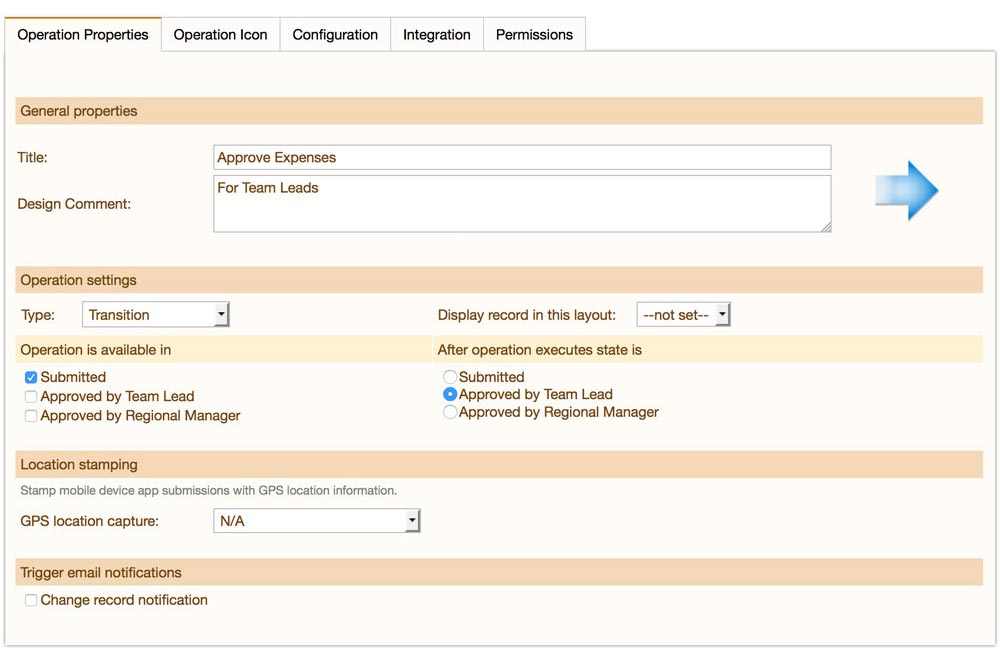
- In the Permissions tab, set the user permissions so that only users with the 'Supervisor' role are allowed to perform the operation.
- Click the 'Save operation' button.
-
Check the appropriate checkboxes to make the operation available from 'Submitted' state, and transition to the 'Approved by Team Lead' state
-
Click the 'Add operation' button to create another 'Transition' type operation called 'Approve Expenses'
-
Check the appropriate checkboxes to make the operation available from the 'Approved by Team Lead' state, and transition to the 'Approved by Regional Manager' state.
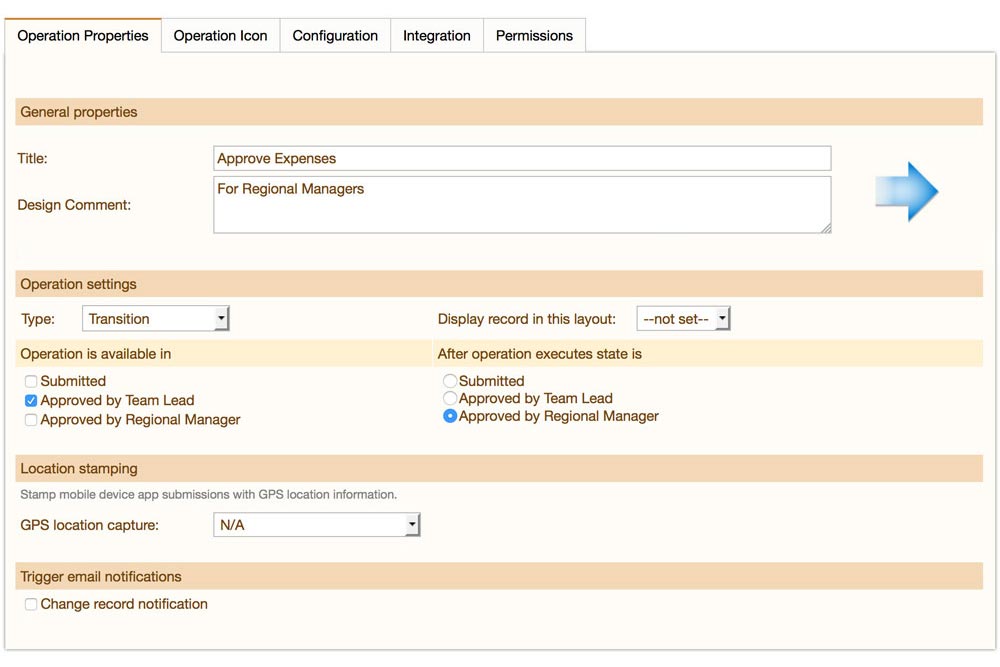
- In the Permissions tab, set the user permissions so that only users with the 'Power User' role are allowed to perform the operation.
-
Check the appropriate checkboxes to make the operation available from the 'Approved by Team Lead' state, and transition to the 'Approved by Regional Manager' state.
- Publish the application