Query records in Flowfinity app using Power Automate (Microsoft Flow)
Flowfinity provides the ability to integrate with external systems by enabling access to views in apps via Representational State Transfer (REST) Application Programming Interface (API) services. When access is enabled, programmers can use an HTTPS request/response-based REST API model to query view data in Flowfinity.
This tutorial uses a demo Lead Registration app as an example. To follow along you may download and import an FTF file of the Lead Registration app to your Flowfinity site.
Introduction
This article outlines how to configure Power Automate (formerly Microsoft Flow) to query data from a Flowfinity app View. The data from the View can then be used as part of a flow to check for existing records or display a list.
Views can also be used for synchronizing records between Flowfinity and external systems. To learn more about this concept refer to this article.
Step 1: Enabling REST API surface configuration
Enable REST integration by assigning a dedicated integration user, providing access to app operations and creating a view in the App Editor by following these steps.
Once external integration is enabled the REST URL endpoint address for submitting operations to Flowfinity will be displayed in the Configure > Integration > REST Integration section. Click the Details link to see the JSON payload request and response which you will need to set up Power Automate.

Step 2: Configure a dedicated View that will be used for synchronization
A View containing the system value 'lastSubmissionID' must be created to enable queries. This view may or may not have parameters. We will use a 'Search Leads' View with parameters included in the Lead Registration app for demonstration purposes.
- In Flowfinity select the 'Configure' tab and customize your app. Click the Views tab in the App Editor and edit the 'Search Leads' View.
- To enable REST access to view data, open the 'Integration' tab and select the checkbox 'Allow external code and visual workflow orchestration tools to retrieve this view records using REST API.'
- Set the type of data to return for 'Query() view object contains:' to 'View Columns.' This will return only values for the columns configured in the Layout tab for that view.
Note: 'Record Objects' is typically used for synchronization purposes or to access to all system fields and all record fields, including nested fields.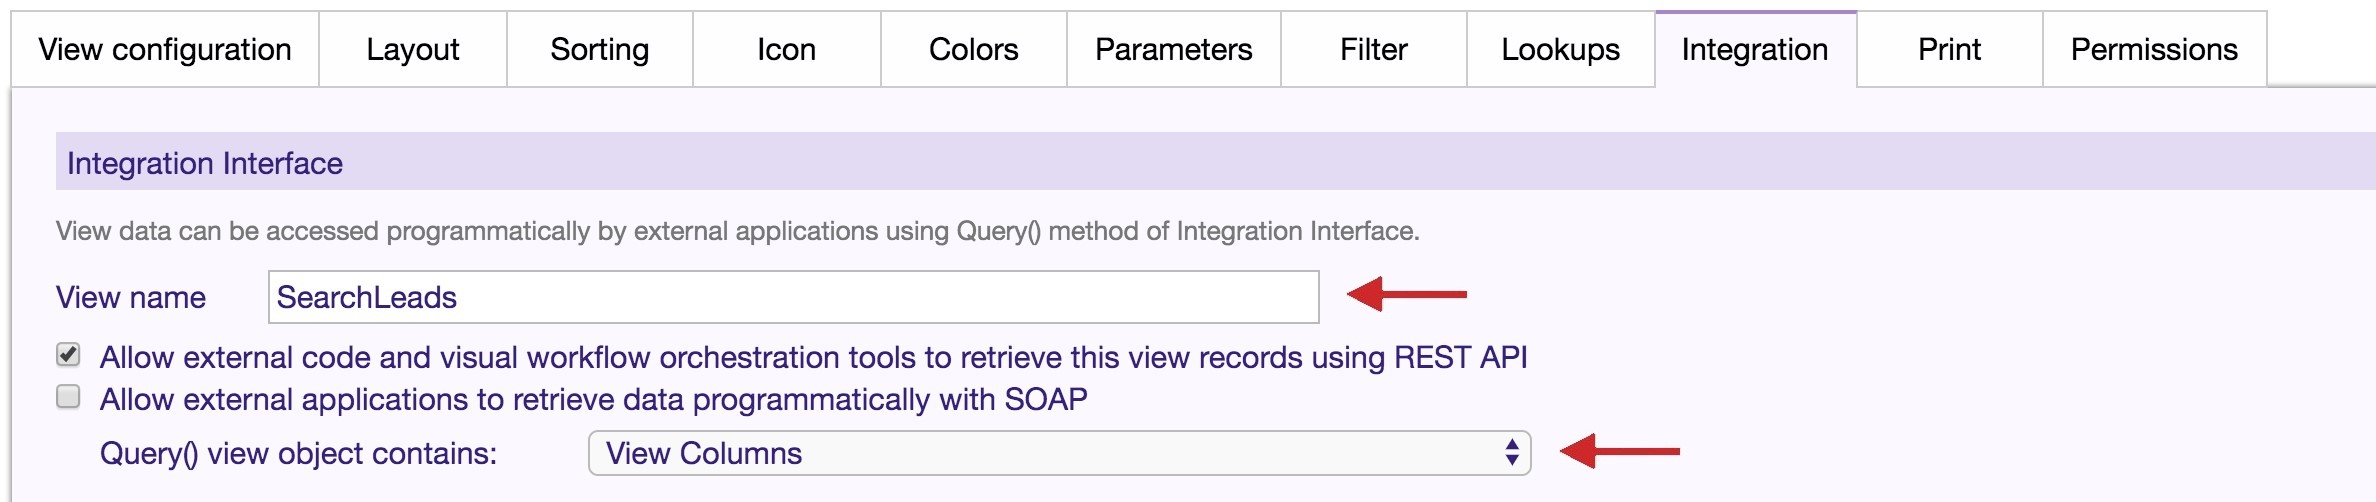
- Save the view and publish the app.

Step 3: Configure a Power Automate workflow
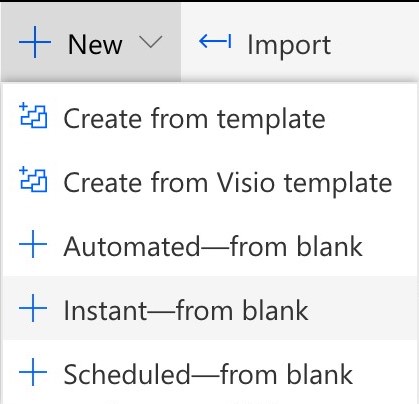
- Log in to Power Automate. Click 'New' to create a new flow and set the type to 'Instant – from blank' from the dropdown.
- Name the flow and add two input fields to the 'Manually trigger a flow' block: 'Company' and 'Minimal value.' You can use a Numeric field for minimal value.

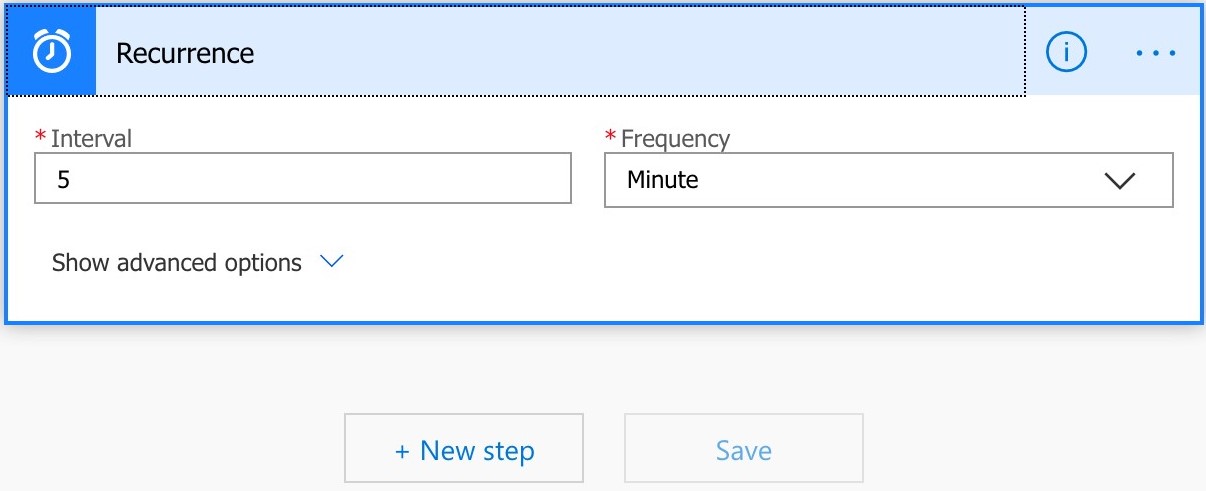
- Configure a 'Recurrence' block and set the desired run frequency, we'll set ours to 5 minutes. Click 'Create.' and 'Save' the flow.
- Next, we need to configure the flow to connect with Flowfinity. This is accomplished by querying the 'Search Leads' View we created while setting the value for the parameters to those supplied by the user.
- Add an HTTP request flow block to the flow and configure its parameters as follows:
1. Method: 'GET'
2. URL: Copy the value from the 'Details' section of the desired view listed in Configure > Integration tab of the Flowfinity app.
e.g. https://yourserver.com/Flowfinity/rest/LeadRegistrationSample/SearchLeads
3. In the query you need to specify two parameters: 'CompanyName' and 'Minimumvalue.'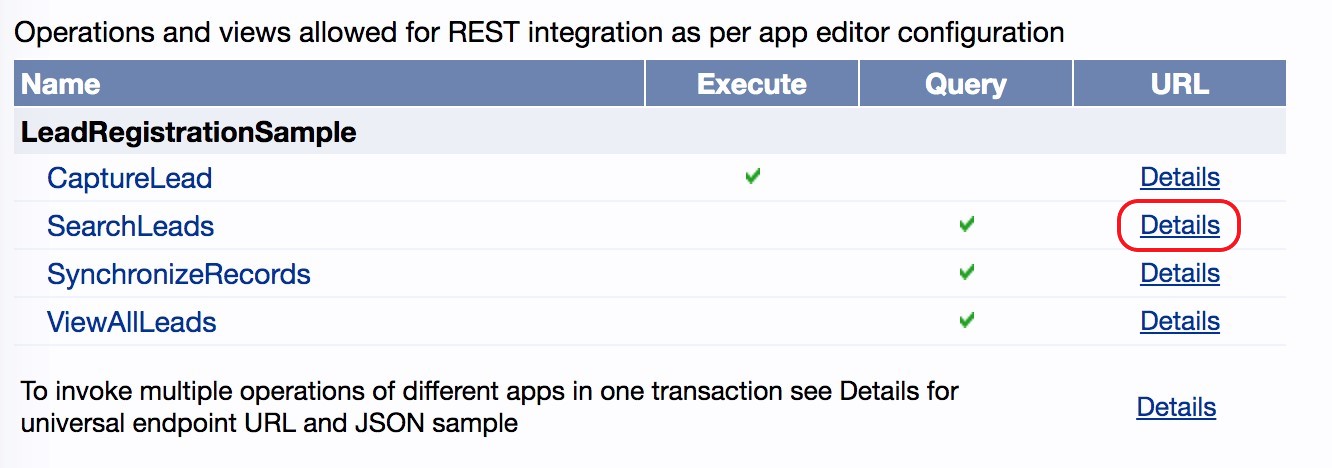
Set the values to the dynamic content of the input field from the 'manually trigger a flow' block.
Note: The names of the parameters can be found in the 'query' part of the URL from the Details page
e.g.'https://yourserver.com/Flowfinity/rest/LeadRegistrationSample/SearchLeads?CompanyName=[value]&Minimumvalue=[value]
4. Authentication: 'Basic'
5. Username & Password: Enter the appropriate username and password for your dedicated integration user account. You may use any of the Integration account users listed in the Configure > Integration tab. See below:The resulting configuration should look like this: 6. Once the request is received, it returns records in a JSON format. In this tutorial, we have chosen to just send an email notification to see the Body response of what the query returned to the current user.
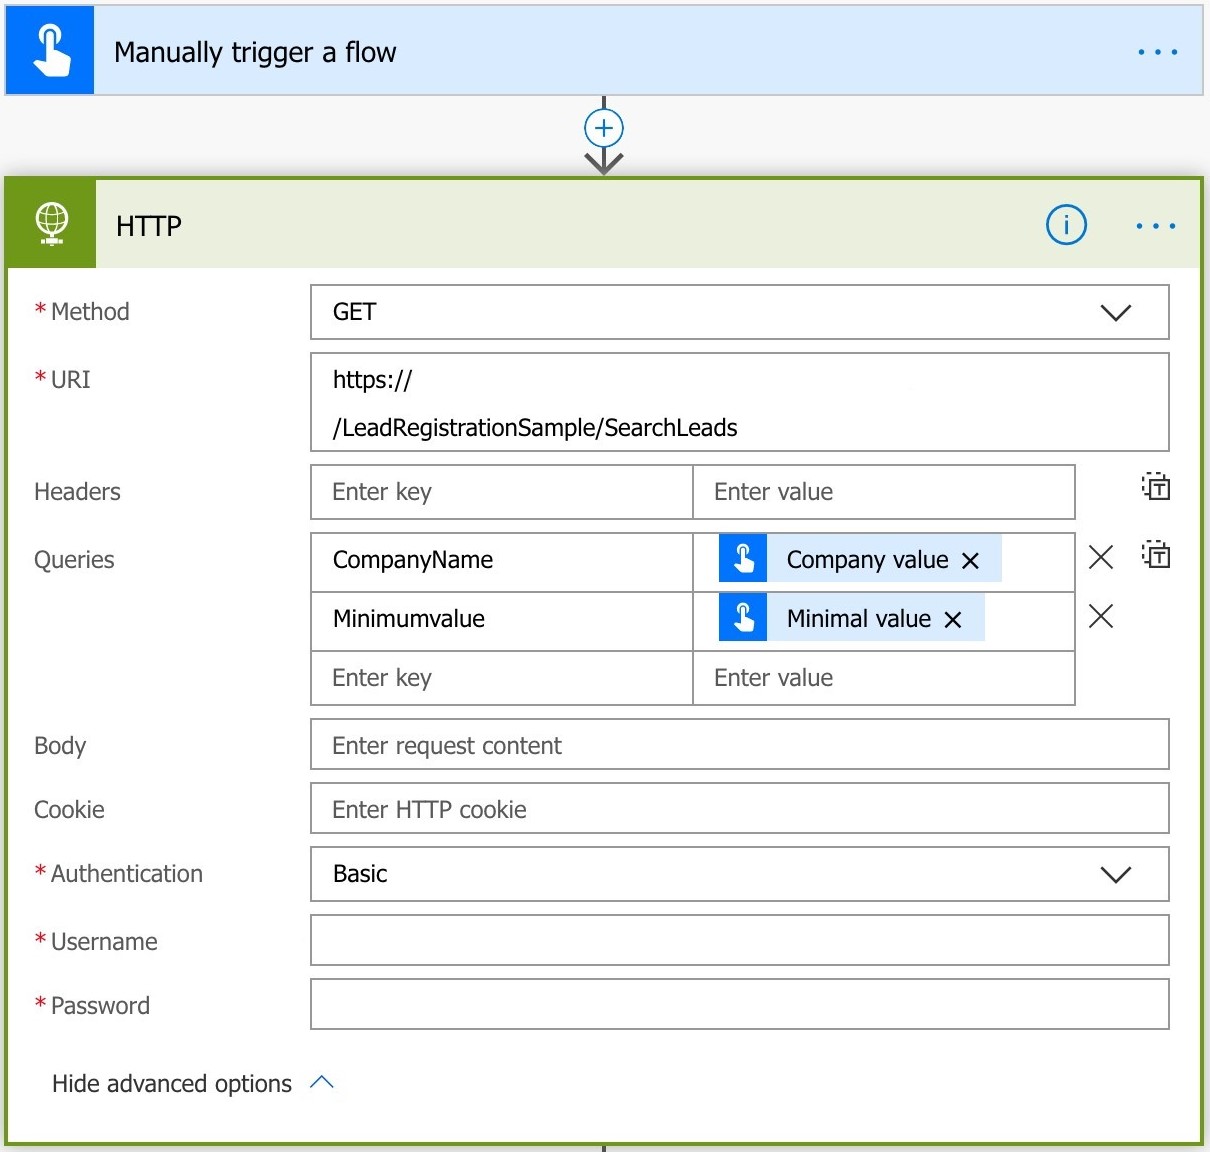
Use a 'Send email notification' block to accomplish that: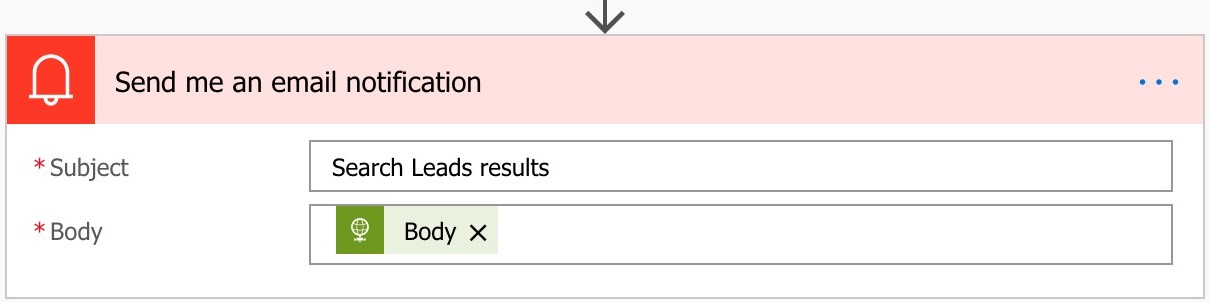


Step 4: Test the configuration
You are now ready to save and run the flow. Here is an example of a successful run of the flow:

